
Work Orders are Sales Orders for services rather than products. Work Orders are an important part of the transaction process for your installation, care and maintenance, and repair services.
From the Work Orders page, you can track and view existing Work Orders as well as create new Work Orders.
Looking for info on a specific section of Work Orders? Use these links to jump ahead:
- Create a New Work Order
- Profile and Customer
- Request and Equipment
- Schedule and Work Order Outcomes (Schedule Tasks and Task Outcomes)
- SKUs (Including information on Taxes)
- Kit SKU Actions (Actions available when you add a Kit to an Order)
- Deposits and Invoices
- Marketing and Notes and Details
- Images
- Work Order and Outcome Boxes (Top of the Work Order document/Document Status)
- Create a Return Work Order
- Return SKUs
- Notes and Details (for Return Orders)
Key Steps:
Go to Work Orders
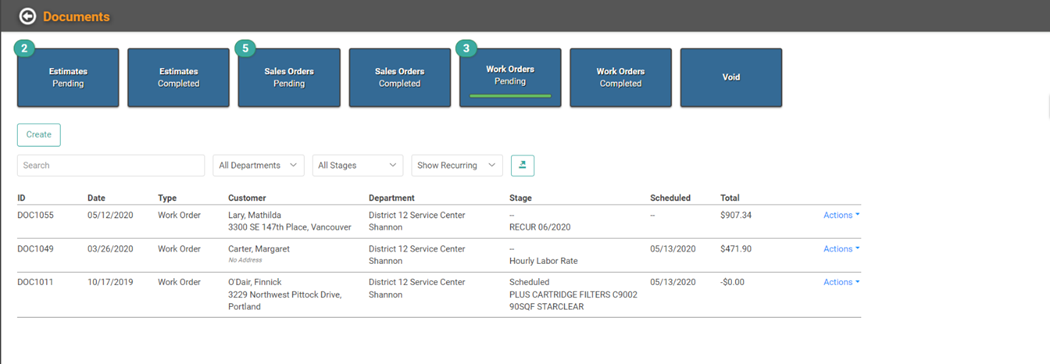
This is the Documents screen. When you access this page from the Work Orders tile, the default view shows Pending Work Orders. You can use the buttons along the top to access other Documents, Completed Work Orders, and Voided Documents.
Use the search field to search keywords in a document to quickly locate it. You can also narrow the list results by Department and by Document Type, using the dropdowns.
Click the Export button ![]() to export the list to an Excel file.
to export the list to an Excel file.
On this Documents screen, you can quickly see several pieces of information from each document.
- ID: This is the Document’s unique identifier.
- Date: This is the date the document was created. Below that Date is the Description. The default description is the first SKU on the Order. If you have used the Override Description field in the document, that Description will display here.
- Type: This is the Document Type. Work Order, Sales Order, or Estimate.
- Customer: The Customer Name and Address appear here.
- Department: This is the Department for which the Document was created. Below the Department, the user who created the Document (Document Owner) is listed.
- Stage: This is the Document Stage. You can use this Stage to identify where in the process this Document falls. This field can be useful in providing additional search parameters. For example: if you have a Stage called “Warranty”, you can search “Warranty” in the search field and it will return all Work Orders with a Stage “Warranty”. This would allow you to easily view Documents in just that stage of the process.
- Scheduled: If the Work Order has a Scheduled Task, the Date will display here.
- Total The total cost on the Order.
Create a New Work Order
For Returns and Refunds, click Create a Return Work Order to jump to how to create a Return Work Order.
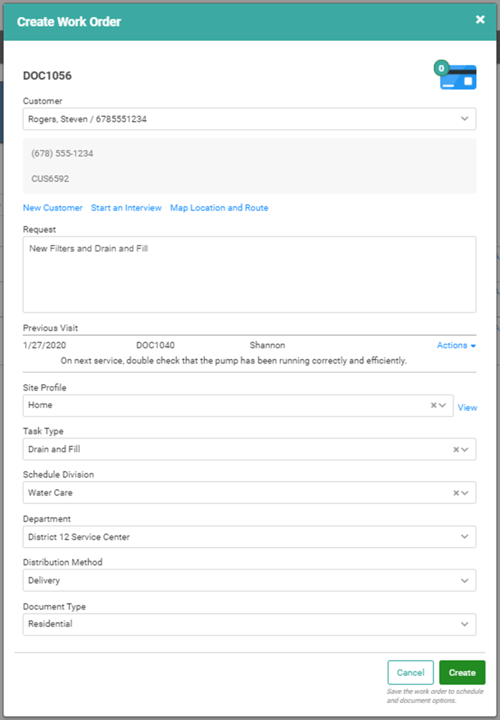
- To create a new Work Order, click

- Select the Customer from the dropdown
- You can use the New Customer link to create a New Customer.
- If you use Interviews, you can Start an Interview.
- When your Customer has a verified address on file, you can use the Map Location and Route link to view the Map and Route.
- Enter the Request details
- The Previous Visit displays below the Request field. You can use the Actions link to Append that text to this current Request or “Mark as Taken Care Of”.
- Select the Site Profile, if active
- Select the Task Type
- Schedule Division will automatically create based on Task Type. You can use the dropdown to change it.
- Select the Department.
- Select the Distribution Method. If you’ve set a Default Distribution Method, it will prepopulate.
- Select the Document Type. If you’ve set a Default Document Type, it will prepopulate.
- Click

TIP! On this pop-up, you can also add a Card on File by clicking  .
.
Once you click Create, you will be taken to the Work Order Document Update screen where you can enter additional important information to complete this Work Order. Let’s look at each box on the Work Order Document Update screen.

Profile and Customer
We’ll get to the first two boxes on the page in a minute. Right now, let’s look at the second row of boxes.
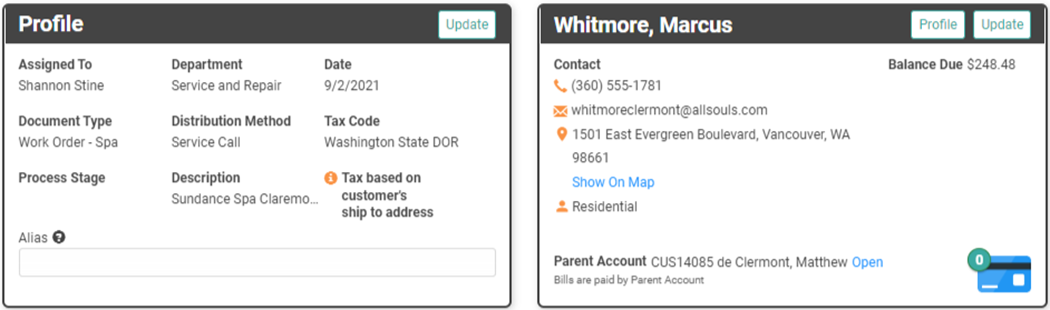
The Profile box contains information related to your business and the Work Order. If you need to make updates, you can click ![]() .
.
IMPORTANT TAX INFO! The Tax Code field will indicate what Tax Code is being used to calculate Sales Tax on the Order. When the Distribution Method uses Destination-Based Tax, that will be indicated with the bold text below the Tax Code. If you are not using Avalara to calculate tax, you may need to update the Tax Code according to the Ship To Address.
Head over to Use Tax for information on how to calculate Use Tax on an Order.
The Customer box contains information related to the customer and the Work Order. To add, or update, important Customer information on this Order, click ![]() . You can use the
. You can use the  to update or add a Card on File for the Customer. The Profile button can be used to access the Customer Profile and the Show on Map link to see a map of the Customer’s address.
When you click ![]() to update Customer information, you will receive a prompt asking if you want to change the Customer information on the Customer Profile and all pending documents OR just for this transaction.
to update Customer information, you will receive a prompt asking if you want to change the Customer information on the Customer Profile and all pending documents OR just for this transaction.
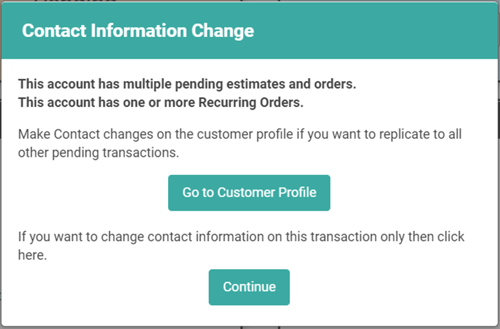
If you select Continue, the updates you make will be on this Order only and will not update Customer Profile or additional pending Documents.
Request and Equipment
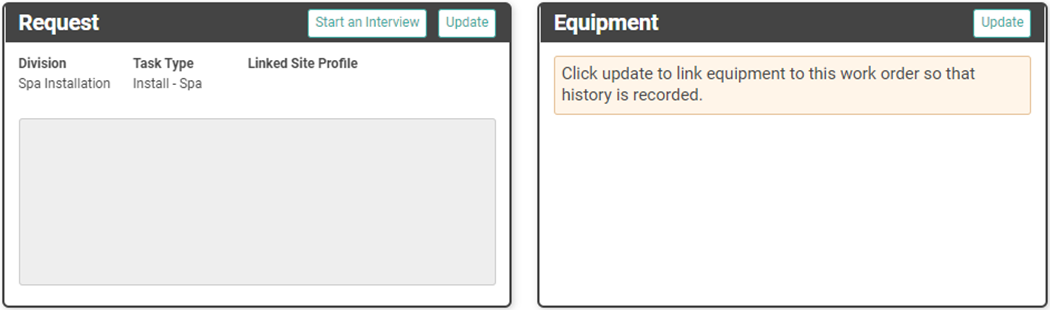
The third row of boxes is where you can find details about the Request and Equipment associated with the Customer.
If you use Interviews, you can View and Start interviews for this Work Order by clicking the ![]() button. You can update the details of the Request by clicking
button. You can update the details of the Request by clicking ![]() . The Customer’s previous visit will display. Use the Actions link to Append the text of that visit to this Request or “Mark this Taken Care Of”.
. The Customer’s previous visit will display. Use the Actions link to Append the text of that visit to this Request or “Mark this Taken Care Of”.
The Equipment box allows you to track Equipment associated with the Customer. If Equipment has previously been added to the Customer Profile, it will appear here. You can also click ![]() to add Equipment to the Order.
to add Equipment to the Order.
REMEMBER! This is for Equipment the Customer already owns.
Schedule and Work Order Outcomes
The Schedule box gives you important information related to Schedule Tasks while the Work Order Outcomes box allows you to create Outcomes for Schedule Tasks and track hours for the Task.
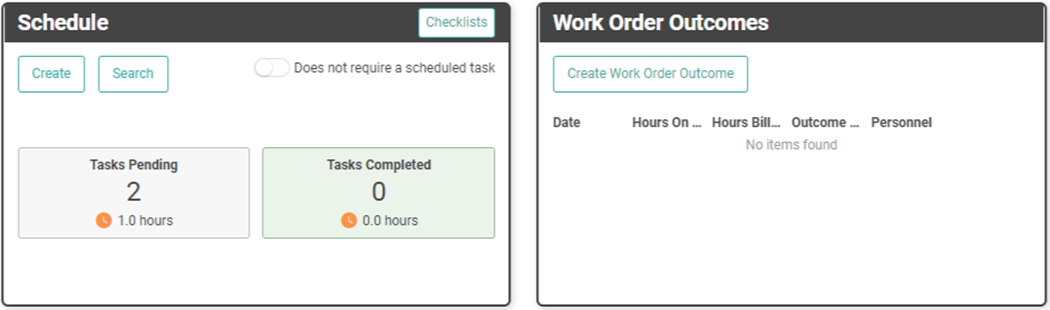
In the Schedule box, you can access Checklists and Create and Search for Tasks. If this Work Order doesn’t require a Scheduled Task, you can toggle Does not require Scheduled Task on. The Pending and Completed Tasks associated with the Order appear along with the total hours. When you click on the Pending or Completed Tasks, you’ll arrive at the Schedule List View on the Schedule Dashboard.
To add a Task, click ![]() and the Create Task pop-up will open.
and the Create Task pop-up will open.
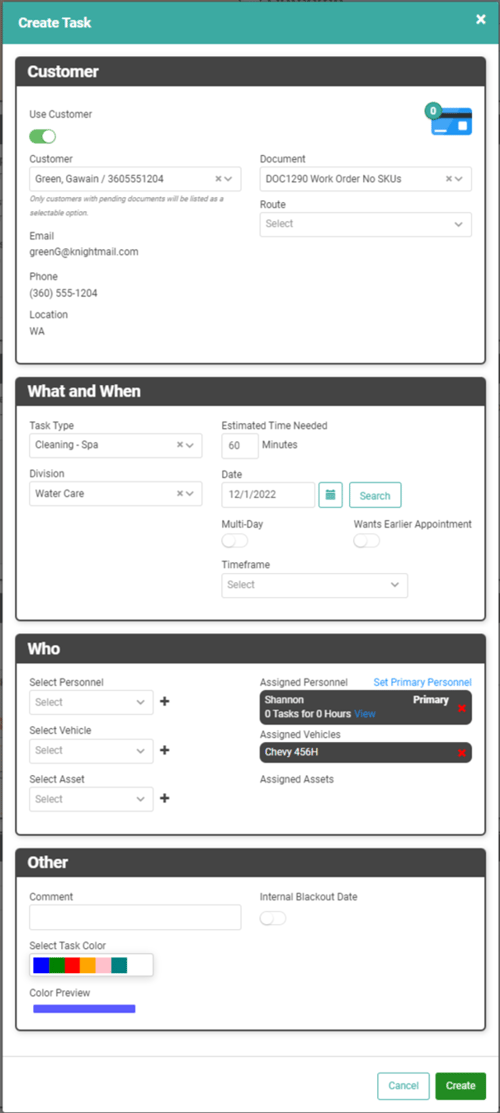
Most of the information for the Task will be prepopulated. You can add and update information to correctly Schedule the Task.
- Customer: This box contains the Customer information. It should be prepopulated with the information you entered in the Work Order. You can change the Customer, Document, and Route using the dropdowns. You can also add or update a Payment on File using the
 button in the upper right corner.
- Use Customer can be toggled off when you want to create a Schedule Task that doesn’t involve sending a tech to the Customer’s Address. An example might include staging the Order in advance of the Schedule Task for Installation/Delivery/Service.
- Routes will be preselected when the Customer’s Ship To Address falls within one of your Routes. In the event the Customer’s address does not fall within a Route, the field will be blank. You can select one of your Routes from the dropdown. (This does not add that address to the Route going forward. It simply allows this Task to be routed as part of that Route for this instance only.)
- What and When: This is where you will determine the main details of the Schedule Task.
- Task Type: Select the correct Task Type from the dropdown
- Division: What Schedule Division should be associated with this Task?
- Estimated Time Needed: This will prepopulate with the time associated with the Task Type. You can update this field if this particular Task will take longer than the Task Type Default.
- Date: It defaults to Today. Enter a Date or click the Calendar to choose a Date.
- TIP! You can click the Search button next to the date to open the Schedule Calendar View. From here, you can view the Schedule, find the date and time you desire, and click the box for the time slot. The Calendar box will immediately close and the What and When, and Who, boxes will automatically be populated with the Personnel, Date, and Timeframe selected.
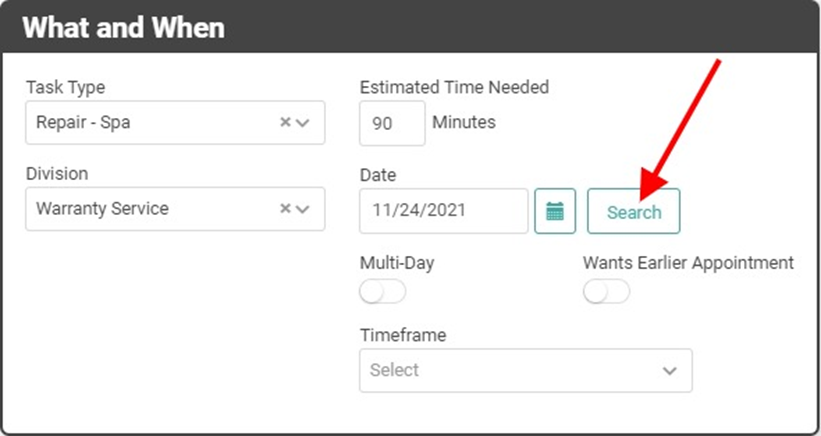
- TIP! You can click the Search button next to the date to open the Schedule Calendar View. From here, you can view the Schedule, find the date and time you desire, and click the box for the time slot. The Calendar box will immediately close and the What and When, and Who, boxes will automatically be populated with the Personnel, Date, and Timeframe selected.
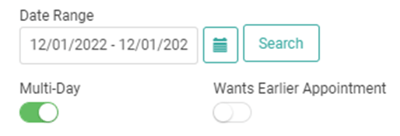
- Multi-Day: For Tasks that will take more than one day, you do not need to create separate Tasks for each day. Toggle this on and it will change the Date to a Date Range, allowing you to select the correct Date Range for the multi-day Task.
- Wants Earlier Appointment: This toggle allows you to add this Task to a Wants Earlier Appointment Queue from which your Service Personnel can pull to assign themselves to the Task if they have an opening. The Service Dispatcher/Manager can also pull from that Queue and place on the Schedule earlier.
- Timeframe: LOU doesn’t schedule set times for appointments, but you can set up time frames that allow you to give your Customers an appointment window during which the Service Personnel will arrive.
- Most common time frames are Morning, Noon, Evening.
- Requires Setup prior to use.
- Who: This is where you will determine what Personnel, Vehicles, and Assets are needed to complete this Task. The Personnel will automatically populate with the Document Owner. You can remove Personnel by clicking the red X.
- The first person you assign to the Task will be the Primary Personnel and additional Personnel will be listed as Helper. To change who is listed as Primary, click the Set Primary Personnel link and click the toggle next to the Personnel you want to set as Primary.

- The first person you assign to the Task will be the Primary Personnel and additional Personnel will be listed as Helper. To change who is listed as Primary, click the Set Primary Personnel link and click the toggle next to the Personnel you want to set as Primary.
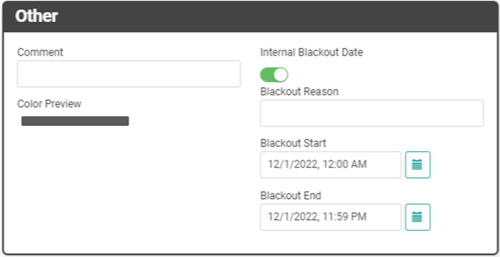
- Other: This whole box is optional. Leave a Comment, select the color the Task will display on the Calendar view, and set an Internal Blackout Date. If you want to ensure this Task is not Scheduled during a specific Date(s), you can provide a Blackout Reason and use the Start and End Date fields to configure the Date or Date Range.
REMEMBER! When a Note or Comment Field does not specify it is Internal or Customer-facing, you should assume it will be visible on Customer Documents and Views.
Work Order Outcomes
You can create Work Order Outcomes and leave notes that are Customer-facing and Internal for the Work Order.
When you click ![]() a window will pop up, allowing you to provide Outcome details, including Internal Notes, Notes to the Customer, Notes for Next Visit, and Bill Labor not included on the SKUs for the Order.
a window will pop up, allowing you to provide Outcome details, including Internal Notes, Notes to the Customer, Notes for Next Visit, and Bill Labor not included on the SKUs for the Order.
IMPORTANT! These outcomes pertain to work within the Work Order – they are more like Task Outcomes -- and do not change the Work Order Document status. See the blue Outcome Box at the top right of the document for document status updates.
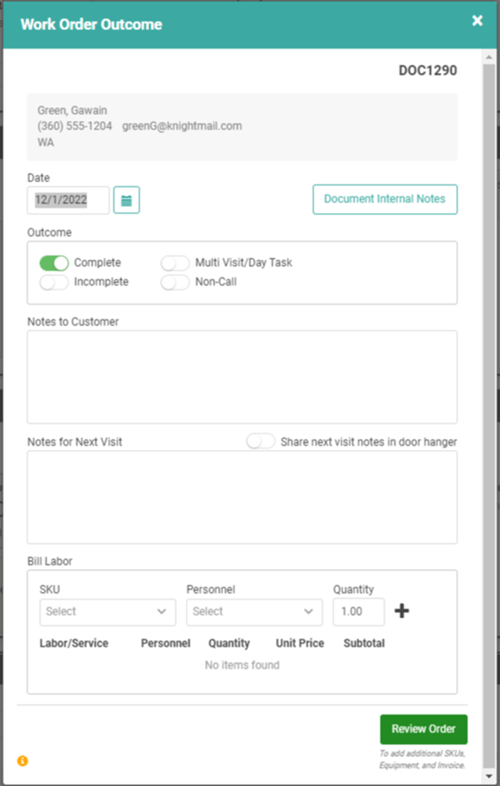
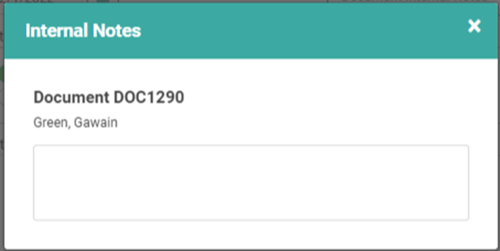
The information filled out here will appear on the Digital Door Hanger. Notes for Next Visit will not appear on the Digital Door Hanger unless you toggle on Share Next Visit Nots in Door Hanger. To leave internal notes that do not appear on the Digital Door Hanger or Customer-facing documents, click the ![]() .
.
You can add additional Labor SKUs that weren’t accounted for on the Order by selecting the SKU, Personnel associated with the SKU, and Quantity in the Bill Labor box. Make sure to click the Plus Sign to add to the Order.
Once you’ve filled out the information for the visit, you can click ![]() to save to Work Order Outcomes.
to save to Work Order Outcomes.
To send the Customer a Digital Door Hanger via Email and/or Text, click the Actions link on the Outcome and select Send Door Hanger.

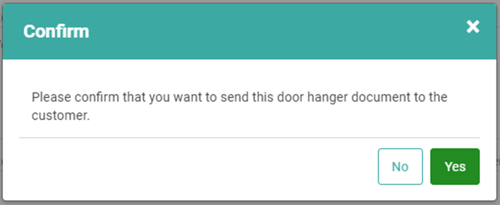
Click Yes to confirm.
This will send the Door Hanger to the Customer according to your Messaging settings and the Customer’s Electronic Message Preferences.
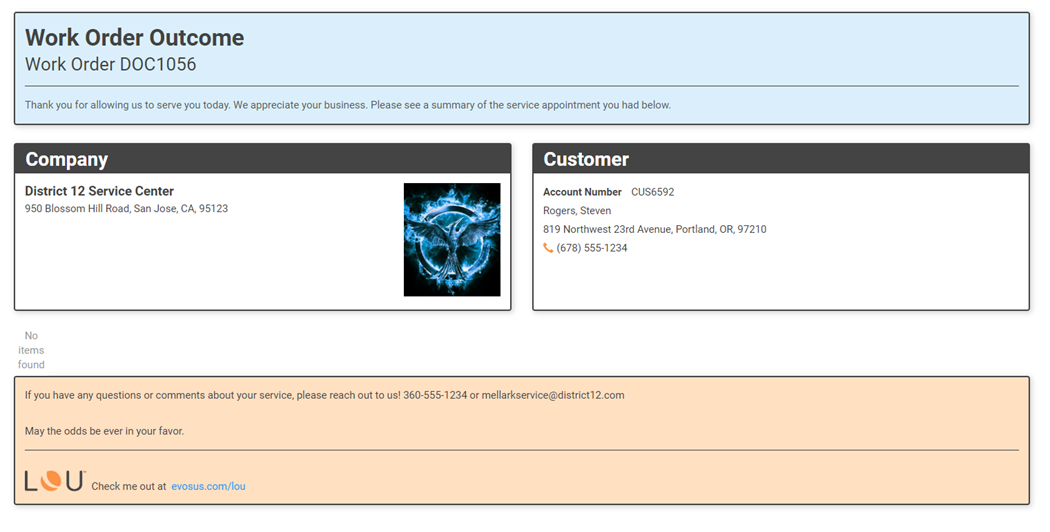
Customer View of Digital Door Hanger
SKUs
You can add the SKUs relevant to this Work Order here.
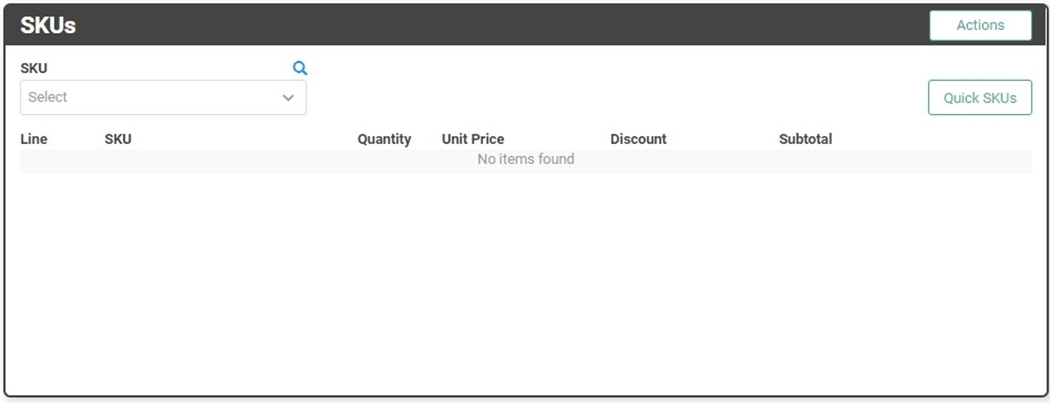
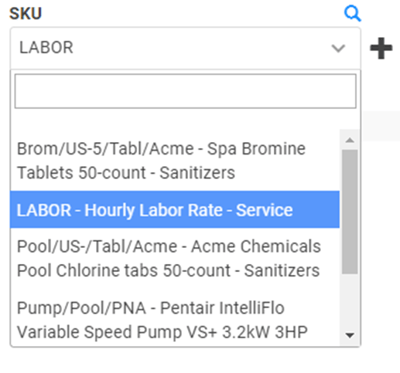
There are three ways to add SKUs. The first way is to select the SKUs from the dropdown and click the plus sign ![]() . Repeat this to add multiple quantities of a SKU.
. Repeat this to add multiple quantities of a SKU.
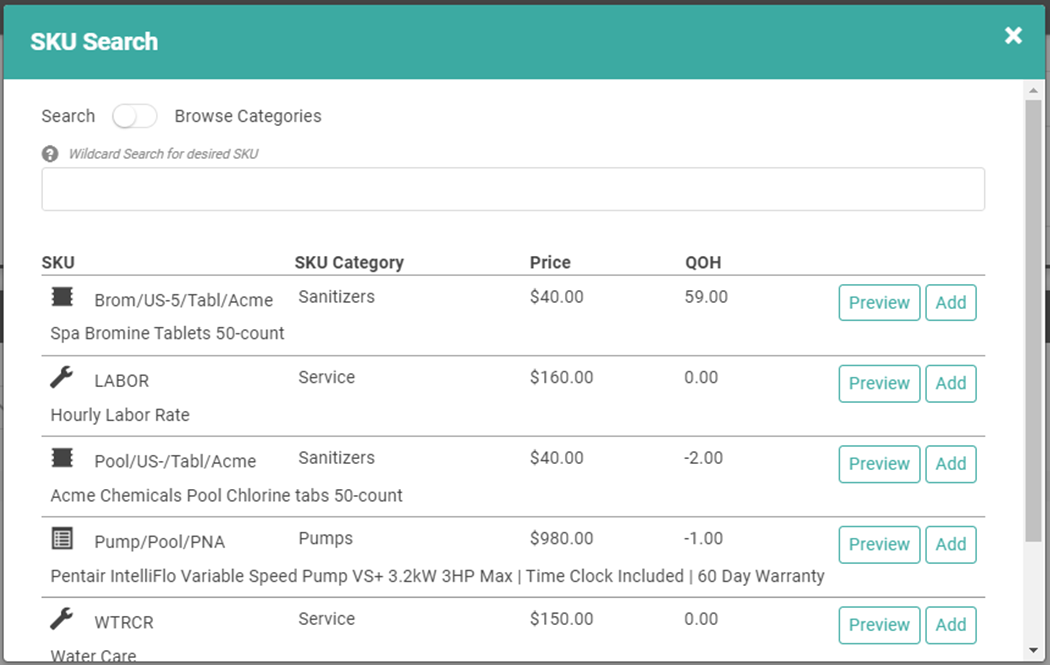
The second way is to click the magnifying glass  . This will pull up the SKU Search box and you can click
 ![]() next to the SKU as many times as required for the quantity of the SKU you need.
next to the SKU as many times as required for the quantity of the SKU you need.
The third way is by using the ![]() button to add Quick SKUs you’ve configured. A pop-up will appear with your Quick SKUs listed. Click the
button to add Quick SKUs you’ve configured. A pop-up will appear with your Quick SKUs listed. Click the ![]() button to include that SKU on the Order.
button to include that SKU on the Order.
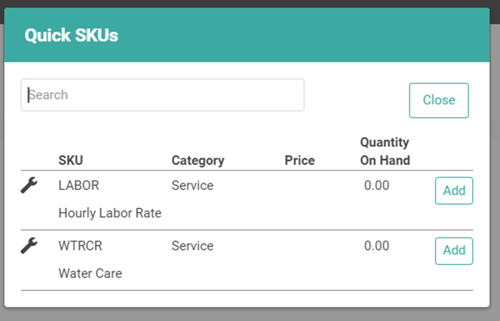
Once you’ve added all the appropriate Quick SKUs, click ![]() to return to the Document Update page.
to return to the Document Update page.
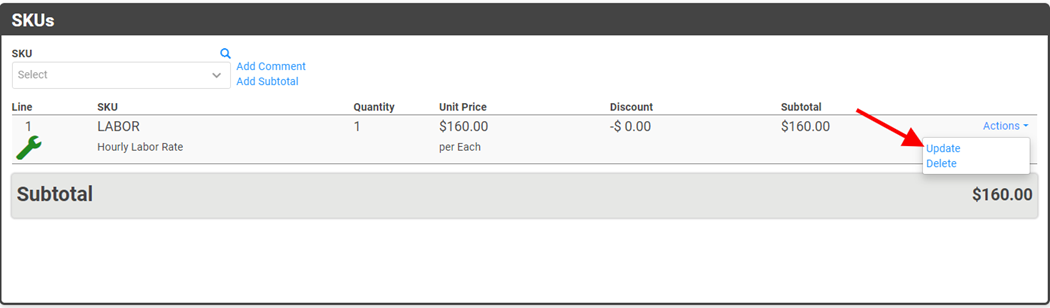
Click the Actions link next to the SKU line item to Update the SKU.
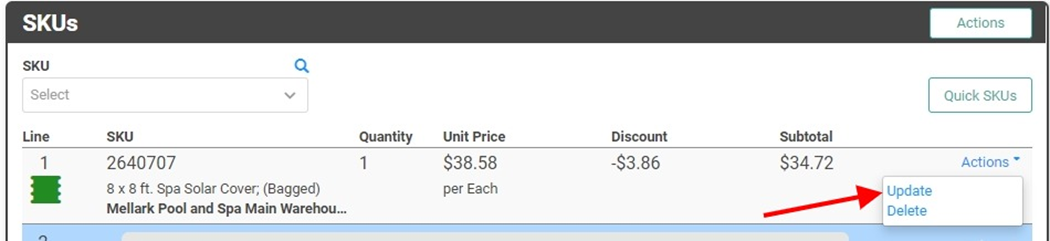
If the SKU is Serialized, you must select Actions and Update to add the Serial Number to the Order.
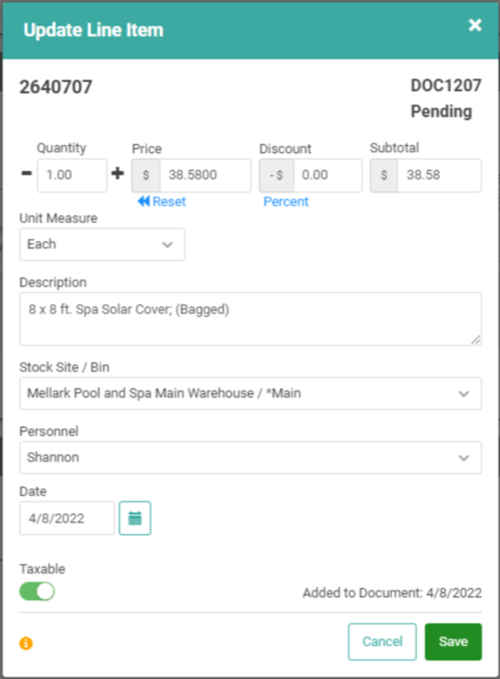
Updating the SKU also allows you to add additional quantity (as long as the SKU is not Serialized or a Kit SKU), change the Price, Enter a flat dollar amount Discount, change the Unit of Measure, change the Description, select the Stock Site/Bin from which you want the SKU pulled, and toggle the Taxable button to change whether the SKU is taxed. You can also see the Personnel who added the SKU to the document and the Date the SKU was added to the document. Both these fields can be updated if necessary. Once you’ve made the changes you wish to make, click Save.
The ![]() button has several additional actions you can take on the SKU box.
button has several additional actions you can take on the SKU box.
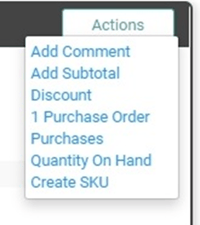
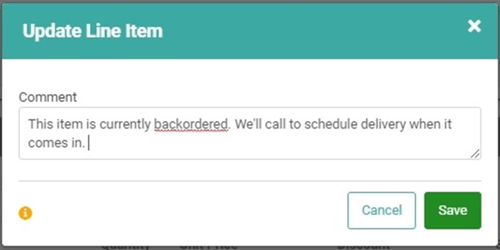
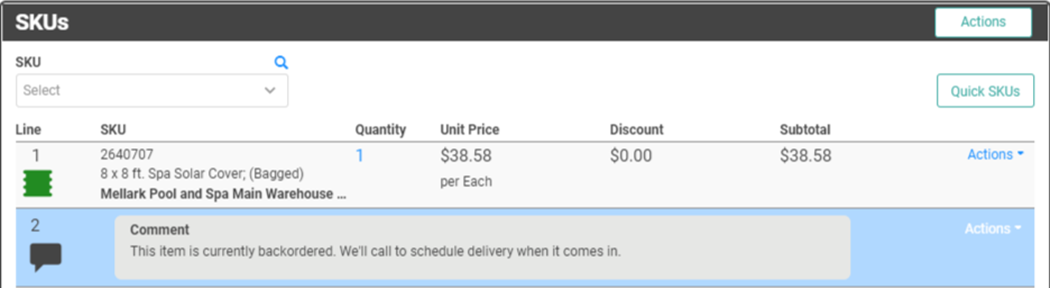
Add Comment adds a comment box below the bottom-most line item in the SKU box.
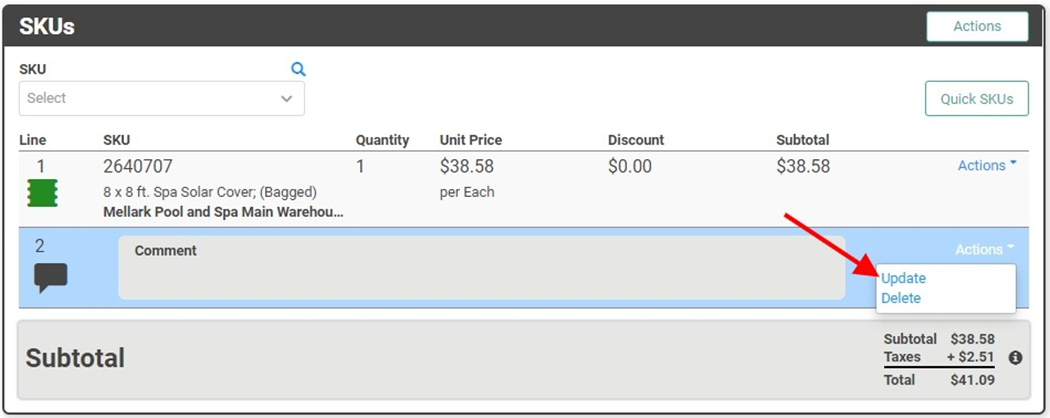
Click the Actions link and Update to add a note.
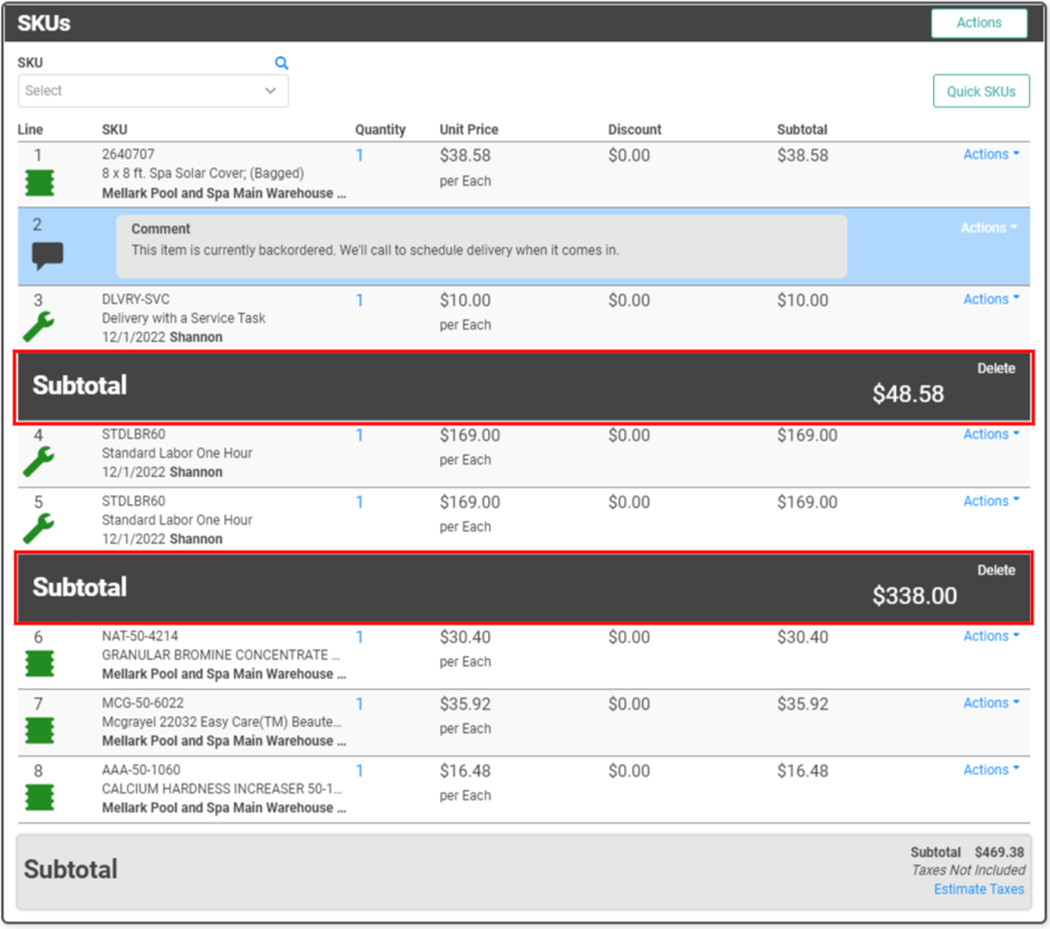
Add Subtotal creates a subtotal of the items added to the SKU box so far. This will provide a Subtotal (no tax calculation) of just the SKUs above this Subtotal line. You can add multiple Subtotals on large Orders.
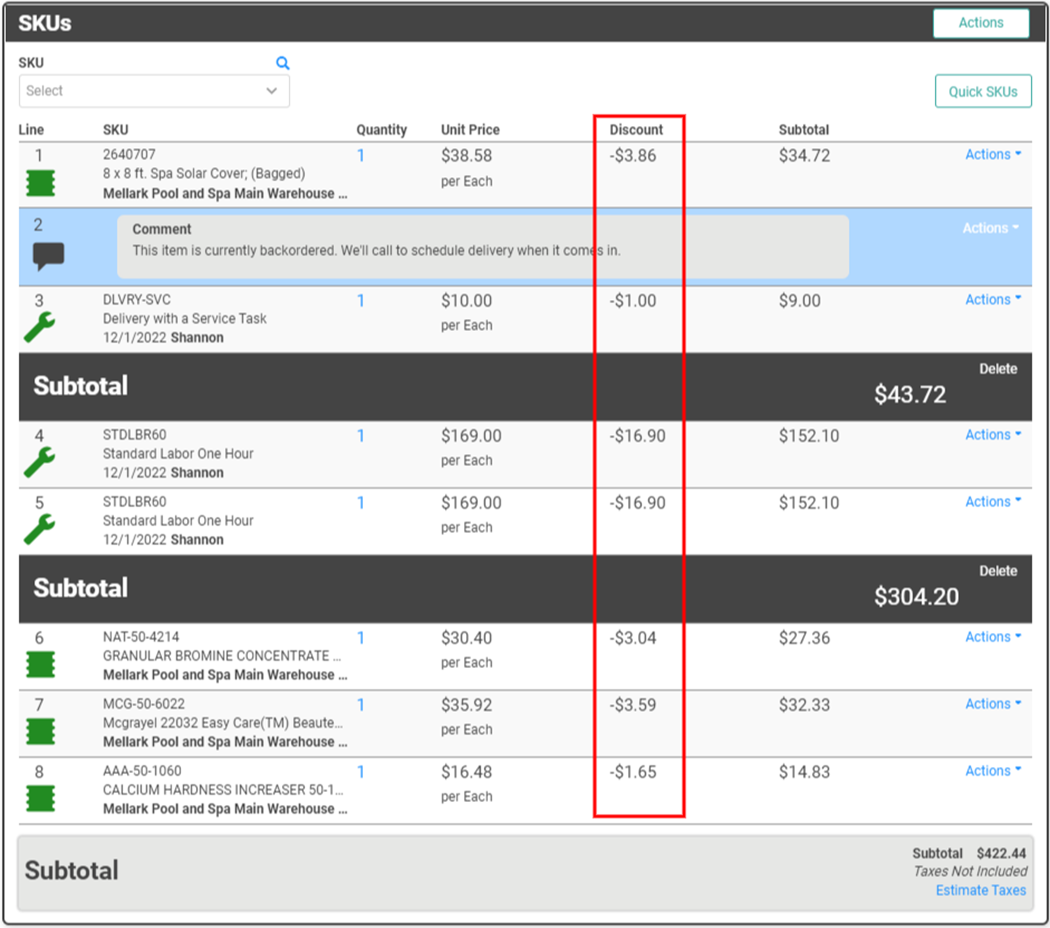
Discount You can add a percentage discount to the Total Order.
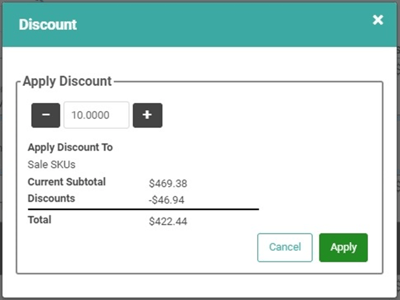
Once you click Apply, the Discount will be reflected on each SKU, totalling the percentage off the Total you selected. In this case, 10%.
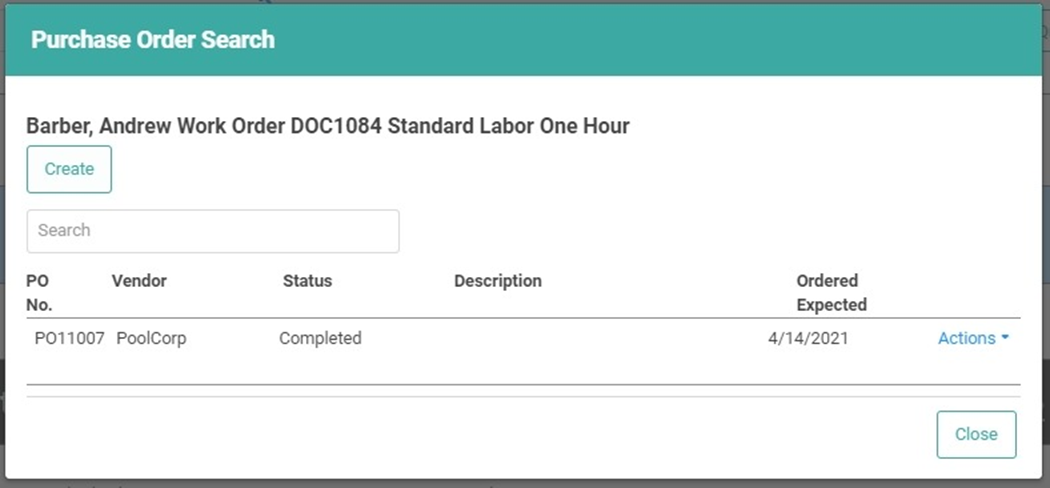
Purchase Order will have a number next to it, indicating how many Purchase Orders exist for SKUs in this Order. You can click the link to open a Purchase Order Search pop-up, as well as create a new PO for one of the SKUs in the Order.
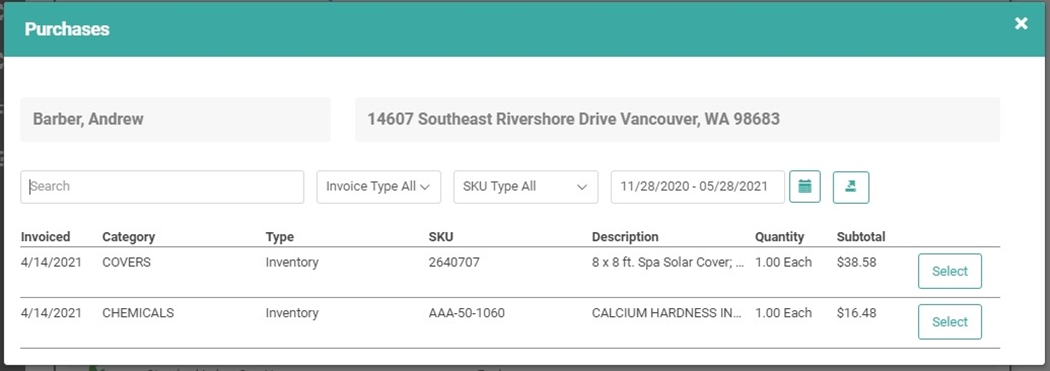
Purchases opens a pop-up Purchase History box for this Customer, allowing you to find and review Invoices for the Customer. This is a quick way to see if the Customer has purchased a particular SKU before, or to find something the Customer purchased and wants to purchase again.
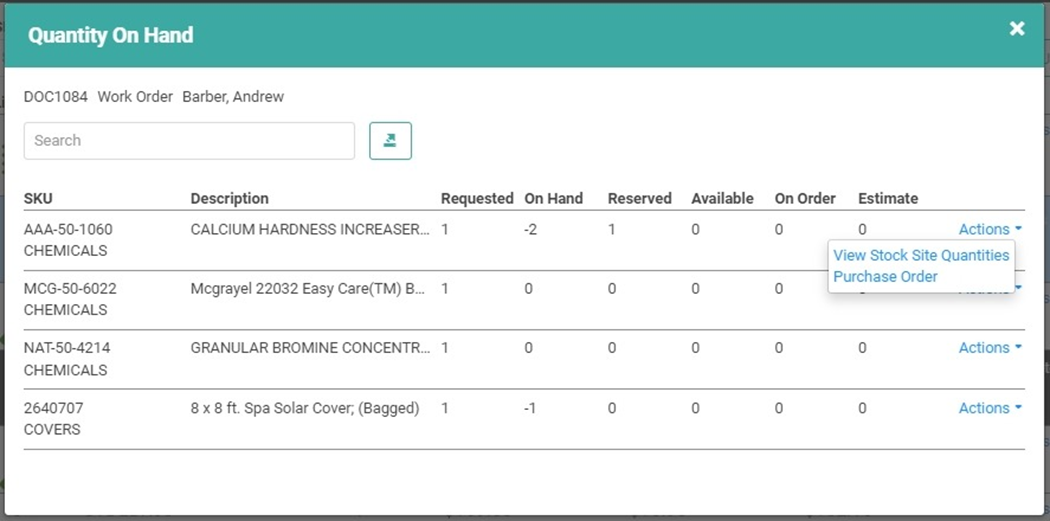
Quantity on Hand allows you to quickly see the Quantities on Hand for the SKUs on the Order, as well as export this information to a spreadsheet. You can create a new Purchase Order for the SKU by clicking the Actions link and selecting Purchase Order. You can also see the QOH by Stock Site(s) when you click Actions and select View Stock Site Quantities.
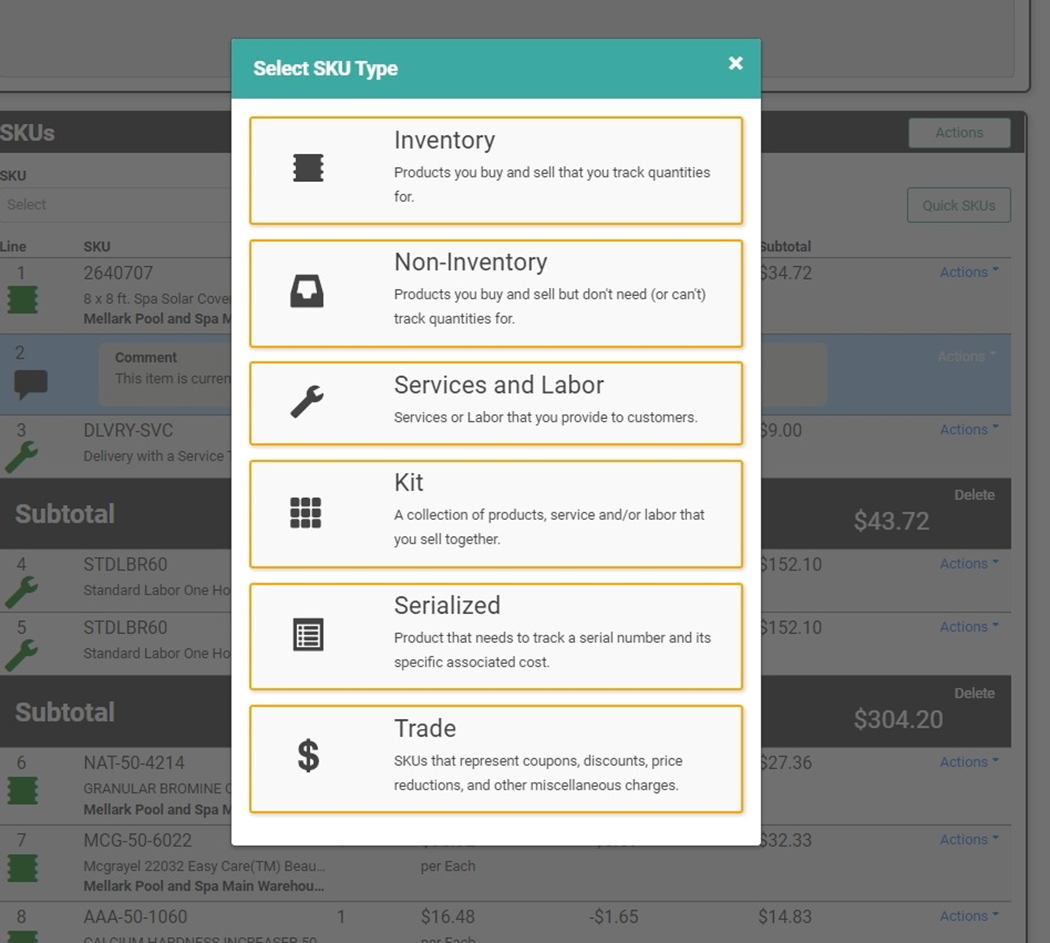
Create SKU allows you to create a SKU without leaving the Order Profile.
Estimate Taxes
In order to ensure the most accurate tax calculations, Taxes are not calculated on the fly. In order to see Taxes and Totals with Taxes, click the Estimate Taxes link.
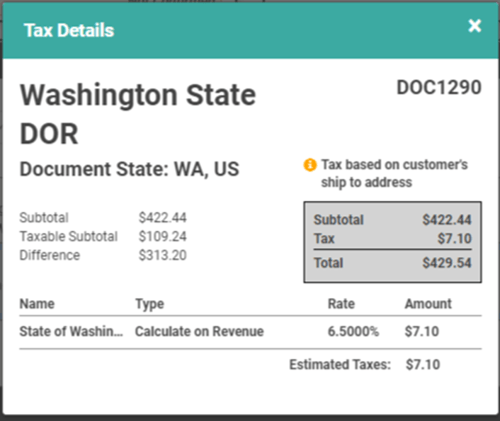
This box will display a breakdown of the Subtotal, Taxable Subtotal, and the Difference between the two. It will also show you the Subtotal, Tax, and Total for the Order. All the Tax Codes associated with the Order will be listed, as well as the amount of Tax for that Code and the Total Estimated Taxes.
Taxes on Reports
Taxes for Pending Orders only appear on Reports if you have clicked Estimate Taxes on the Order first. If you’ve clicked Estimate Taxes multiple times, the most recent estimate is what will appear on Reports. If you change anything on the Order after clicking Estimate Taxes, Reports may not reflect the most current, accurate Tax Amounts.
Kit SKU Actions
There are a few unique Actions you can take when you add a Kit SKU to an Order.

- Update Kit: Click to override the Kit Price for this Order only or to hide SKU line items or SKU line item prices on printed documents. They will still appear on electronic documents.

- IMPORTANT! Hiding Kit SKU lines also hides Kit SKU line prices but hiding Kit SKU line prices will not automatically hide the Kit SKU line items.
- Add SKU to Kit: Click to add an additional SKU to this Kit for this Order only. This does not add the SKU to the Kit permanently. This affects the current Order only.
Delete Kit: Remove the Kit SKU from the Order.
Deposits and Invoices
This is where you can see and add Deposits to the Order, as well as Invoice All or Partial and view a list of existing Invoices.

To make a Deposit, click ![]() . You will be taken to the Payment – Deposit page to complete the Deposit transaction.
. You will be taken to the Payment – Deposit page to complete the Deposit transaction.
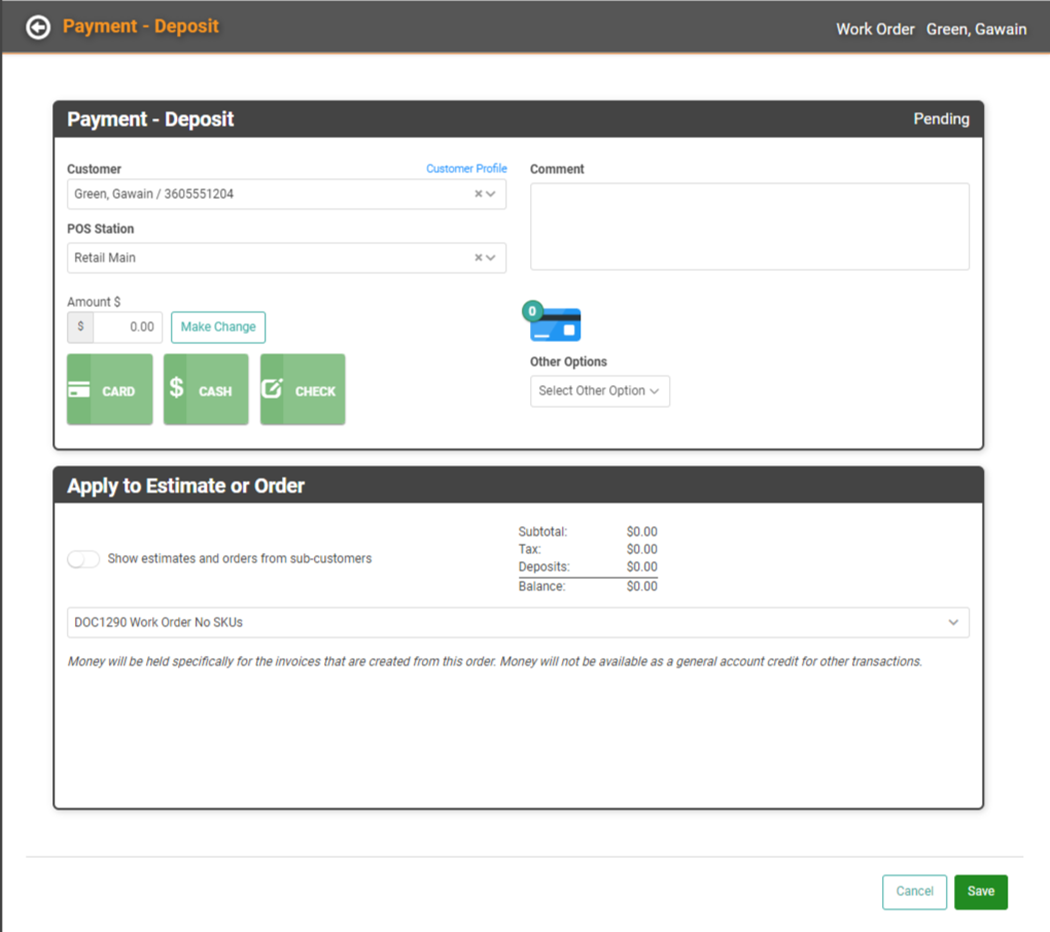
Once you click Save, the transaction will complete and you will land on the Payment Complete page. Click Close to return to the Order.
IMPORTANT! Taxes are not included in a Deposit transaction. Taxes are estimated amounts until the Order is Invoiced, at which time LOU finalizes the Taxes. Totals reflected in the Deposit box represent Total amount of Deposits only. They are not a representation of the entire Total for the Order. To see the full Total for the Order including Taxes, click the Estimate Taxes link in the SKU box.
The Invoices box allows you to Invoice All, Partially Invoice, and see a list of the Invoices associated with the order.
REMEMBER! Once you Invoice All, the Work Order status changes to Complete and the Invoice is created. This can be done before the Task(s) are complete, but best practice would be to leave the Work Order in Pending status until the Task(s) are complete.
Negative Inventory Warning
If invoicing an Order would result in a SKU’s quantity going negative in your Inventory, LOU will display a warning, letting you know that continuing to Invoice will result in a negative quantity. This gives you the opportunity to address the quantity of the SKU prior to Invoicing. For non-admin users, there are Group Security permissions that can allow or restrict their ability to continue with invoicing and going negative.
Release or Reassign Deposit
Occasionally, you may need to release or reassign a Deposit from the Order with which it’s associated. You can do that from the Payment Profile.
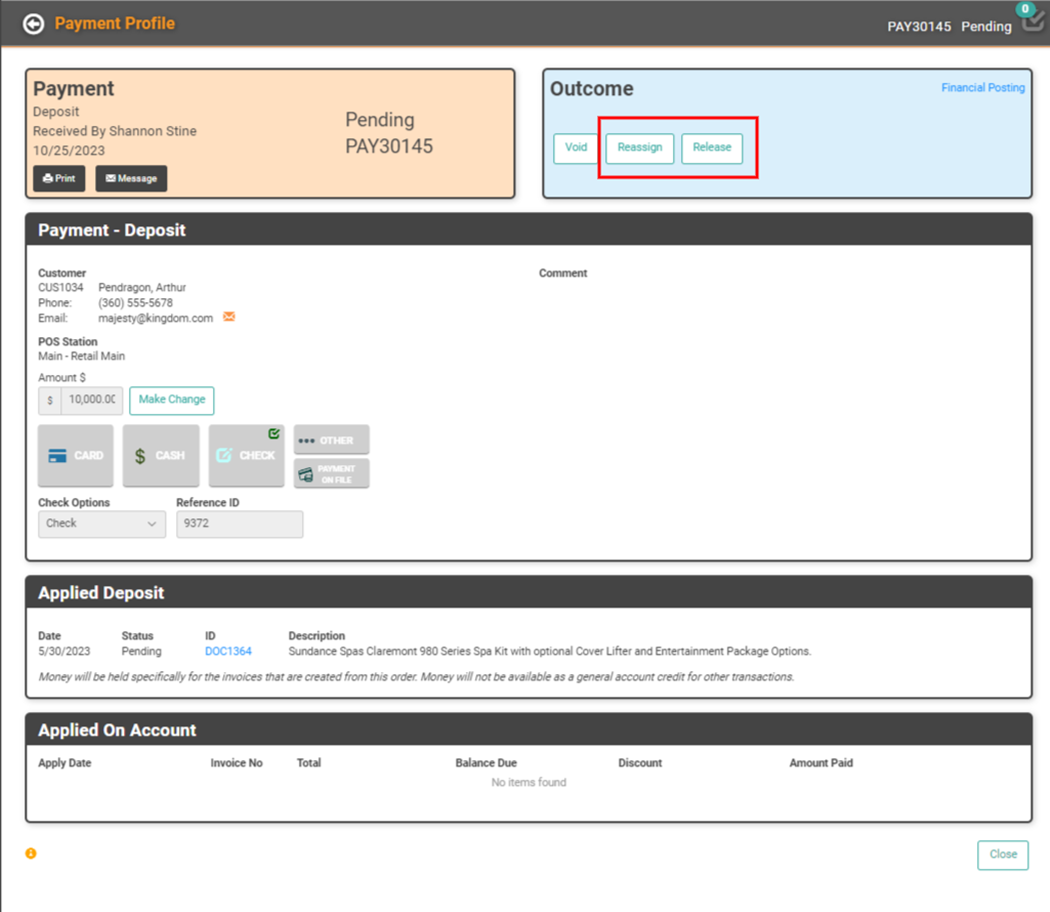
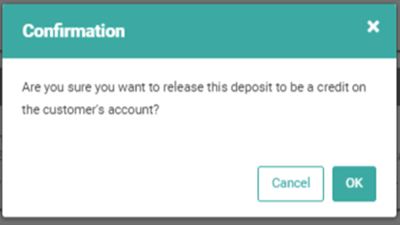
- Release Deposit: Releasing the deposit will move the deposit payment from a Deposit to a Payment On Account, creating a credit on the Customer’s Account Record. This amount can then be applied to any future Invoice(s) until the credit is reduced to zero.
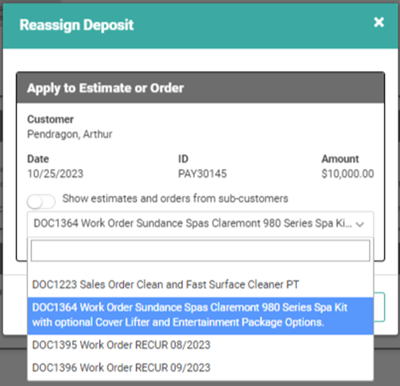
- Reassign Deposit: Reassigning the deposit will transfer the Deposit from being associated with one Order to being associated with a different Order. This does not create an On Account credit for the Customer and does not change the payment from a Deposit.
Invoice
The Invoices box allows you to Invoice All, Partially Invoice, and see a list of the Invoices associated with the order.
REMEMBER! Once you Invoice All, the Work Order status changes to Complete and the Invoice is created. This can be done before the Task(s) are complete, but best practice would be to leave the Work Order in Pending status until the Task(s) are complete.
Marketing and Notes and Details
Manage Marketing features and create Customer-facing and Internal Notes.
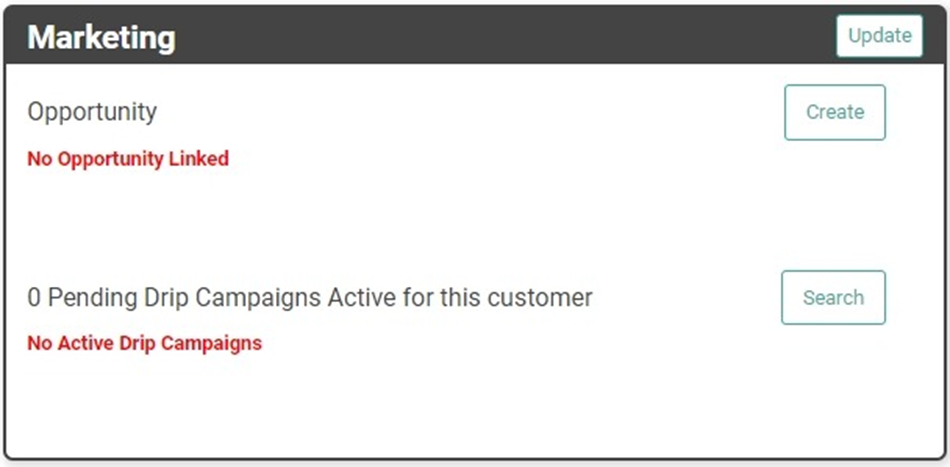
The Marketing box allows you to Create and see list of the Opportunities linked to this Customer, as well as search Drip Campaigns in which the Customer is enrolled. You can use the Update button to link the Customer to an existing Opportunity.
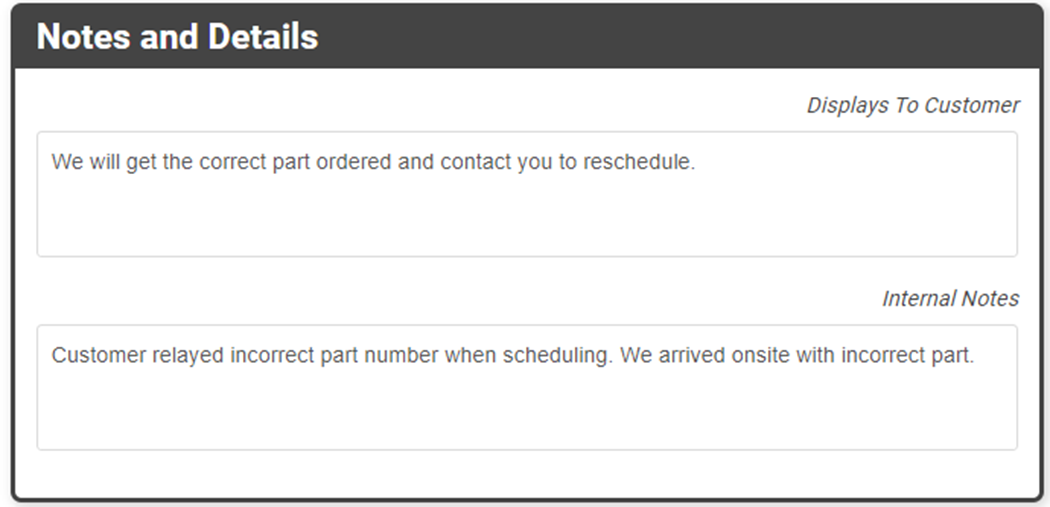
In Notes and Details, add both Customer-Facing and Internal Notes to the Order.
Images
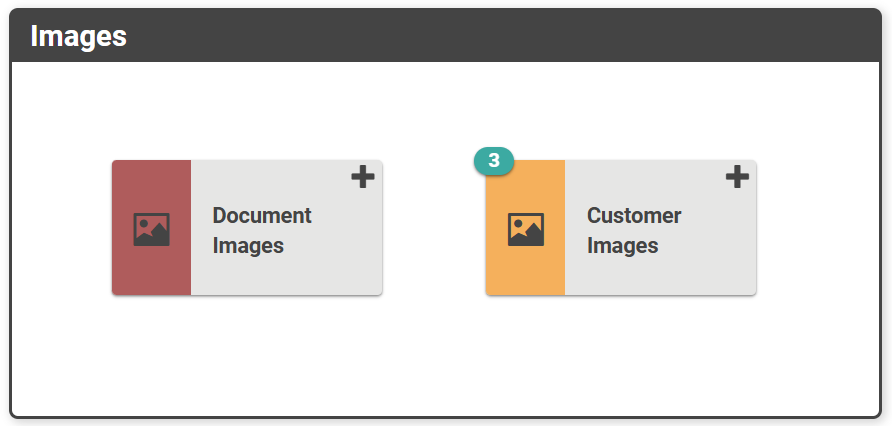
This is where you can access or add images specific to this Document or the Customer’s Profile.
Work Order and Outcome Boxes
Let’s get back up to those first two boxes.

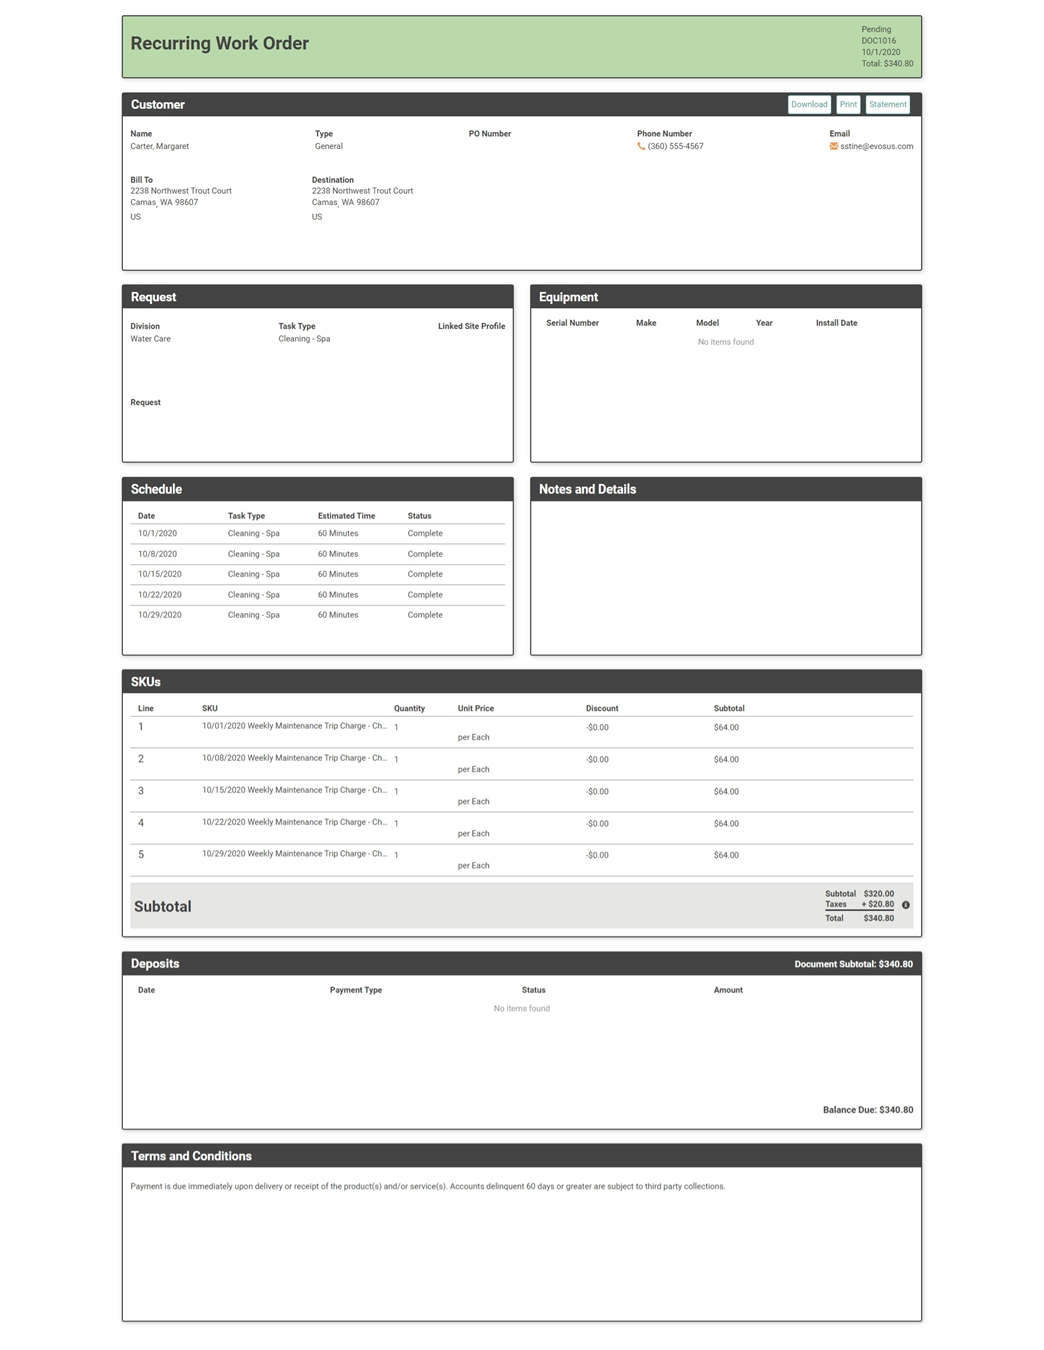
The box on the left has information about the Work Order. You can see the document ID, status, and Amount. You can also print a physical copy of the Work Order.
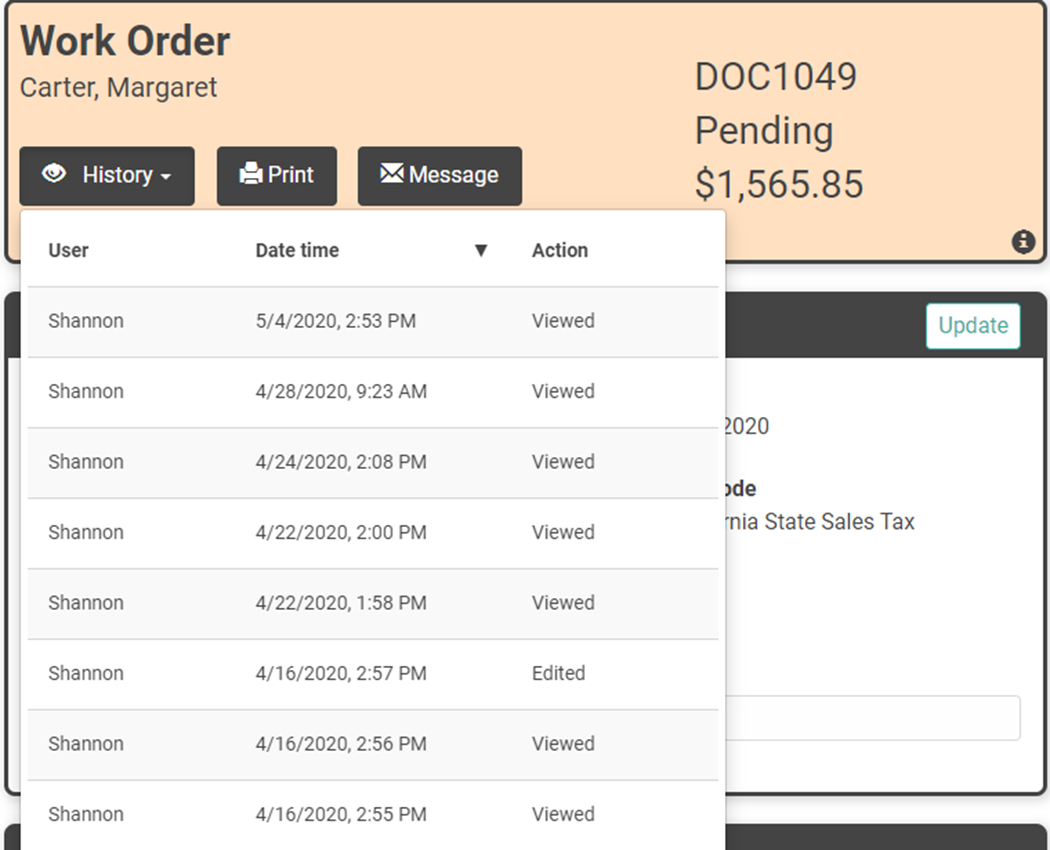
History
The History button will show you everyone in your organization who has viewed and/or updated the Work Order since it was created.
Message
To send an Email or Text message of the Work Order to your customer, click the Message button. The email is created/managed through Setup / Configuration / LOU Integrations / Email Messaging. Depending on the Customer Message Preferences, when you click the Message button on the Work Order Profile, LOU will open a pop-up box with the message you’ve configured as well as a link directly to the Work Order.
REMEMBER! If you have “Send Both” selected in the Customer Profile’s Message Preferences, this message button will only send the text message to the customer.
The ![]() button allows you to add the link to the Customer Portal to the Email.
button allows you to add the link to the Customer Portal to the Email.
REMEMBER! You do not have to click this button for your Customer to view the Sales Order electronically. The Email or Text will automatically include a link directly to the Work Order.
Email Pop-Up
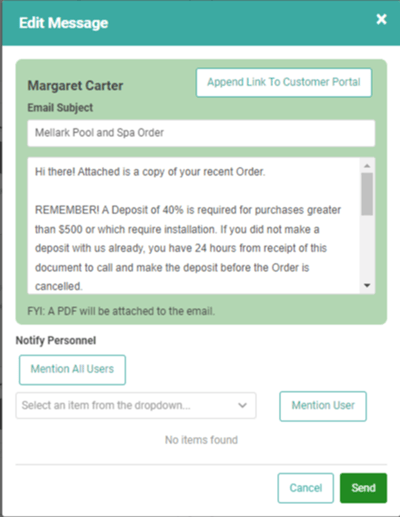
Email messages will include both the default link to the electronic document and an attached pdf. You may choose not to include the link by deleting it from the body of the email. You cannot opt out of sending the pdf.
Text Message Pop-Up

Text messages do not include a pdf as they are difficult to access on mobile devices. Instead, only the link to the electronic document will be included.
In addition to customizing the email or text message, you can notify additional Personnel about this message, creating a thread in their My Messages page. LOU will automatically include the Document Owner. If another user is sending the message, they will be included as well.
Once you have customized the email or text message and are ready to send, click the Send button and the Text or Email will be sent!
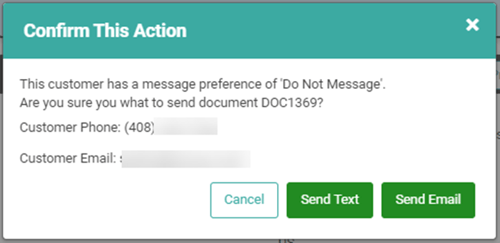
Customer Message Preference – Do Not Message
If your Customer has Do Not Message toggled on their profile, clicking the Message button will give you a warning, letting you know that they Customer’s message preference is ‘Do not Message’. It will provide the Customer’s contact phone number and email and allow you to click Send Email, Send Text, or Cancel out of the pop up and return to the Order. If you select either Send Email or Send Text, LOU will bypass the Do Not Message instruction and send the Email or Text.
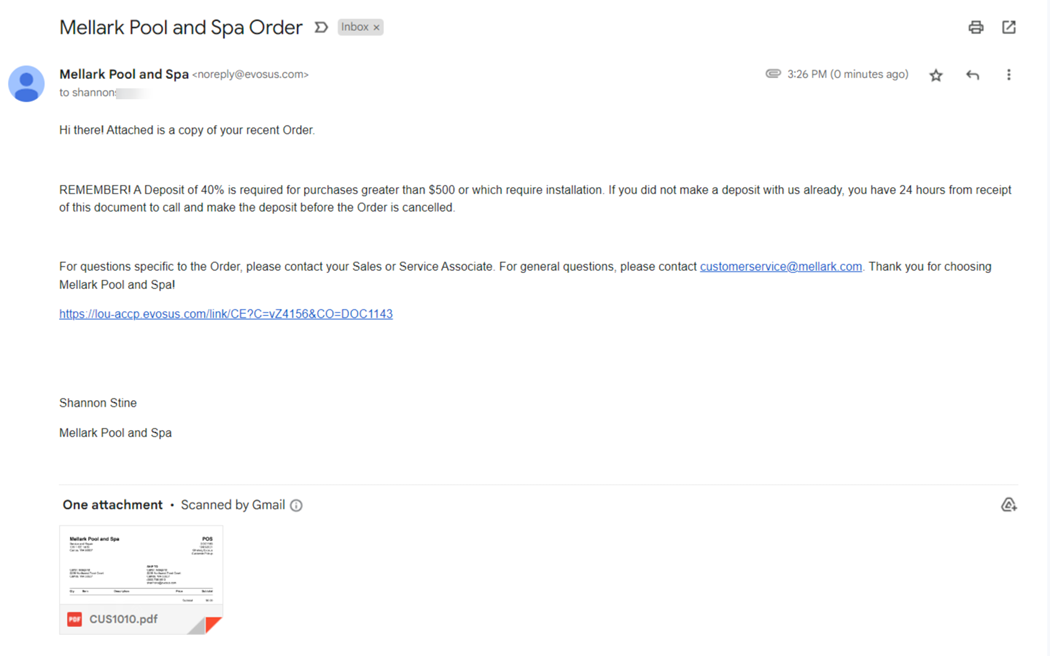
This is what the Customer will see when you send them a message.
The Text Message will look similar.
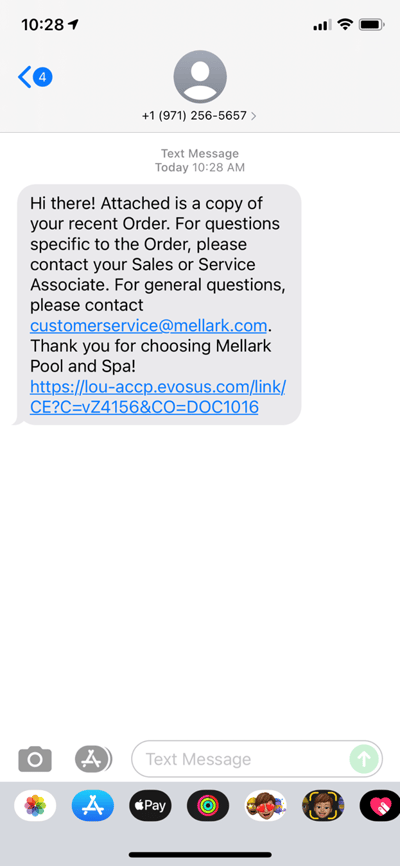
When you click the link, you will see the document.
Audit Log
The Audit Log will give you details on who/what/when that something on the doc was updated. This is linked to the History. Areas of the Work Order where changes are currently tracked by the Audit Log include Contact Info, Request, Equipment, Schedule, SKUs, Work Order Outcomes, and the final Outcome (Void, Forced Closed, etc.)
IMPORTANT! The Audit Log only tracks information added or updated in LOU Web, not from the mobile apps.
Outcome
The Outcome box allows you to apply an Outcome to the Work Order as a whole. You can select several buttons related to Outcomes. You can Invoice all or part of the Work Order, Void the Order, Force Close the order, or take a Deposit Payment for the order. You can also enter the Work Order Outcome and create a digital door hanger, as in the Work Order Outcomes box.
- Work Order Outcome: This is the same option as in the Outcomes Box. This will allow you to create a Digital Door Hanger, add notes, etc. This does not change the status of the document from Pending.
- Invoice All: The pop-up will default with all SKUs selected to Invoice All. This will update the status of the Work Order to Complete and create the Invoice under Invoices. To Partially Invoice, deselect the SKUs you do not want to include in the Invoice.
- Void Order: This allows you to void and cancel the order if necessary. This is like deleting the Work Order, it removes everything like it never happened.
- Force Close: This allows you to close the Work Order before it’s complete. This is like a cancel. It will close the Work Order but does not reverse anything already complete.
- Make Deposit: This allows you to accept a Deposit on the Work Order. This does not Invoice the Work Order or change the status from pending.
Changing the Invoice Date
You can change the Invoice Date to any date between the Order Creation Date and Today. You cannot create an Invoice Date prior to the Order’s Creation Date.
There are two ways you can update the Invoice Date.
On the Order Search Page:
- Locate the Order line item
- Click the Actions link
- Select Invoice

- The Invoice pop-up will open.
- All SKUs will be selected. To Partially Invoice, deselect the SKUs you don’t want to include in the Invoice. To Invoice All, leave the SKUs selected.
- Click Update

- Select Date and Payment Terms.

- Click OK.
- Click Create Invoice.
On the Order Profile:
- Click Invoice
- An Invoice pop-up will display with all SKUs selected.
- To Partially Invoice, deselect the SKUs you don’t want to include in the Invoice. To Invoice All, leave SKUs selected.
- Click Update to change Invoice Date

- Select the Date and Payment Terms

- Click OK
- Once you’re satisfied, click Create Invoice
The Invoice will be created as of the Date you selected, financial transactions will appropriately post to the General Ledger, and the Order will be updated. When invoicing all SKUs, the Order status will update to Complete. When partially invoicing, the SKUs included will be marked as Invoiced on the Order and the Balance Due will be reduced by the SKUs Invoiced.
Create a Return Work Order
You may occasionally need to process a refund on a transaction related to a Work Order. To do that, you will need a Return Invoice which can be made through a Return Work Order. The process for creating a Return Work Order is the same as a regular Work Order with two key differences: SKUs & Notes and Details.
Return SKUs
- Add SKUs to the Work Order as outlined above. Then use the Actions link to select Update.
- The Update Line Item window will pop up. In the Quantity field, add a minus sign (-) before the number to make the Quantity negative.
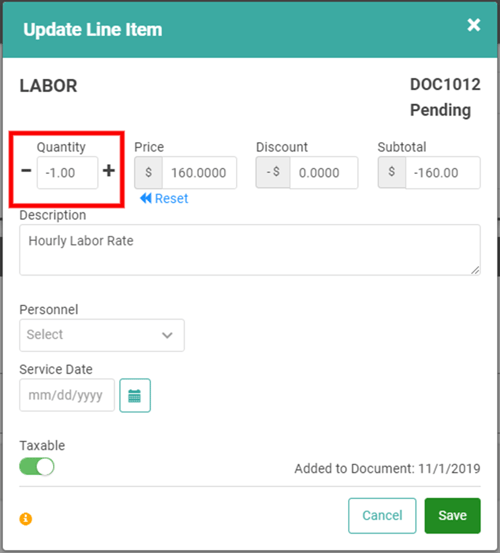
- This will automatically update the Amount field and you will not need to update that. Click
 .
.
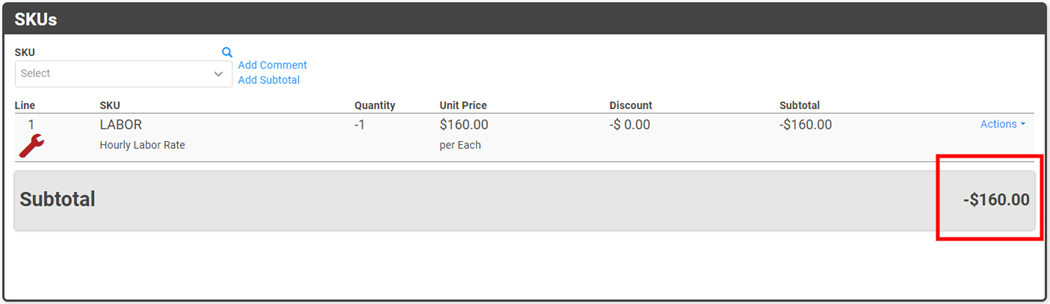
The SKU Type icon will change to red and the Subtotal will reflect a negative amount.
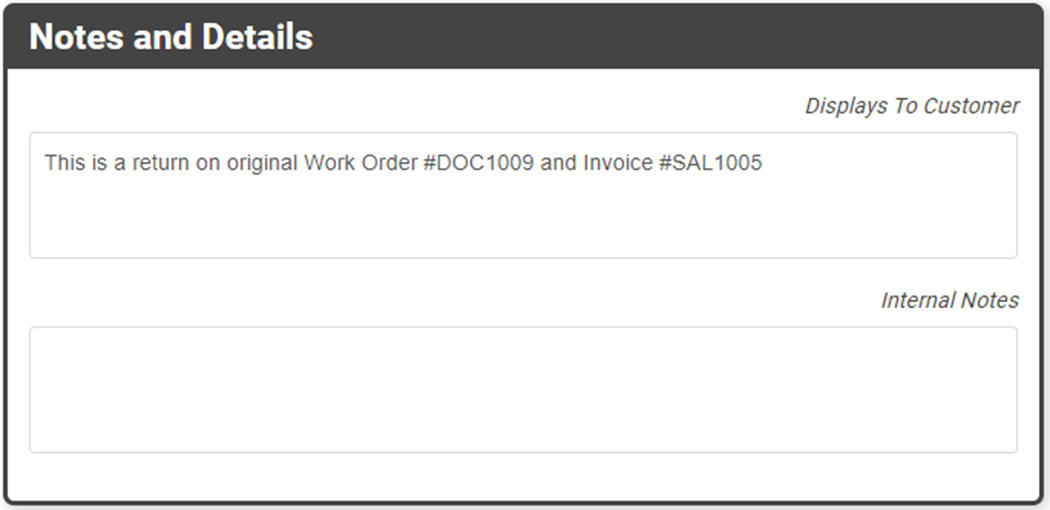
Notes and Details
This step is optional, but helpful. In the Notes and Details section, add the original Work Order and Invoice numbers to help with recordkeeping.
The rest of the Work Order process will be the same as a regular Work Order. Once you Invoice All, the Return Invoice will be created, and you can process a Refund Payment.