IMPORTANT! If you are looking for help with Payments on a PAX machine through LOU Retail POS, please see Post a Sales Transaction on PAX .
The Payments screen is where you can track Payments made in LOU. In addition to tracking Payments from this page, you can Create, Apply, and Void Payments through this screen.
Payments posted through the Create feature on this page are Payments which are not processed via a customer-facing POS Station.
WAIT! Before you can accept Payments, a few things need to be configured. Make sure you’ve already configured the following:
Got everything configured? Fantastic! Let’s look at the Payments Screen and create some Payments.
Key Steps:
1. Determine what type of Payment you want to create: On Account, Deposit, or Refund.
2. If this Payment is associated with a specific Order (Deposits) or Invoice (On Account and Refund), head to the Order or Invoice Profile to initiate the Payment from there.
3. Select Customer
4. Select POS Station
5. Enter Payment Amount
6. Select Payment Method
7. Apply to Invoices, when appropriate, if creating a Payment through the Payment tile
8. Click Create
Go to Payments
Payments Start at an Invoice
Most of the time, you will be creating a Payment via Invoices. However, there may be occasions where you need to create a Payment separate from an Invoice.

Additional Options
Looking for specific Payment information? Use these links to jump ahead:
- On Account: Post a Payment from a Customer to their Account.
- Card Payment Options
- ACH Payment Options
- Deposit: A Deposit on goods or services you are providing.
- Refund: Refund a previous Payment made by the Customer.
Create an On Account Payment
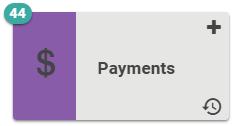
- To post a Payment, click

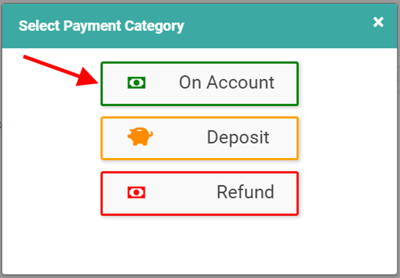
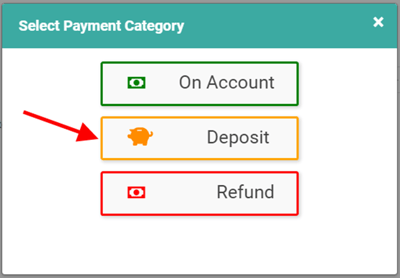
- A box will pop up, asking you to select the Payment Category. For this example, we’re choosing On Account.
- A Payment – On Account screen will pop up.
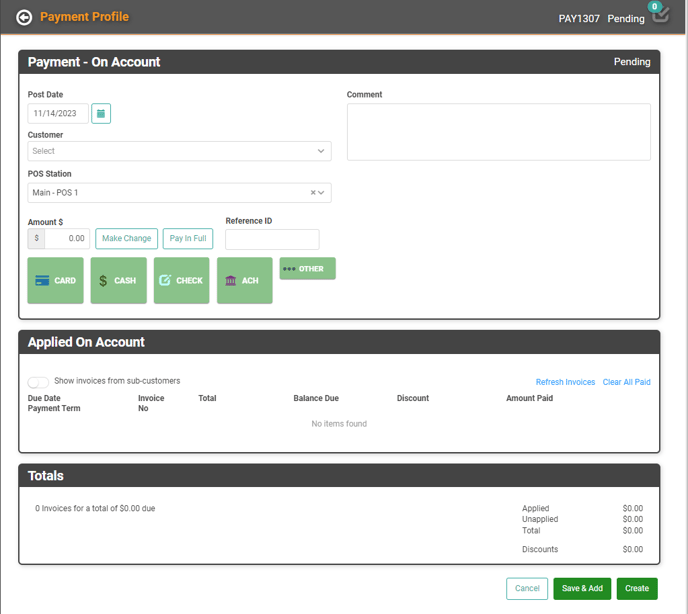
- Optional The Post Date will default to Today. You can change it to any date from the Invoice Date, forward. For standalone Payments, you can choose any date.
- IMPORTANT! Changing the Payment Date affects financials, including the GL. Posting a Payment with a date other than Today should be done with extreme caution.
- Choose the Customer from the dropdown.
- Select the POS Station to which the transaction will be attributed.
- Enter the Payment Amount
- TIP! If a customer gives you an amount in excess of the Payment Due, enter the total Payment Due amount in this field, not the amount tendered. You can use the Make Change Calculator in Step 7 to calculate the correct change for the amount tendered.
- You can click
 to pull up a Calculator to help you make correct change.
- Click
 to post the entire amount.
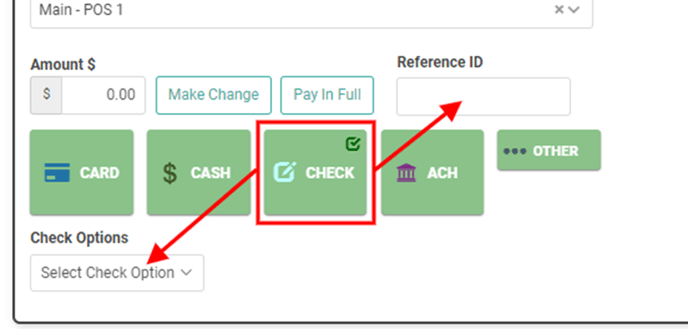
 - Select the Payment Type: Card, Cash, Check, or Other Options
- ACH will only appear if you have ACH enabled for your company
- When you choose Check, a Check Options dropdown and a Reference ID field will appear.
- When you chose a Customer in the dropdown, the second box on the page populated with any outstanding Invoices available for the Customer.
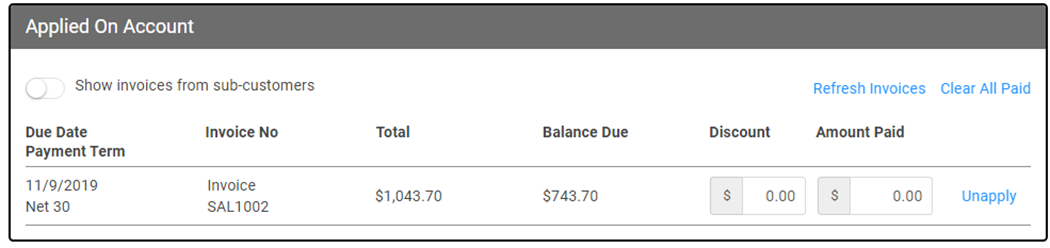
- The Payment information you have entered will automatically Apply to the outstanding Invoice. You can click Unapply if you want to apply the Payment elsewhere.
- The final box on the screen shows the total for the transaction. Applied, Unapplied, and how many invoices were impacted. You can click
 to save this Payment and continue to add another Payment, or click
  if this was the only Payment you need to enter.
Card Payment Options
If you choose Card as the Payment Method, there are some additional options that will come up when you click ![]() or
or ![]() .
.
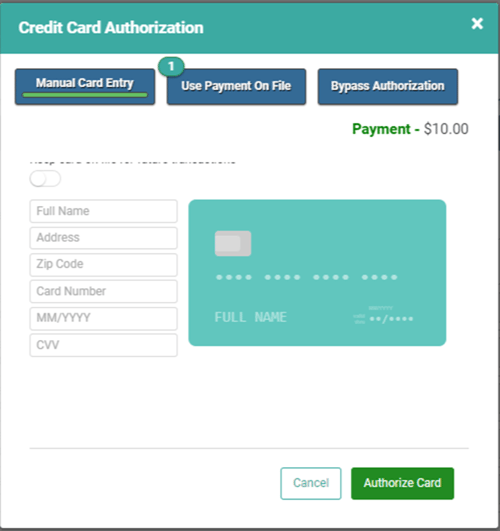
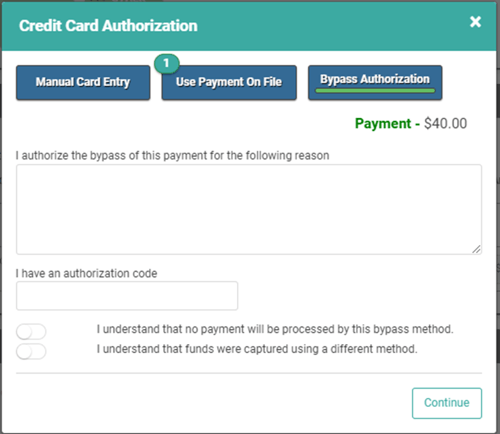
This screen allows you to enter a card for a one-time payment by completing the card details on the screen. It also allows you to select the Card(s) on file as a payment or use Bypass Authorization.
- Manual Card Entry: Enter the Full Name, Address, Zip Code, Card Number, and Expiration Date. If you want to store this information as Payment on File for future use, toggle on Keep card on file for future transactions.
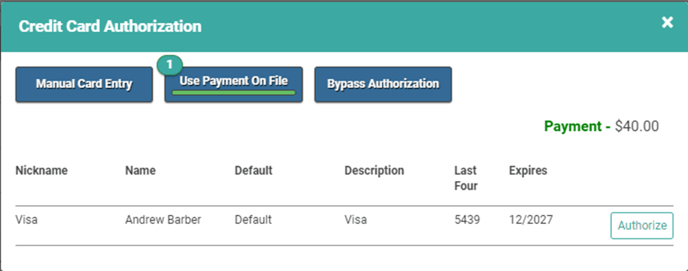
- Use Payment on File: Select one of the cards stored on file for the Customer by clicking Authorize.
- Bypass Authorization: Process the Payment as a credit card payment without charging a card. This is useful if you have already taken the card payment outside of LOU. For example, you processed it through the TSYS Merchant Portal directly. With Bypass Processing, you can complete the transaction in LOU so that it correctly updates the Invoice and Order, and adds the correct journal entries to your GL, without processing another credit card payment. You should have login information for your TSYS Merchant Center. If you need assistance, please contact Evosus Support.
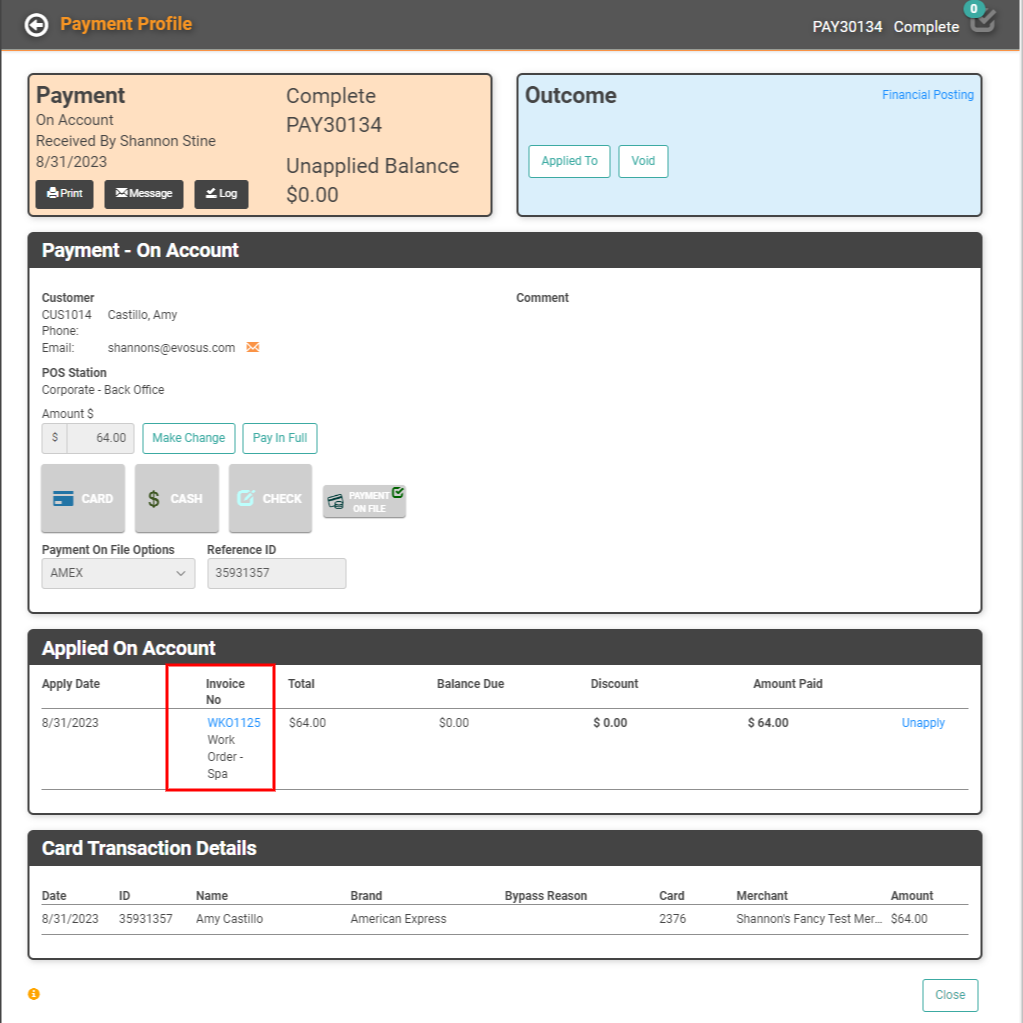
Once you’ve entered card info, selected a Card on File, or entered Bypass Authorization, the Payment will process and you’ll land on the Payment Profile page which can be used as a receipt that can be printed or messaged for your Customer.

ACH Payment Options
If you have ACH enabled for your company and you choose ACH as the Payment Method, there are some additional options that will come up when you click ![]() or
or ![]() .
.
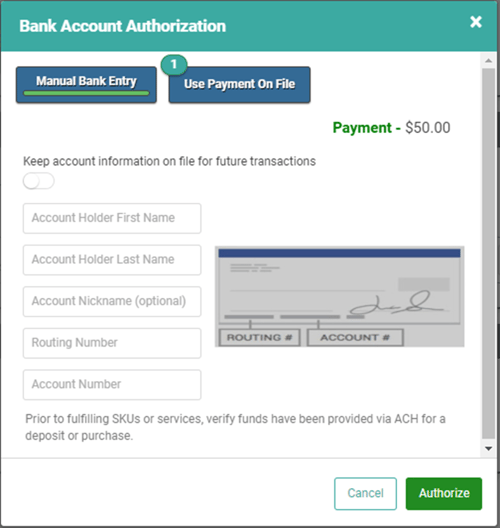
Manual Bank Entry: Enter the Account Holder First and Last Name, optional Account Nickname, Routing Number, and Account Number. If you want to save this Payment Method for future transactions, toggle on Keep account information on file for future transactions.
Use Payment on File: Select one of the bank accounts saved on file. 
Once you’ve entered card info, selected a Card on File, or entered Bypass Authorization, the Payment will process and you’ll land on the Payment Profile page which can be used as a receipt that can be printed or messaged for your Customer.
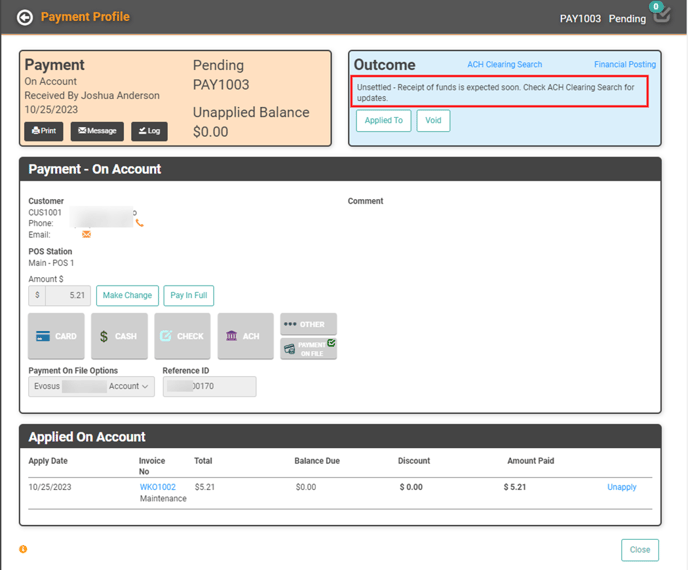
Settled vs Unsettled
Since ACH Payments require a few days for the banks to process the transfer, they are considered Unsettled until the funds are received. LOU tracks those payments through the ACH Clearing Search. The Payment Profile will indicate whether the payment has been settled and guide you to the ACH Clearing Search.
Head over to How to Track and Reconcile ACH Payments for additional information on tracking ACH Payments.
Create a Deposit Payment
You may choose to require Deposits on larger Work Orders and Sales Orders. Using the same steps above, choose Deposit instead of On Account.
The screen will look very similar to the “On Account” Payment screen.
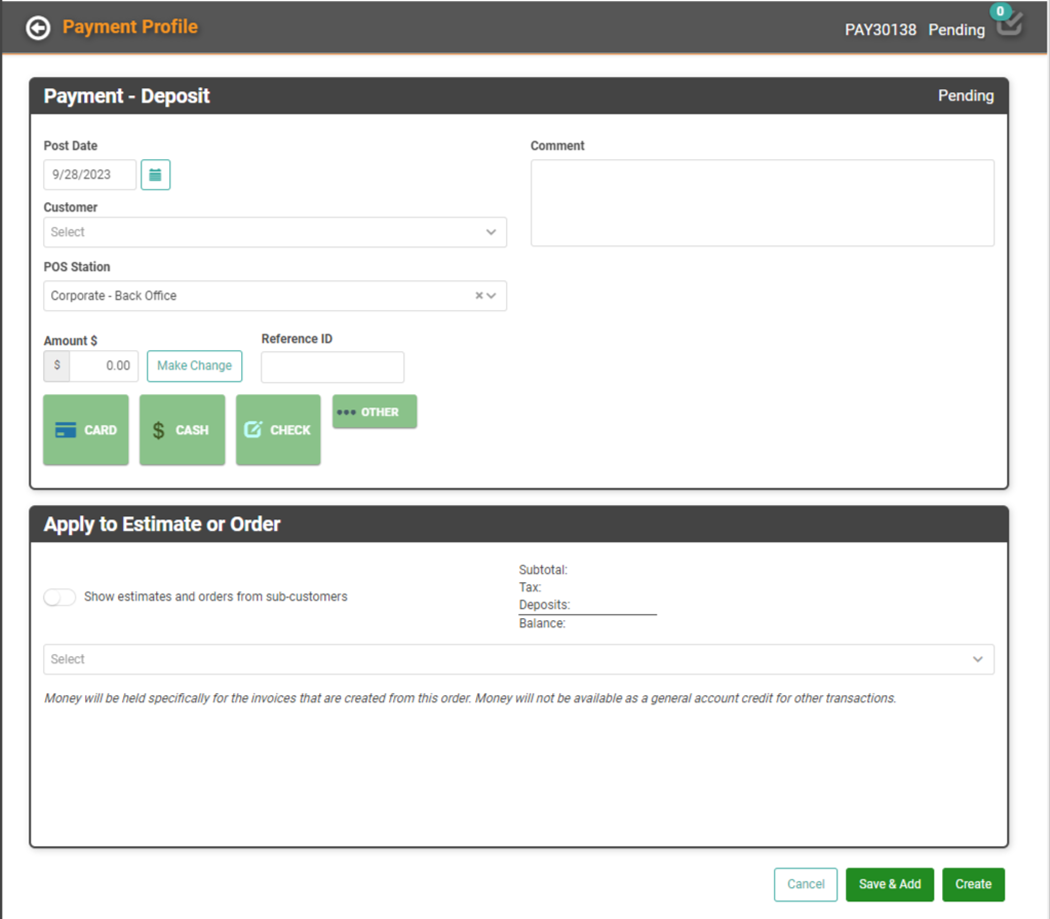
The Payment box is the same as “On Account”. The second box allows you to choose what Estimate or Order to which you’d like to apply the Deposit. Once you’ve chosen the Estimate or Order, you can click to apply the Deposit and complete the transaction.
IMPORTANT! Best practice is to create the Deposit from the Order or Estimate profile, not from the Payments tile. That way, the Deposit is automatically associated with the Order or Estimate. Once an Invoice is created from the Order, the Deposit will be applied to it automatically.
Release or Reassign Deposit
Occasionally, you may need to release or reassign a Deposit from the Order with which it’s associated. You can do that from the Payment Profile.
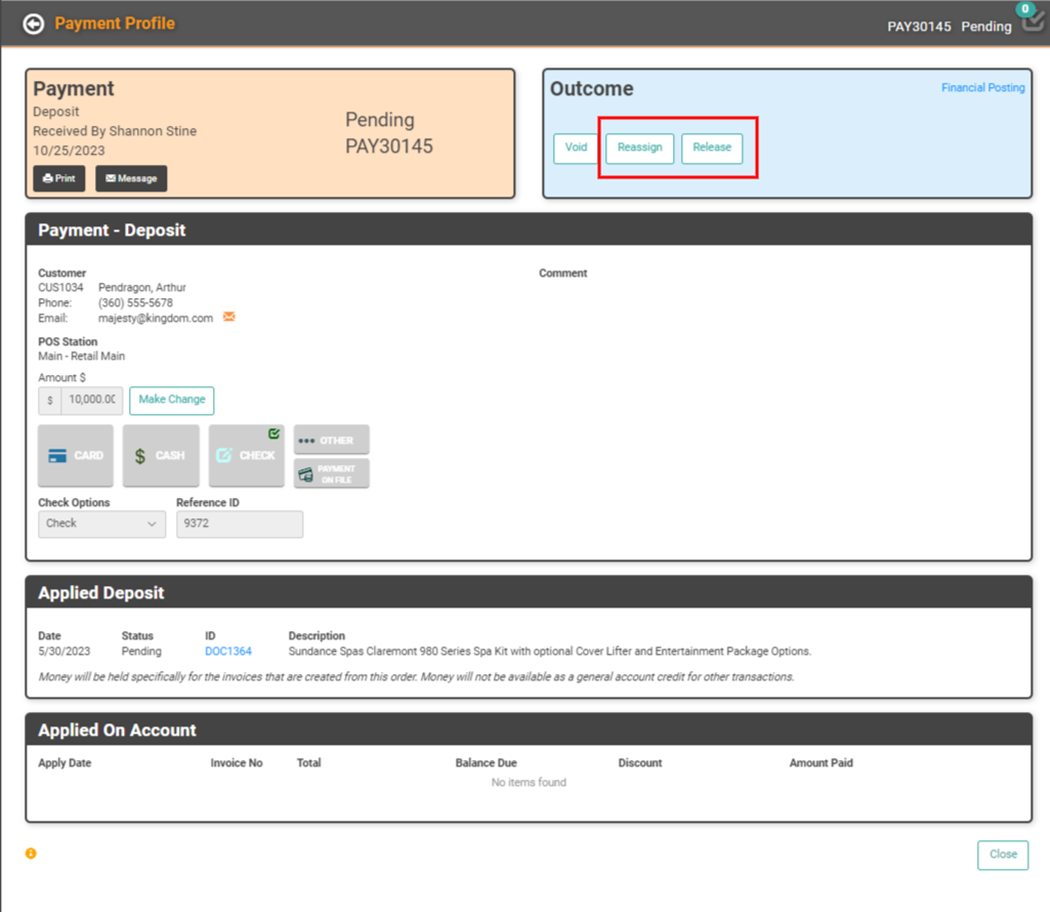
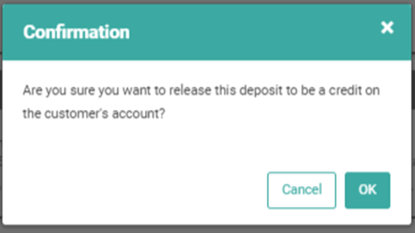
- Release Deposit: Releasing the deposit will move the deposit payment from a Deposit to a Payment On Account, creating a credit on the Customer’s Account Record. This amount can then be applied to any future Invoice(s) until the credit is reduced to zero.
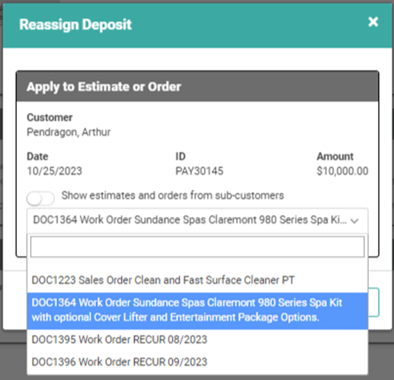
- Reassign Deposit: Reassigning the deposit will transfer the Deposit from being associated with one Order to being associated with a different Order. This does not create an On Account credit for the Customer and does not change the payment from a Deposit.
Create a Refund Payment
Refunds are a little more involved. Head over to Payment Refunds for more information on the process.
Email or Text Payment Receipt
Once you have completed the Payment, you will see a Message button at the top. Clicking this button will allow you to Email and/or Text your customer a copy of this completed Payment.
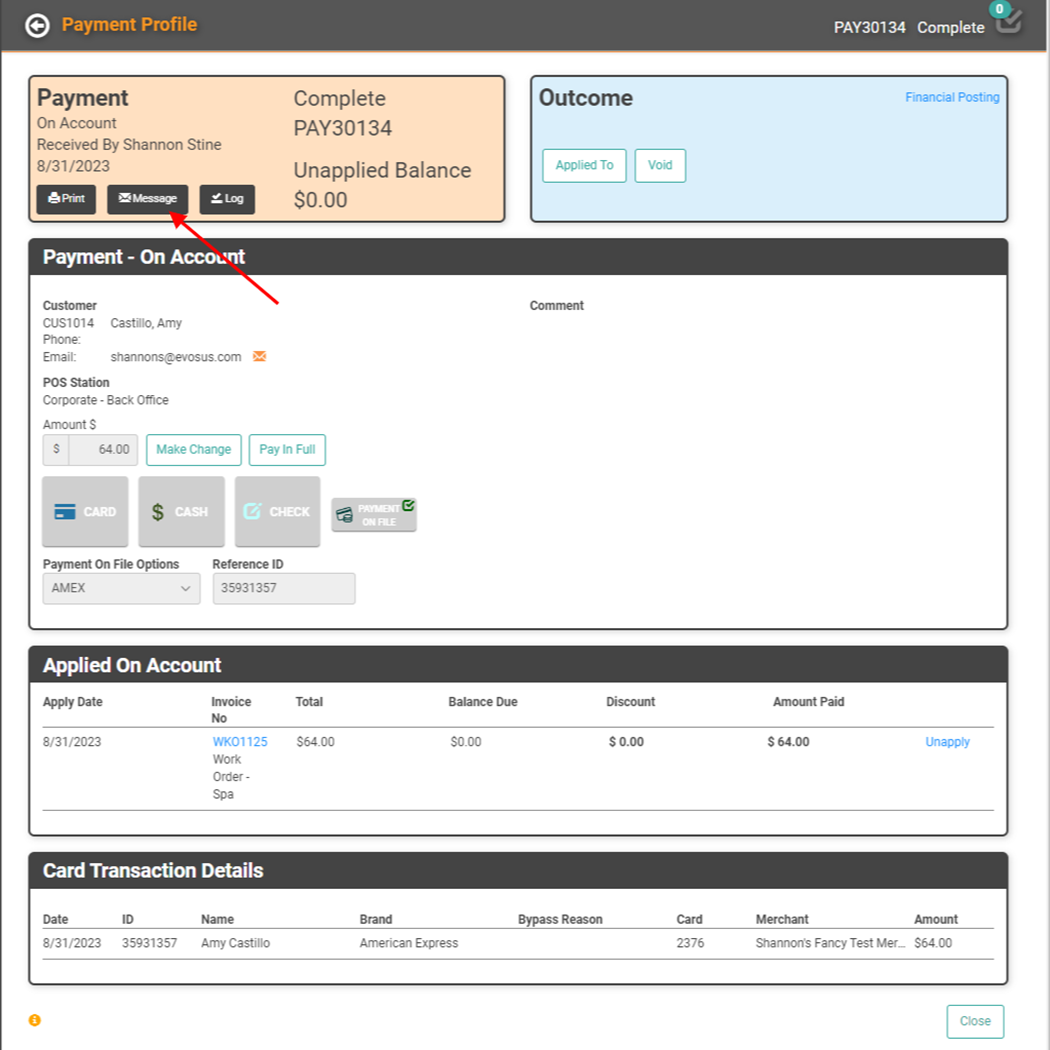
REMEMEBER! You must have Email and/or Text Messaging configured and your Customer must have Electronic Message Preferences set to allow Email and/or Text before you can message Customers.
Return to Invoice
If you want to return to the Invoice from the Completed Payment Page, simply click the Invoice document ID in the Applied On Account box under Invoice No. and you will be taken back to the Invoice.