Invoices are an important component of the billing process in LOU. After you create a Sales Order or a Work Order, Invoices are the next step in the process for completing a transaction.
REMEMBER! Completed Invoices are created in LOU Web whenever a transaction is processed in LOU Retail POS.

Go to Invoices
Once you’ve invoiced Sales and Work Orders, those Invoices appear here. You can use the buttons across the top to filter your view by Pending, Complete, or Voided Invoices.
IMPORTANT! Invoices are sorted by Creation Date, not Completion Date. As with all Documents, when searching for a specific Invoice under Complete or Void Invoices, adjust your Date Range to include the date the Invoice was created.

As with all the Document Search pages in LOU, and many other Search pages, you can treat the grid of data as a report by clicking on the headers to reveal filter, sort, and other actions; and you can right-click anywhere in the grid to expose additional actions and Export options.

Actions Link
You can access the Invoice Profile, Customer Profile, Order Profile, Make a Payment, or Message the Customer.

Invoice Profile
The Invoice Profile is where you can make certain changes to the Invoice which can affect the Sales or Work Order associated with it. You cannot add or subtract SKUs or update the Customer information such as Bill To and Ship To Addresses. You can make the following updates/changes to an Invoice:
- View History and Print the Invoice
- Email or Text the Invoice to your Customer
- Apply an Outcome: post a Payment, Apply a Payment, or Void a Payment.
- Update the Profile information

- The Invoice Date can be updated to any date between the Order Creation Date and Today. Use this option with extreme caution because it will change your financial postings. Best practice is to select the correct Invoice Date during Invoice creation rather than after the fact.

Payment
Payment takes you to Payments to process a payment on the Invoice.
Applied
You can view Payments that have been applied to this Invoice and Unapply them if necessary.

Void
The Void link allows you to quickly Void the Invoice. Voiding the Invoice will reopen the Order associated with it. The voided Invoice will appear on the Invoices Search page under Void.

If you are voiding an Invoice that has already been completed and the Payment was already received, the Payment will be unapplied. The Payment will appear in Unapplied Payments on the Payments Search page and on the Customer Profile as a credit/On Account Amount.
Changing the Invoice Date
You can change the Invoice Date to any date between the Order Creation Date and Today. You cannot create an Invoice Date prior to the Order’s Creation Date.
There are two ways you can update the Invoice Date.
On the Order Search Page:
- Locate the Order line item
- Click the Actions link
- Select Invoice
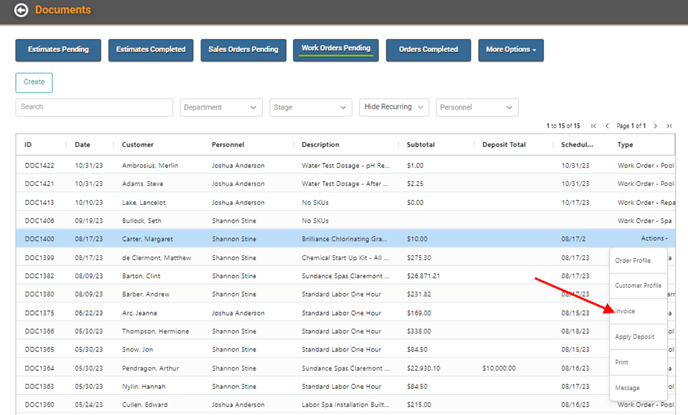
- The Invoice pop-up will open.
- All SKUs will be selected. To Partially Invoice, deselect the SKUs you don’t want to include in the Invoice. To Invoice All, leave the SKUs selected.
- Click Update.
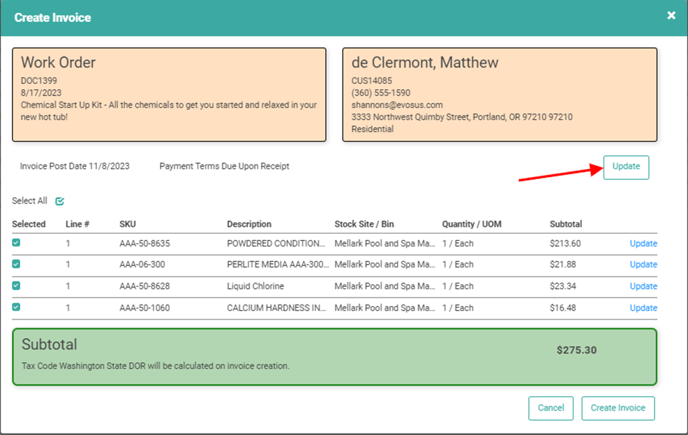
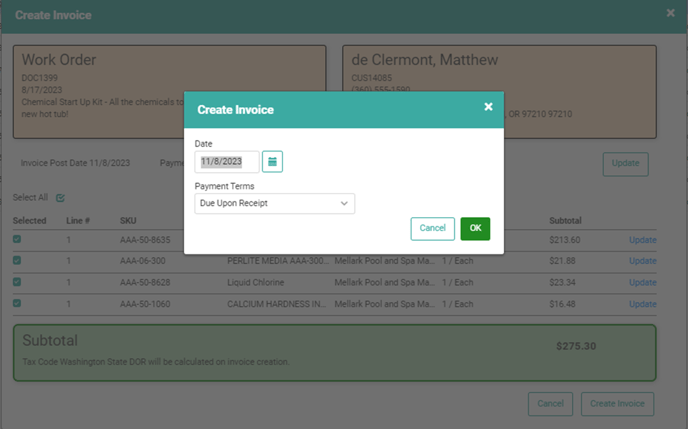
- Select Date and Payment Terms.

- Click OK.
- Click Create Invoice.
On the Order Profile:
- Click Invoice
- An Invoice pop-up will display with all SKUs selected.
- To Partially Invoice, deselect the SKUs you don’t want to include in the Invoice. To Invoice All, leave SKUs selected.
- Click Update to change Invoice Date

- Select the Date and Payment Terms
- Click OK
- Once you’re satisfied, click Create Invoice
The Invoice will be created as of the Date you selected, financial transactions will appropriately post to the General Ledger, and the Order will be updated. When invoicing all SKUs, the Order status will update to Complete. When partially invoicing, the SKUs included will be marked as Invoiced on the Order and the Balance Due will be reduced by the SKUs Invoiced.
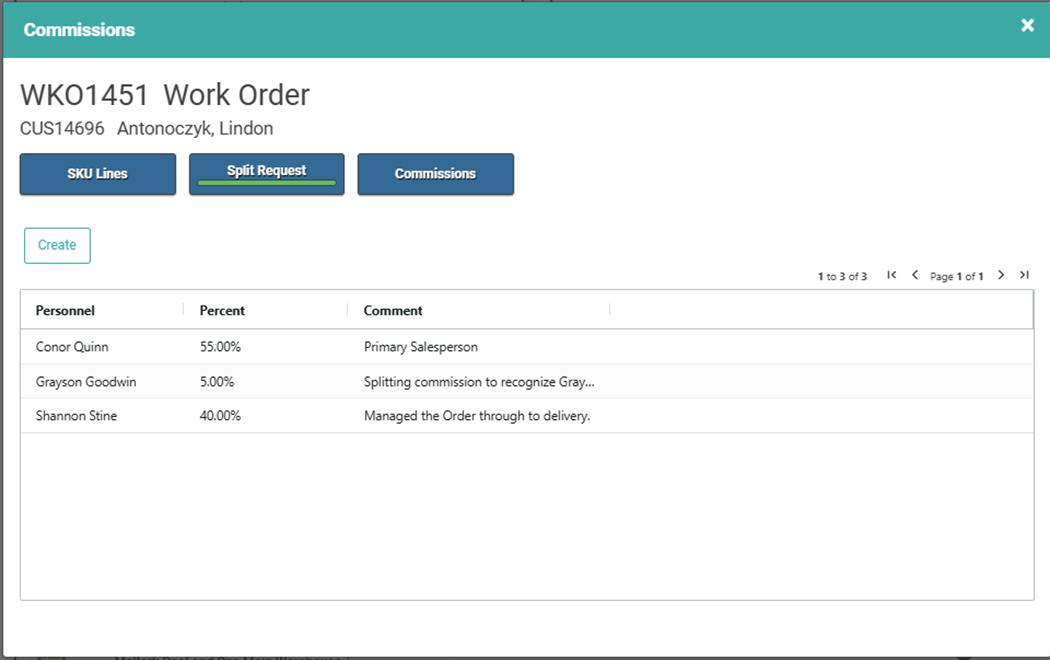
Commissions
This button allows you to access information regarding Commissions and prepare for Commission Runs.

- SKU Lines let you to see the SKUs on the Invoice and you can update the SKU line item from here. You can update the Personnel associated with the SKU, the date the SKU was added to the Invoice, and the Extended Description Text for the SKU on this Invoice only.

- Split Request allows you to create a Split Commission for this Invoice. When the Commission amount on the Invoice is greater than zero, the Create button will be available on this screen.
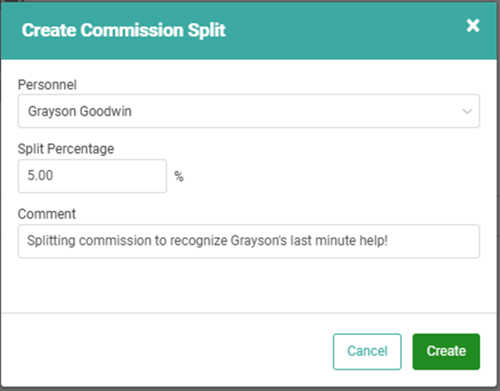
- Click Create
- Choose Personnel (this list will respect the Commission Group parameters associated with the Commission Run)
- Enter a percentage of the Commission that this Personnel should earn.
- Enter a Comment.
- Click Create
If the Split you create is less than 100%, you will get a warning message. You can click Yes to proceed. You must create additional Split requests to add up to 100%.

IMPORTANT! You will have to delete and re-run the Commission Run for the Split Request to take effect. To avoid deleting/re-running, Split Requests can be entered on the Invoice when it’s invoiced, before it’s included in a Run
- Commissions gives you a quick look at the Commissions that will be earned for this Invoice.