
Whether you’re a Service Manager or a Service Tech, the Schedule Dashboard is an important part of your day. This is where you can see an overview of the tasks scheduled.
The Schedule Dashboard is an overview of everything scheduled in Service. You can create tasks through this feature, but the primary function is to get a view of service tasks and progress, as well as the schedule.
IMPORTANT! The only users who can view Tasks on the Schedule are those users who have access to the Service Bundle and who are listed as Primary Personnel in the Schedule Division to which the Task has been assigned. If you click on a Calendar without being a member of the Division, you will see an empty calendar.
You can also jump straight to the Schedule Search section below to find out how you can quickly and easily run through several important service-related processes.
Hey there, are you just looking for details about the Calendar?! Head over to How to Access the Calendar for all that info!
Go to Schedule 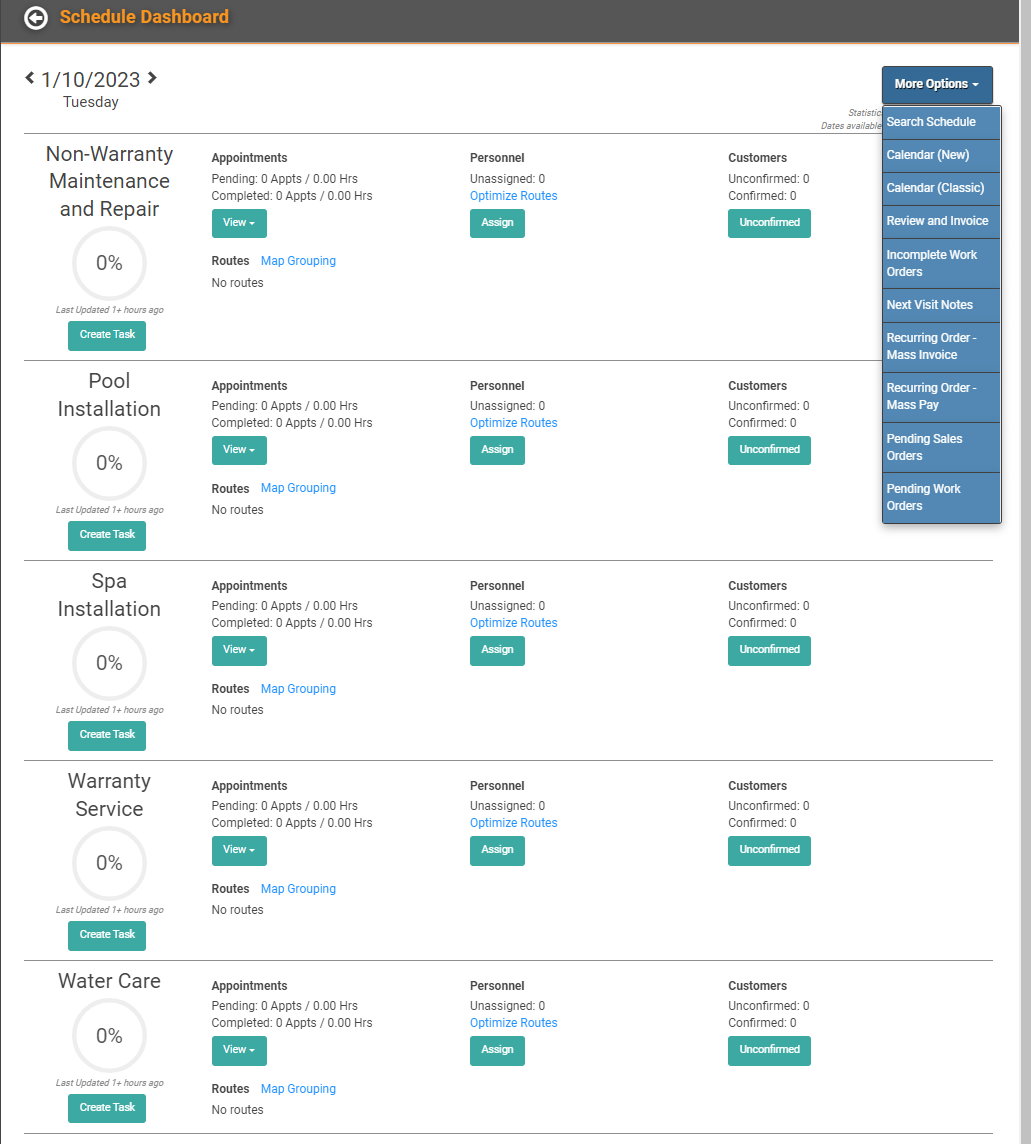
This is the Schedule Dashboard with several at-a-glance statistics and links to important pages. If there are past due tasks, those will be called out in the red box at the top of the page. 
IMPORTANT! This is not real time data. LOU updates statistics and data on this page every 15 minutes. 
- Date: The dashboard will always default to Today. You can use the arrows to toggle backwards to Yesterday or forwards to a future date up to 7 days out.
- More Options: Allows you to quickly navigate away from this page to other relevant pages.
- Alert: The red Alert box will only appear on the page if there are past due Tasks from the past 7 days. The Search box allows you to see a list of these Tasks so you can take action.
- You may need to reschedule, reassign, or update the Task in another way. By clicking the Actions link on the Task, you can access the Task Profile, Document Profile, and other important related pages. You can also click to Change Date to Today or Change Date to Tomorrow to quickly reschedule the Task without additional Updates.
- Divisions: Each Schedule Division will be displayed with a progress circle indicating the percentage of Schedule Tasks for the Day complete for each Division.
- You can see the last time the data was updated in fine print below the progress circle.
- You can click Create Task to create a Task for that Division.
- Appointments: You can see the numbers of Pending and Completed Appointments as well as the total number of hours Pending and Completed.
- Click the View dropdown to select the Appointment View you want.
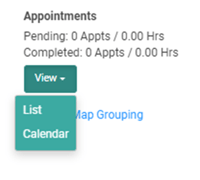
- Map Grouping: Click here to see a Map view of the Appointments for this Division for the Day.

- Click the View dropdown to select the Appointment View you want.
- Personnel: See the number of Unassigned Tasks for this Division and click Calendar to view Tasks for this Division in the Calendar view. Click Assign to go straight to the Scheduler and drag and drop unassigned Tasks onto the schedule.
- You can also Optimize Routes for yourself. If you are an admin, you can use the Switch button to Optimize Routes for another Service Personnel.
- IMPORTANT! Optimizing Routes may change Schedule Task Timeframes. Do so with caution.
- Customers: See the number of Unconfirmed and Confirmed appointments. Click Unconfirmed to look at Schedule Search (more information below.)
- IMPORTANT! Unconfirmed and Confirmed statistics require Schedule Confirmation Messaging to be configured.
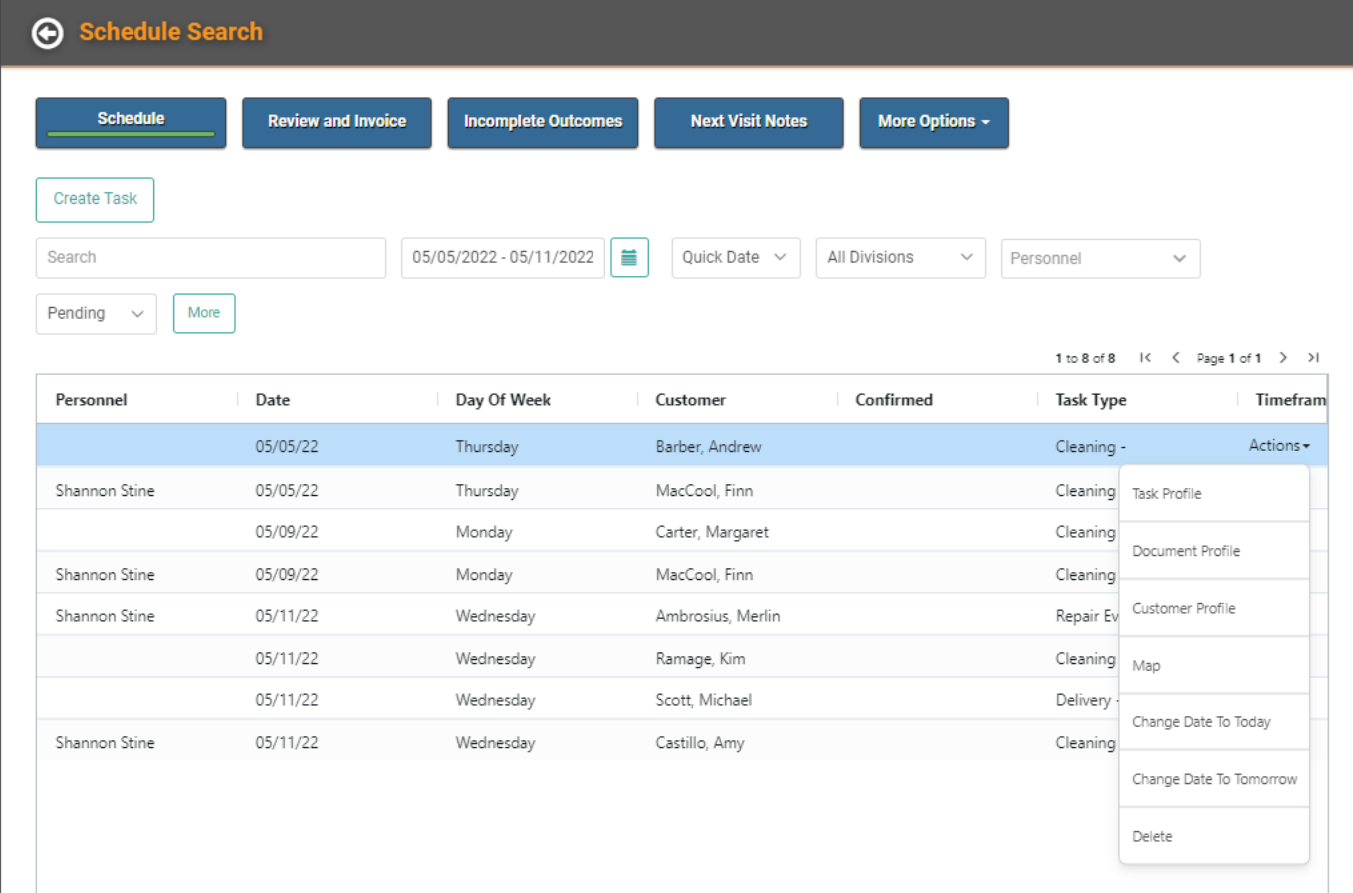
Schedule Search
Click Search under Customers to access the Schedule Search page filtered for the corresponding Division Search button. 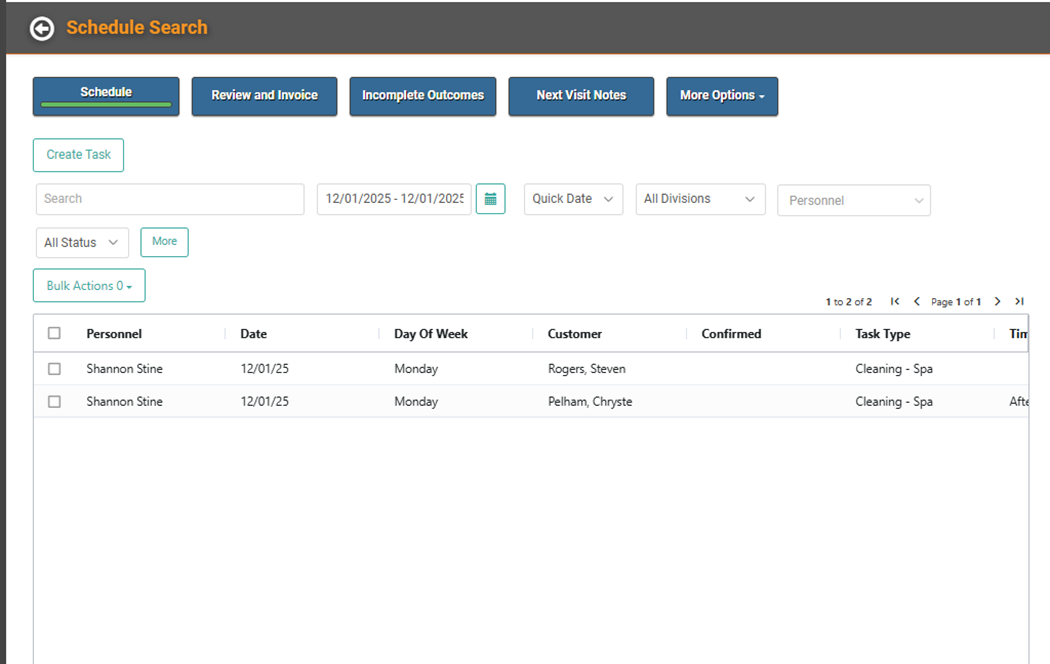
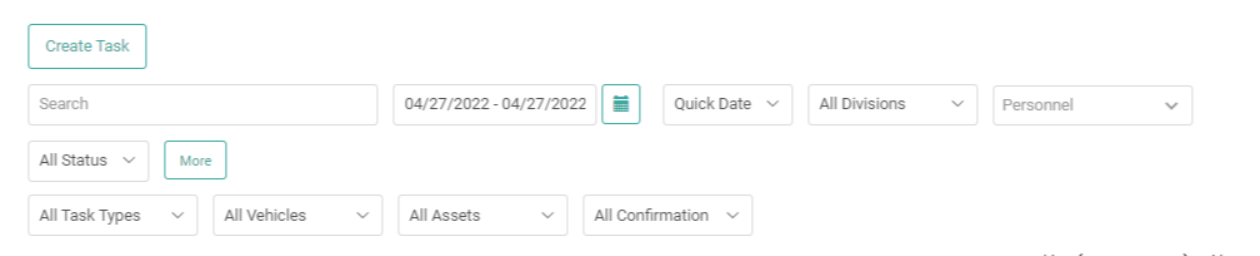
On the Schedule Search page, you can see a list of all Tasks scheduled for the selected Date or range of Dates. You can Create a Task, as well as search for a keyword or filter by several fields.
- Date: This will default to the Date you were viewing on the Schedule Dashboard when you clicked Search to arrive at this page. You can type in, or use the Calendar to find, another Date Range to search previous or future days on your Schedule.
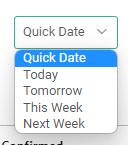
- Quick Date: This allows you to change the Quick Date. Choose Today, Tomorrow, This Week, or Next Week.
- Divisions: Filter for a specific Division. You cannot choose multiple Divisions. To see all Divisions, leave his filter blank. To see one Division, select from the dropdown.
- Personnel: Leave this filter blank to see all Tasks, regardless of Personnel. Choose a Personnel from the list to see just the Tasks for the selected Personnel.
- All Status: Leave blank for all. Select Completed or Pending to filter for just that status.
- More: Click More to reveal additional filter dropdowns for Task Types, Vehicles, Assets, and Confirmation.
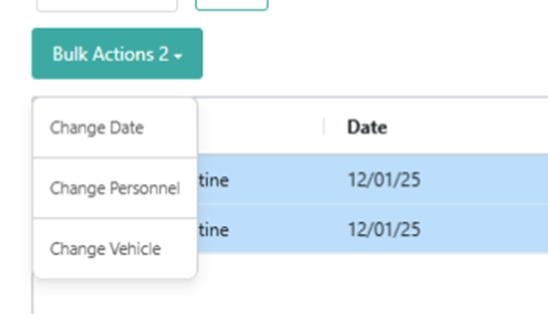
- Bulk Actions: You can use the boxes next to the Tasks to multi-select Tasks and use the Bulk Actions button to change the Date, Personnel, or Vehicle en masse. You can select one Task and use this button to change just one Task as well.
There are several other pages you can access from the Schedule Search page. 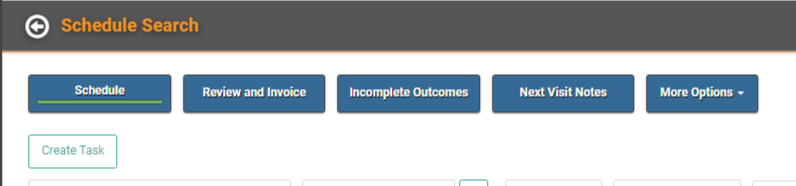
Review and Invoice: This page allows you to review all Work Orders on which all Schedule Tasks have been marked as Complete and determine if further action must be taken or if you’re ready to Invoice.
Incomplete Outcomes: This page allows you to review all Work Orders on which a Schedule Task has been marked as Incomplete, requiring your attention and further action. These Orders will often be unready to Invoice.
Next Visit Notes: This page allows you to see any Tasks on which Next Visit Notes have been added by Service Personnel. These can be reviewed, and additional action can be taken as necessary.
More Options : Quickly head over to the Schedule Dashboard, Calendar (New), Calendar (Classic), Recurring Order Mass Invoice, Recurring Order Mass Pay, all Pending Sales Orders, all Pending Work Orders, Recurring Orders, and Product Setup.