
Kits are great way to group products together to create “packages” that include everything your customer needs at one price.
Kits can be created for any group of products you typically sell together. This might be a big-ticket item like a spa paired with a cover, steps, and the various parts and pieces required to install everything together. You might also create a kit for smaller items like chemicals. Perhaps you want to sell a “Starter Kit” that contains all the chemicals and testing supplies needed for a new pool or spa.
WAIT! Before you can create a Kit, you need to create the individual SKUs. If you have a product that you sell in multiple colors or other options, a SKU must be created for each color/option which can then be added to the Kits for selection.

There are two ways you can build a Kit. You can click one of the types of Kits to skip to that section of this article:
- Static Kits are kits in which the SKUs don’t change. These are kits that contain items with no customization or options such as colors. No matter what, you’re always selling these exact SKUs together.
- Dynamic Kits are kits in which the SKUs may change. These are kits that contain items with customization or options such as colors. These Kits don’t always contain the exact same SKUs because you might have Wood Stove SKU123 or Wood Stove SKU456, depending on which color hardware the Customer wants. These Kits require you to answer questions when adding them to an Order so that LOU can select the correct SKUs to select for the Kit.
IMPORTANT! You can add most SKU Types to a Kit, including Trade SKUs and Service & Labor SKUs. However, adding Special Order Items (SOIs) to a Dynamic Kit will require a two-step process when added to Orders. See Kits vs SOIs for details.
Static Kits You should already be familiar with creating new SKUs. You can see Inventory SKUs for information.
- In Inventory, click

- Select Kit as the SKU Type
- Enter information for the Profile of your Kit SKU

- The Price By field will be defaulted to Total of Items as that is currently the only pricing for Kits LOU supports.

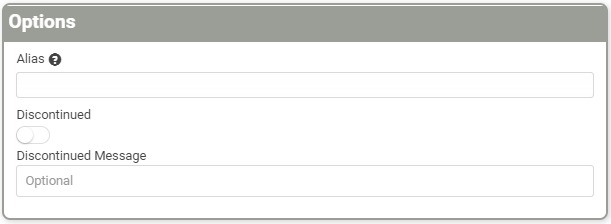
- In Options, you can create an Alias. This is also where you’d come to edit the SKU and mark it as Discontinued if you decide not to offer it anymore.

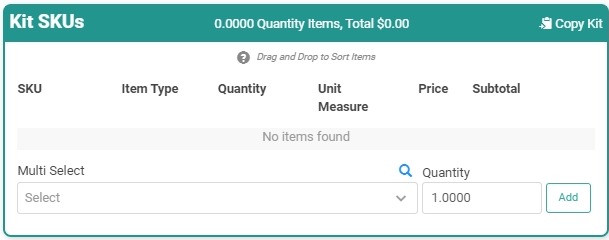
- Now it’s time to add SKUs to the Kit. Type or select the SKUs from the dropdown. Change the quantity if you want to include more than one and click
 .
. 
As you add SKUs, you can adjust the prices of each SKU, including a discount if you want to create an incentive for buying the Kit rather than each individual SKU. On a SKU in your list, click Update to change the quantity, UOM, and Price Options. 
It will always default to the current Retail Price. You can choose to discount the Retail Price by a percentage, choose a new fixed price, or make the item No Charge.
REMEMBER! The changes you make to the price on this pop-up will only impact the price of the SKU in the Kit. The price of the SKU will remain untouched when accessing the SKU individually.
What happens if you do a SKU Mass Update to change the price of a SKU you added to a Kit? If the SKU Price above is set to Retail, the price will update within the Kit. If you have applied a discount or changed the SKU price to a Fixed Price or No Charge, the updated price will not impact the price of the SKU within the Kit. 
The total quantity of items and the total price of the Kit is displayed at the top of the box. This total will update as you adjust the prices on each SKU. Once you’ve added the SKUs and adjusted the prices for your Kit, click  .
. 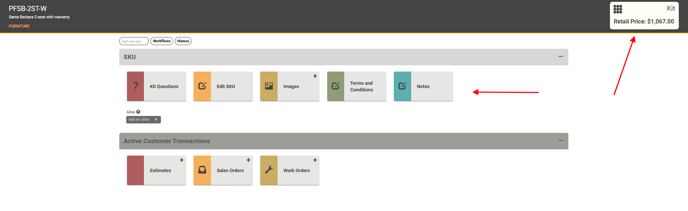
You will be taken to the SKU Profile page. Your Kit is now part of your Inventory.
Unlike individual Inventory SKUs, Kits do not have information on Stock Sites and Quantities in the Inventory Search screen. You do not order Kits through POs, either. Inventory maintenance, such as purchasing and quantity tracking, happens on the individual SKUs which are in the Kit. 
How Kits Appear on Orders
Once you’ve created the Kit SKU, you’re ready to use it on Orders. When you add a Kit to a Sales or Work Order, each individual SKU will automatically list out on the Order underneath the Kit SKU.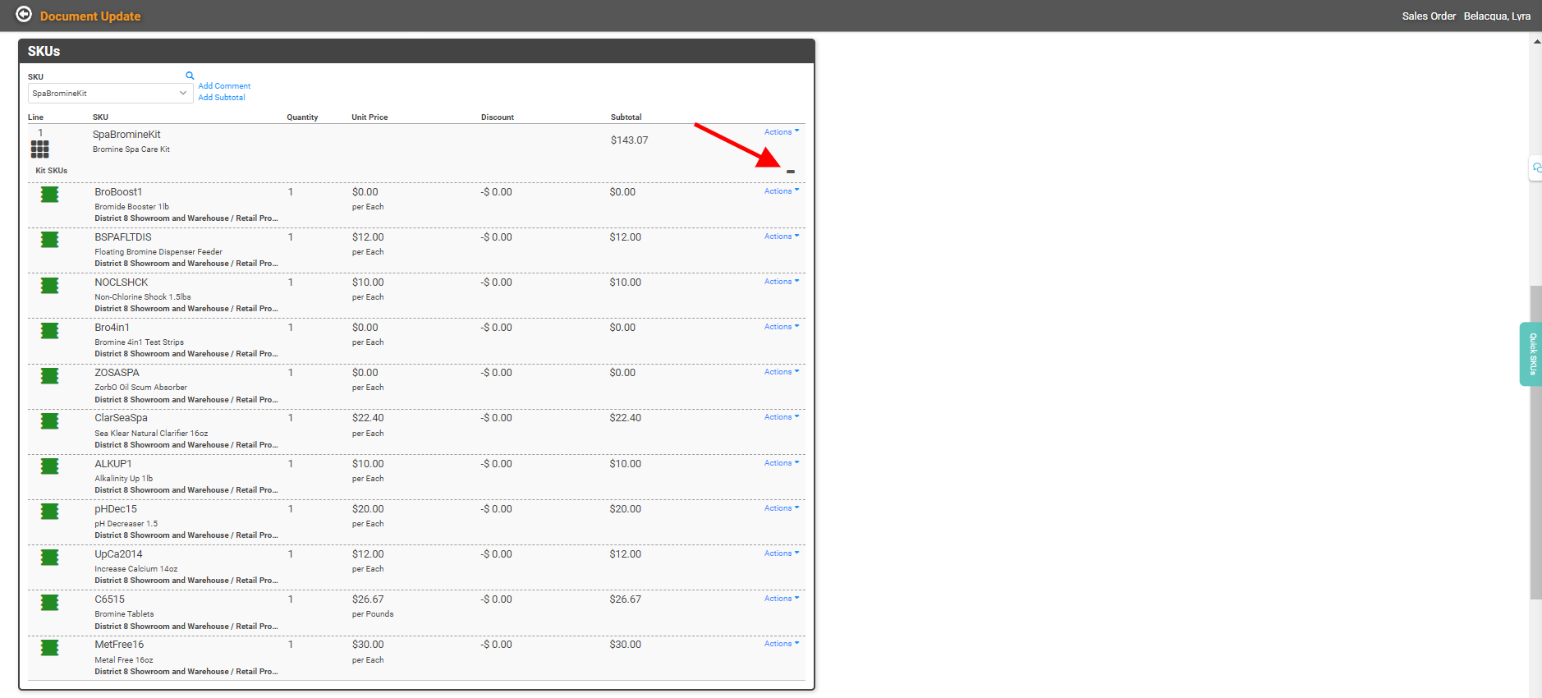
The default view on the Order will be with the Kit expanded to display each SKU. However, you can click the minus (-) symbol below the Actions link on the Kit SKU line item to hide the SKUs to make it easy to navigate the document in LOU. To see each individual SKU again, click the plus (+) sign to expand. 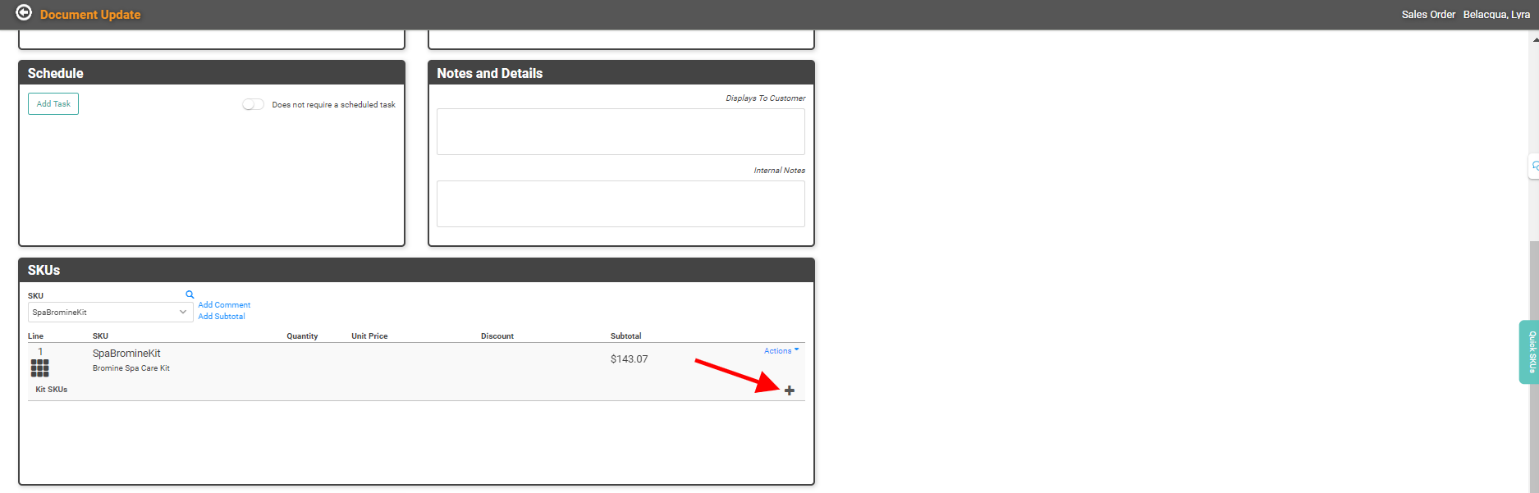
Actions
Click the Actions link on a SKU line item to perform specific actions for the Kit SKU on the Order.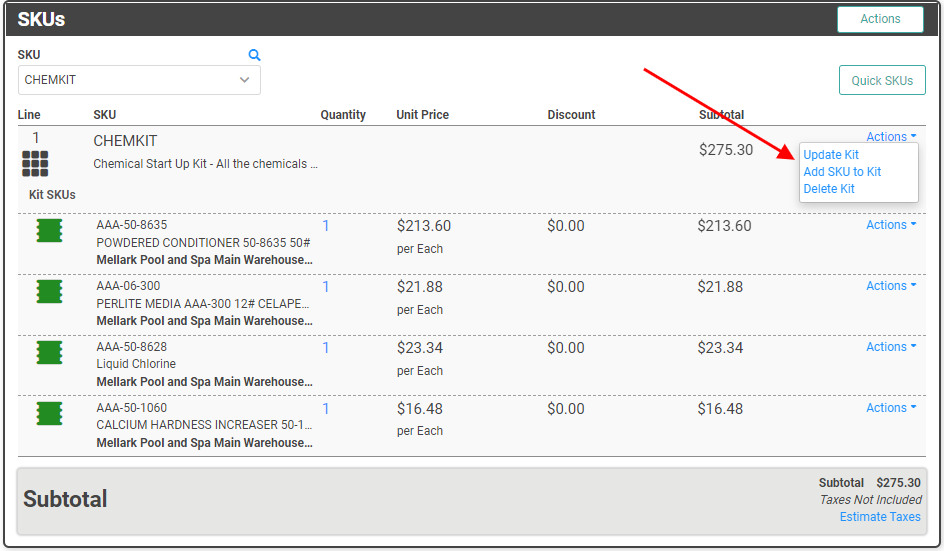
- Update Kit: Click to override the Kit Price for this Order only or to hide SKU line items or SKU line item prices on printed documents and customer-facing document links, including the Customer Portal.
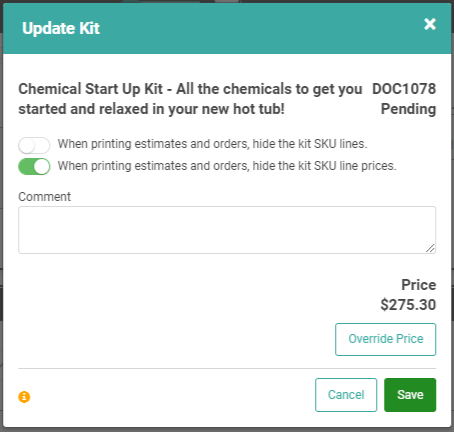
- IMPORTANT! Hiding Kit SKU lines also hides Kit SKU line prices but hiding Kit SKU line prices will not automatically hide the Kit SKU line items.
- Add SKU to Kit: Click to add an additional SKU to this Kit for this Order only. This does not add the SKU to the Kit permanently. This affects the current Order only.
- Delete Kit: Remove the Kit SKU from the Order.
Printed Document View with Hidden Kit SKU Line Items
Printed Document View with Hidden SKU Prices on a Kit
Dynamic Kits
Dynamic Kits are created through the exact same process as Static Kits with the addition of Kit Questions. These Questions guide Personnel to select the correct individual SKU for the Kit. In our example, we have a spa which we sell in 3 color options. Each of those colors represents a unique SKU for the spa. We will add a Kit Question asking what Color. This will select the correct SKU for the option.
REMEMBER! Before you can create a Dynamic Kit, you must create two things:
- SKUs for each of the individual items that can added to the kit.
- Kit Questions to add to the Kit to make it dynamic.
Once you’ve got your SKUs and Questions ready, creating a Dynamic Kit is done exactly the same way we created the Static Kit above with the addition of the Kit Questions.
In Inventory, click New SKU.
- Select Kit as your SKU Type.
- Fill in the information in the Profile. Give your Kit a SKU, Description, UPC if you want, and Category.

- Determine if you’re going to Sell your Kit by the Total cost of the items in the Kit or as a fixed Sell Price. REMEMBER! If you’ve added SKUs to Kit Questions at a discount, or if you will add SKUs to the Kit with a discount on the line item, you probably want to select Total of items here.

- If you want to give the kit an Alias, you can enter it here. If this is an existing kit that you want to discontinue, you can toggle that button on, too.
- If you have SKUs to add to the Kit which are not added by a Kit Question, add them here. Otherwise, you will leave this blank. If you are adding SKUs at this point, you will do so the same way you do in Static Kits above.
- Click
 .
.
After you click Create, you’ll be taken to the SKU Profile. This is where you will start adding your Kit Questions. 
Click the Kit Questions Tile. 
Use the dropdown to select the Question you want to Add and click the Plus Sign. Repeat this to add each Question to the Kit. 
You can reorder Questions as you add them by dragging and dropping them in a new spot. Just grab the textured icon  and drag the question. The order of the Questions here is the order in which they will be “asked” in the Kit on an Order.
  If you need to manage the Questions, you can click Manage Questions to jump over to the Kit Questions Page where you can Update or Add Questions. Use the back arrow to get back to this SKU Kit Questions page on the SKU Profile.
  If you want to copy Questions from another Kit, you can use the Copy Questions button.
  You can test the Kit to see how the Questions will be answered on an Order by clicking the Test Kit button. This will step you through the Kit Questions pop-up just as you would on an Order.
 You can create a Question Workflow to control the Questions based on Answers. This is useful when the answer to one question negates the need to answer another Question. Creating a Workflow allows you to say “If the Answer to Q1 is this, then Skip to Q3”.
IMPORTANT! You can only skip to later Questions. You cannot skip backwards to earlier Questions.
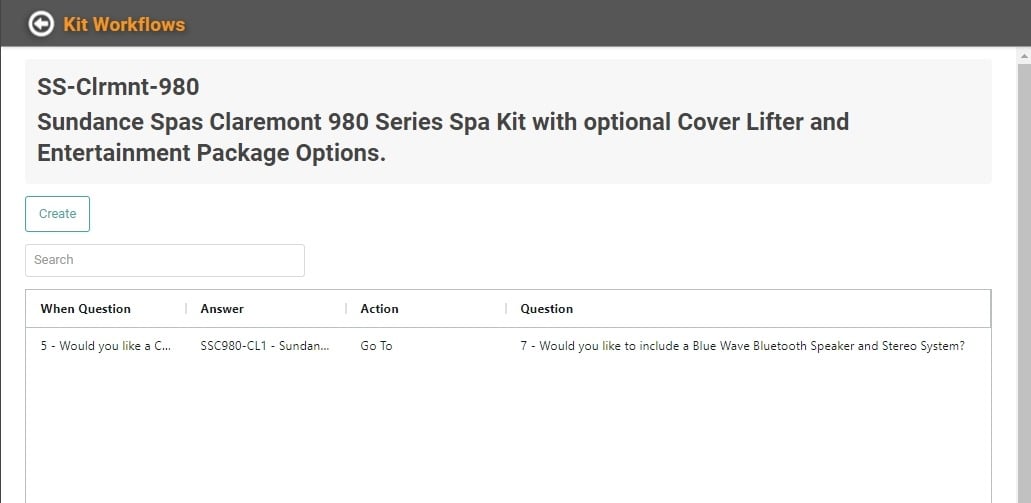
To create a new Workflow for this SKU, click Create. 
You may have Questions that you want to skip depending on previous Answers. That is the purpose of the Workflow. “When Question 3’s Answer is B, Go To Question 6.”
IMPORTANT! You do not need to make a Question optional for it to be skipped through a Workflow. Questions can require Answers and still be skipped in a Workflow when necessary.
Once you’ve added all the Questions in the correct order, and created any necessary Question Workflows, you can use the back arrow next to SKU Kit Questions to return to the SKU Profile page. The Kit Questions are automatically saved to the SKU Profile and will be used when the SKU is added to an Order.
How the Kit Appears on a Schedule
When you add the Kit SKU to an Order, the Kit Questions will immediately pop up and require you to answer.
- As you answer the questions and click Next, you can click the Previous button and go back to the previous Question.
- Each Answer (SKU) will show a link below it indicating the number of that SKU currently on hand. Click the link to open a SKU Quantities pop-up that will break out Stock Site information for that SKU, including whether the quantity is On Hand, Reserved, Available, etc
 .
. - You can click Review at any point to see a Subtotal for the Kit, plus any additional SKUs added to the Order separately, with a Total so far in the upper right corner.
- You can see the Questions and your Answers with Price and Subtotal for each line item. This can help you and your client review totals and options so far, without taking you away from the rest of the Questions in the Kit.

This Review also allows you to Save to the Order if you’re ready to move on or to click Come Back Later to save progress on the Kit Questions in the event you need to go do something else and come back. Come Back Later saves your progress.
When you’re ready to get back to the Kit Questions, you can click the Actions link on the SKU box for the Order and select Kit Builds. The number next to it will reflect the number of pending Kit Builds on the Order.

If you have multiple Kit Builds saved, clicking this link will pull up a list of the Kit Builds from which you can select to continue building the Kit.

Once you select which Kit Build you want to continue building, you will be taken right back to the Review page where you left off. Click one of the Question Numbers to go right back to a Question. You can click a Question you’ve already answered if you need to make changes, or you can click a Question you haven’t answered yet.

You can click the Question Mark to see the full text of the Question.


Once you’ve answered all the Questions and you’re finished building this Kit, click Save To Order.

Everything else will happen exactly as with Static Kits above. Each SKU in the Kit will be listed beneath the Kit SKU with a subtotal of each item. You can click the Minus Sign to collapse the list of SKUs, Add Comments, Update SKU Line Items, etc.

The printed Order will look same as Static Kits as well.
