One of the benefits of cloud-based software like LOU is it can be accessed in whole from anywhere in the world, so long as you have an internet-ready device and an active internet connection (including mobile service).
You can access LOU and perform all the same processes and access all the same features while out in the field as you would in the office.
There are occasions when you’re out in the field and you need to add additional SKUs to an Order. Maybe you needed to use a part that wasn’t originally part of the order, maybe you need to add additional labor. Whatever the need, you can add any SKUs you need to an Order any time before it is invoiced.
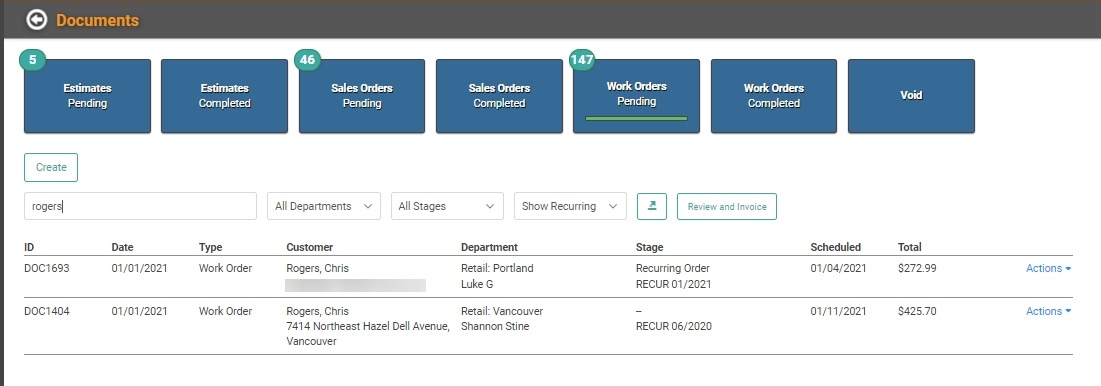
Add SKUs to an Existing Sales Order or Work Order in the Field
IMPORTANT! Due to specifics of setup in Recurring Orders, please skip down to Recurring Orders for the process there.
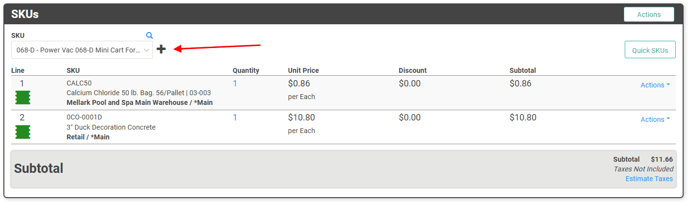
While an Order is open and has not been invoiced, you can add SKUs to the Order. Open the Order and scroll down to the SKUs box. 
Using the SKU Select dropdown to locate your SKU and click the Plus symbol.
After you add the SKU, you can also add a Comment to the SKU by clicking on Actions and choosing Add Comment 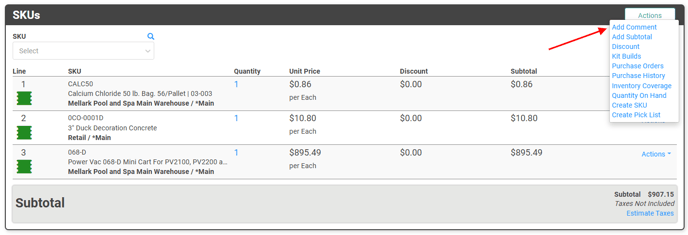
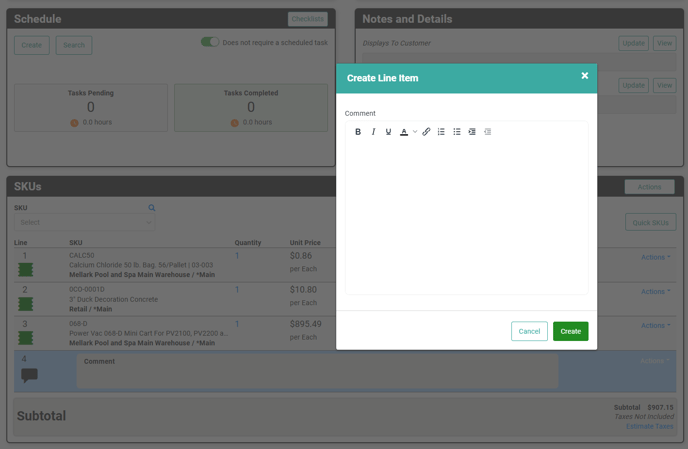
To add text to the Comment, click the Actions link and select Update. A window will pop up and allow you to write your note. TIP! Notes should be brief. Longer notes can be made in the Order’s Notes field. 
Once you click Create, your note will appear on the SKU box below the SKU. 
Work Order Outcomes
In addition to accessing the Order and adding the SKU through the SKU box, you can also add SKUs through the Work Order Outcomes box. IMPORTANT! The SKU box above is where you can add additional Inventory and Labor SKUs. The Work Order Outcomes Box allows you to add additional Labor only. If you need to add Labor SKUs, but don’t need to add Inventory, you can use this method.  In the Work Order Outcomes box, click
 ![]() to create a new Work Order Outcome. This is where you create a Digital Door Hanger.
to create a new Work Order Outcome. This is where you create a Digital Door Hanger.
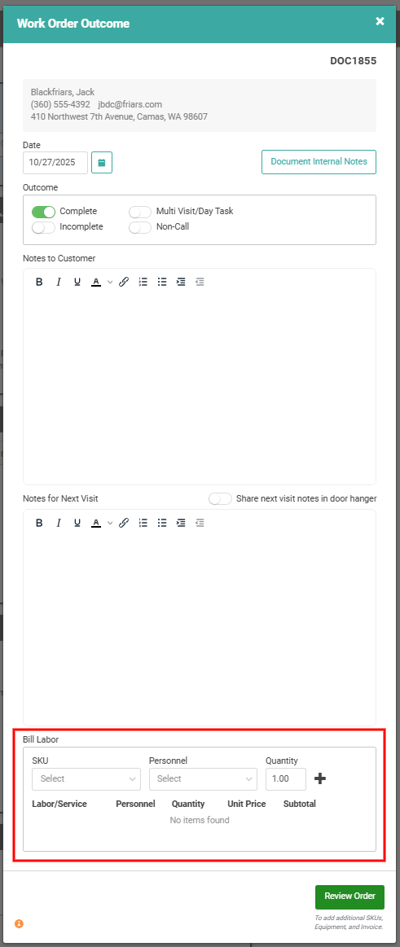
In the Bill Labor section of the pop-up, you can select the appropriate Labor SKU and the Personnel responsible, as well as adjust the quantity. This can be useful when you arrive on a job and it takes longer than originally scheduled or you need help from a coworker who wasn’t originally scheduled for the task.
Once you select the SKU and Personnel from their dropdowns, click the Plus Sign to add to the Outcome. Once you’ve completed the Outcome box, click Review Order to Save and return to the Order.

Add SKUs to Recurring Orders in the Field Recurring Orders have additional setup features and function that make them a little more complicated than one-time Work Orders, so let’s step through how to add SKUs in the field on Recurring Orders correctly.
You can use both options described above, on stand-alone Orders, for Recurring Orders. However, there is an additional set of options for SKUs added to REOs which you may need to configure when adding additional SKUs.
To update or review the configuration of an REO, go to Recurring Orders on the main dashboard.
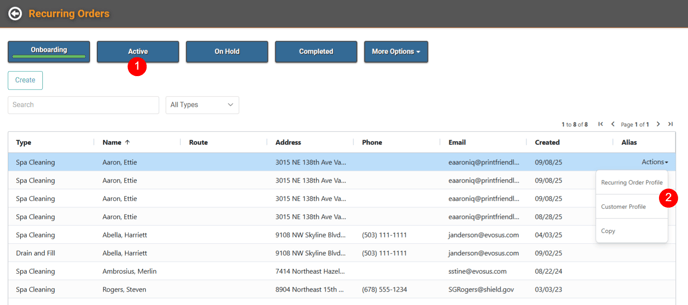
Select the Active Search Filter and go to the correct REO and click the Actions link and select Recurring Order Profile. 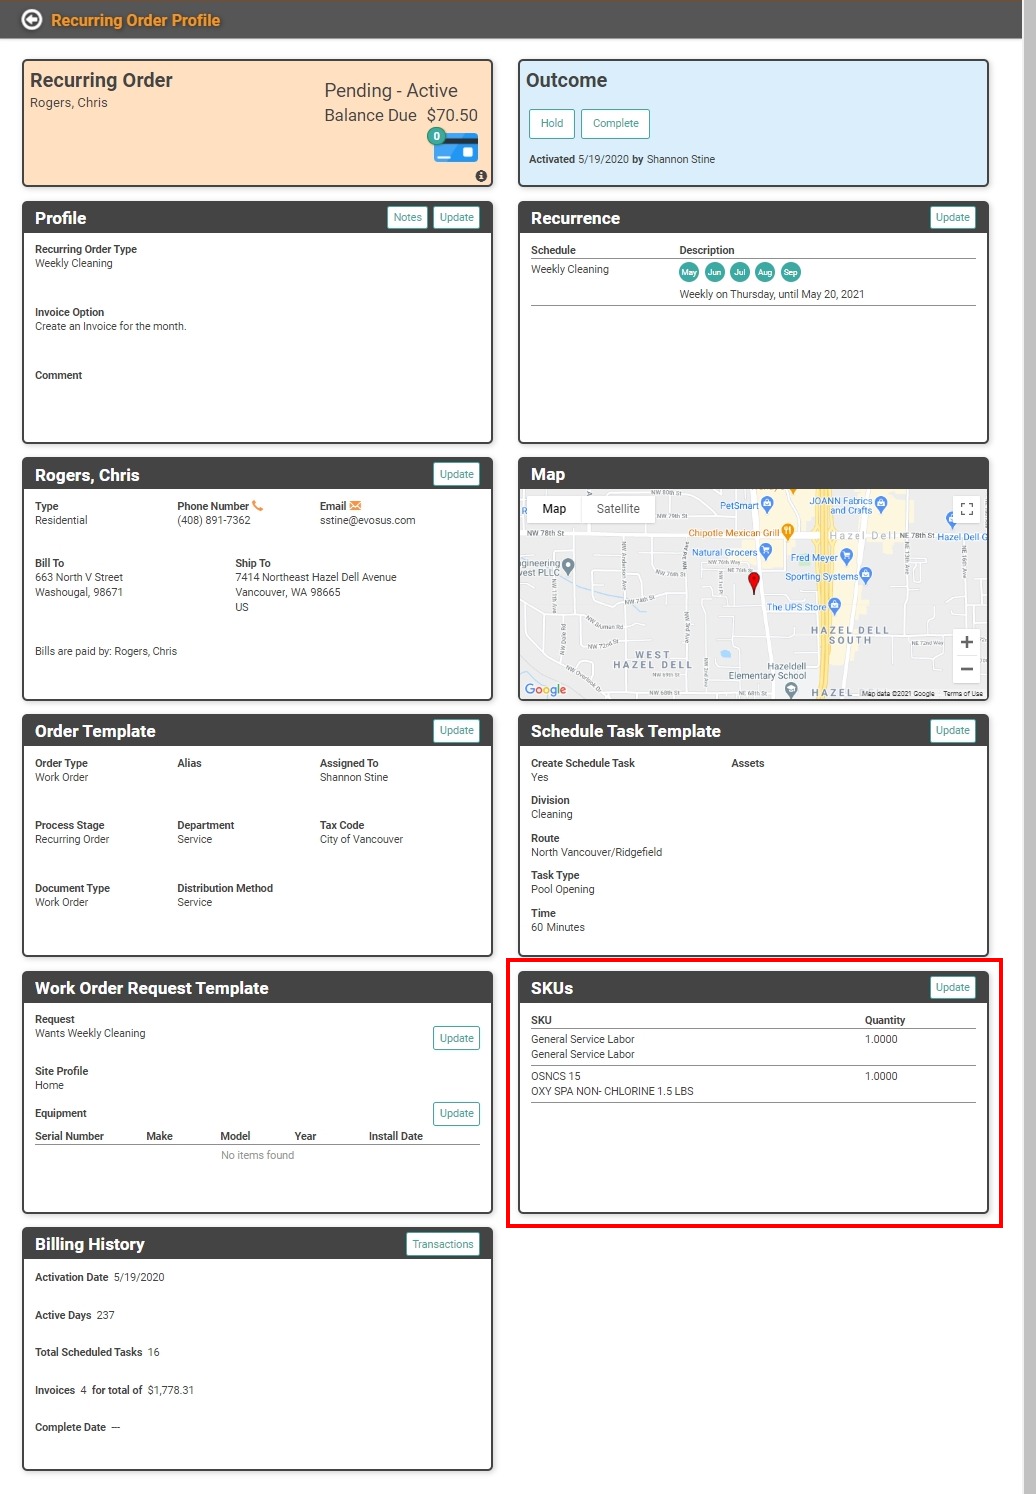
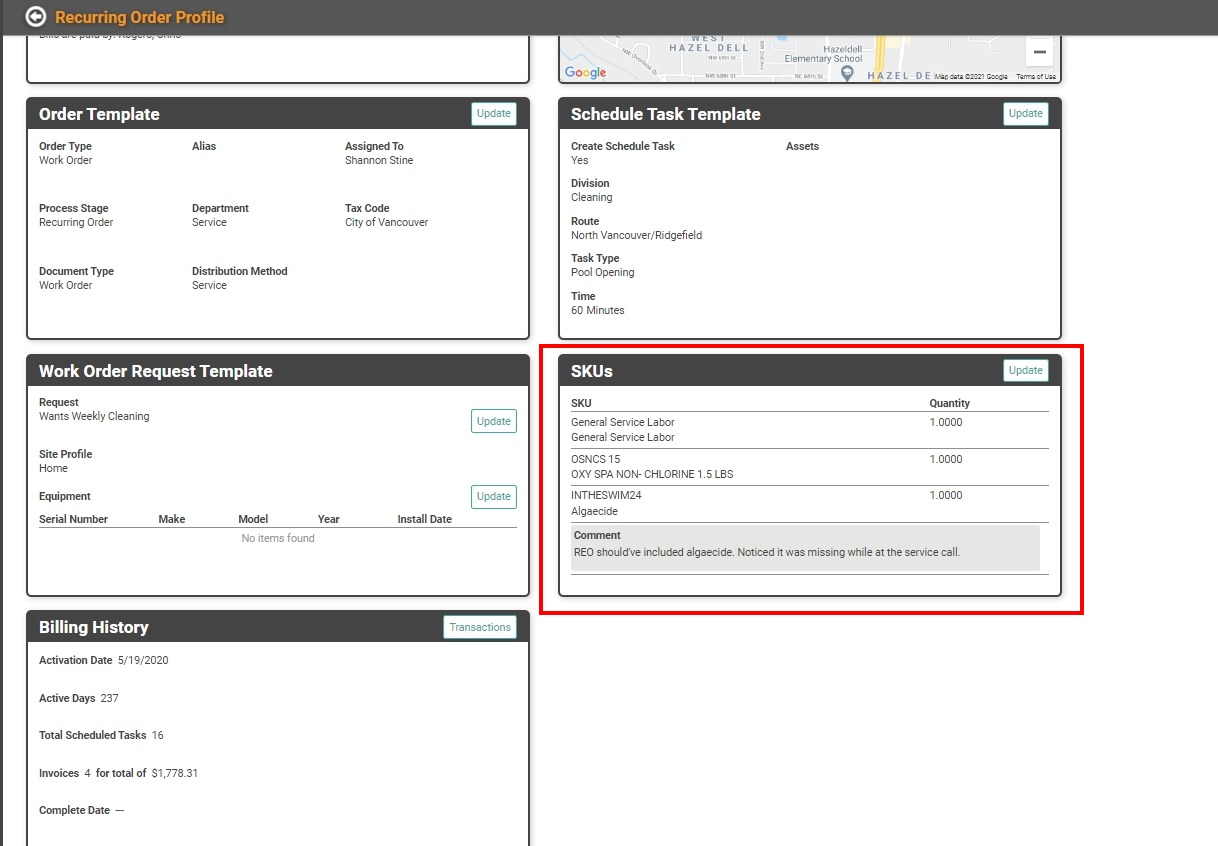
On the REO Profile page, scroll to the SKUs box. Click Update. 
To add an additional SKU, click Create. 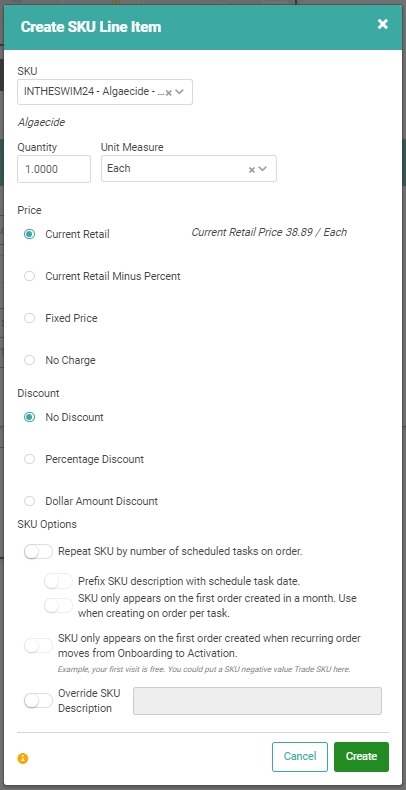
- SKU: Use the dropdown to select the SKU
- Quantity: How many of that SKU do you need?
- Unit Measure: Do you want to change the UOM for this SKU on this Order?
- Price: Once you select the SKU from the dropdown, you need to determine if this SKU should be priced at the Current Retail price or if you want to change the price.
- Discount: Next, determine if there is a Discount to apply to this SKU when it’s added to an REO.
- Repeat SKU by number of scheduled tasks on order: After that, determine if the SKU should be repeated for every Task.
-
- Example: You are adding a quantity 3 of SKU ABC to the REO, but for each Tasks on the Order you will need that quantity 3. There are four tasks on the REO, so you need a total of 12 SKUs. At the top of the Create SKU box, you will change the Quantity to 3, then down at the SKU Options section, you will toggle the “Repeat SKU by number of scheduled tasks on order” button on. That will allow for a quantity of 3 to be included per scheduled task.
- SKU only appears on the first order…: If you don’t want the SKU repeated for every task, and it only needs to be charged once per full REO cycle, you can toggle the “SKU only appears on the first order created when recurring order moves from Onboarding to Activation” button on. This will add the SKU to the first Order created for the REO, but not for the additional Orders.
- Override SKU Description: Finally, you can override the SKU Description to create a description unique to the REO.
Once you’ve configured the SKU, click Create. You can add a Comment below the SKUs you add. This is especially useful if you’re adding SKUs in the field because it can clearly identify the SKUs were added after creation and why.
Click Add Comment and a comment box pops up.

Write your brief comment and click Create.

The comment now appears below the SKU you added to the REO. When you click the X to exit this pop-up, you can see the SKUs and Comments you added in the SKUs box.
If you want to add the SKUs on a specific Order only, and not the entire REO, you can do so by accessing the Order through Work Orders on the Main Dashboard. Following the instructions at the beginning of this document, you can search for and open the current, active Recurring Work Order and update the SKUs through the SKU box or through Work Order Outcomes just as with the stand-alone Orders. Doing this will ONLY impact your current Order, which includes all tasks for the current month, and will not impact the remaining months on the Recurring Order Recurrences.