
Recurring Orders (REOs) are a great way to take a lot of the manual work out of creating Orders and Tasks for your recurring, regular maintenance and service customers. With some simple setup, LOU can automatically create Orders and Schedule Tasks monthly!
To understand Recurring Orders and how they work, please check out How to Use Recurring Orders.
REMEMBER! Before you can use this feature, you need to complete the setup for Recurring Order Type, Recurring Order Personnel Assignment, and Recurring Order Settings.
There is a LOT involved in creating and managing Recurring Orders. They are a complex feature. These are the main areas of REOs discussed below:
- Create New REO
- Process Now
- Processed Months
- Process Changes to an REO Profile
- Active Recurring Orders
- Complete Recurring Orders
- Recurring Order Documents
Go to Recurring Orders
Think of this tile as the Recurring Orders Configuration feature. This is where you will configure and define each Customer’s Recurring Order so that LOU can create the Sales or Work Orders for each month of the REO’s recurrence. You are not creating the actual Orders on which work will be recorded and Invoiced. Instead, you’re creating the template that LOU will use to create those Orders. The Orders created will appear in the appropriate (Sales or Work) Orders tile.
REMEMBER! LOU schedules and creates Orders for REOs beginning on the 20th of each month for the following month. LOU will continue to batch process new REOs for the following month between the 20th and last day of the current month. If you create and activate an REO before the 20th of the month, LOU will automatically create the Order(s) and associated Tasks on the 20th for the following month(s). If you create and activate an REO between the 20th and last day of the current month, LOU will automatically create the first Order and associated Tasks during the nightly batch process for the following month.
LOU will continue to create an Order with associated Tasks according to the REO parameters for the next month on the 20th of each month during the recurrence. There is currently no way to create an REO for the current month and no way to add Tasks to the schedule for several months in advance. LOU will automatically create the tasks for each month on 20th of the previous month. For example: REO tasks for June will be scheduled on May 20th. Tasks for July will be scheduled on June 20th, and so on.
.png?width=670&height=311&name=screenshot-lou-accp-evosus-com-2026-04-29-09-49-28%20(1).png)
When you go into Recurring Orders, you land on the Onboarding page first. This is where you will create, or Onboard, your new Recurring Orders (REOs).
Create New REO
We’re going to create an REO that is straightforward for documentation purposes. However, this feature is capable of very complex Recurring Orders. If you have a complex service contract, LOU can do a lot of the heavy lifting!
IMPORTANT! This is a complex feature with a lot of moving parts. If you’re unsure how to get started, reach out to Evosus Support for guidance.
- Click
 .
. - A new window will pop up, asking for the Customer, Recurring Order Type, and any comments you want to leave on the REO. TIP! If you realize the customer has not been created yet, you can use the
 button next to the Customer dropdown to create the Customer right from this screen.
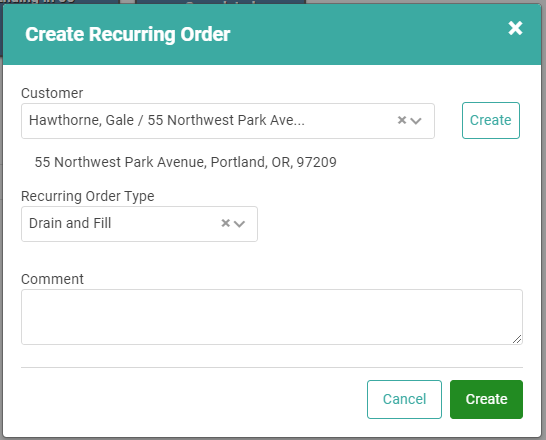
- Once you’ve entered the necessary information, click
 .
.
You are now on the Recurring Order Update page. This page looks like other documents in LOU and should be familiar. If you need to leave this page for any reason, you can do so and the REO will be saved in Recurring Orders under Onboarding. Use the Actions link to select Update and return to this Recurring Order Update page.

REMEMBER! The Balance Due on the top left is the Customer Balance Due, not the Balance Due for the Recurring Order.
We will look at the Outcome box last. Let’s look at every box on the REO.
Copy Recurring Order
You can copy an existing REO Profile to another Customer or the same Customer. This will copy only the information found in the Profile box and the Schedule Task Template box of the REO Profile. 
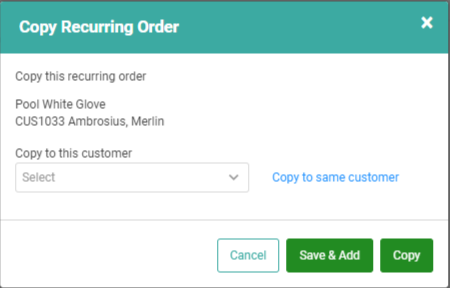
Simply select the Customer or click Copy to the same customer and click Copy. The REO Profile will pop up and allow you to complete setup.
Profile
This box contains the basic information you entered when you created this REO. You can use the Update button to update the information. 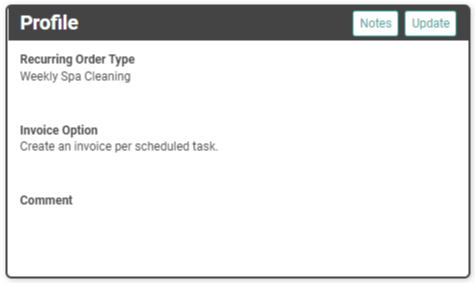
Recurrence
This is where you will create the guidelines for how often this Order should occur.
IMPORTANT! Configuring this box is required for REO Activation.
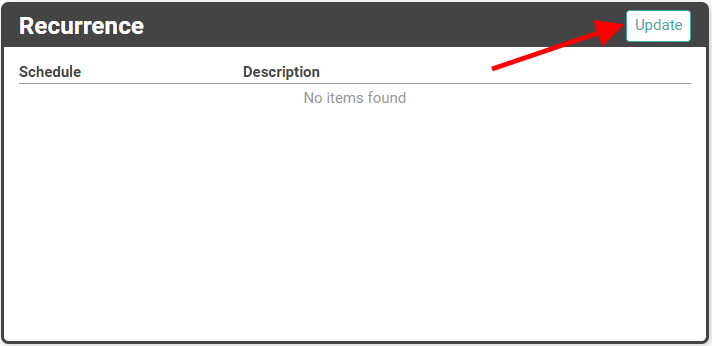
- To create a recurrence, click Update.
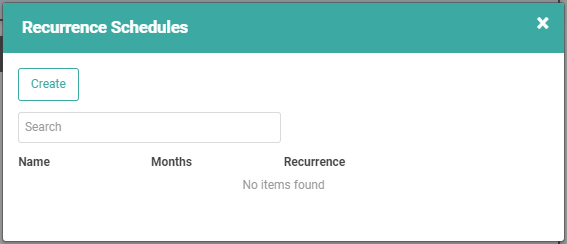
- Click
 .
. 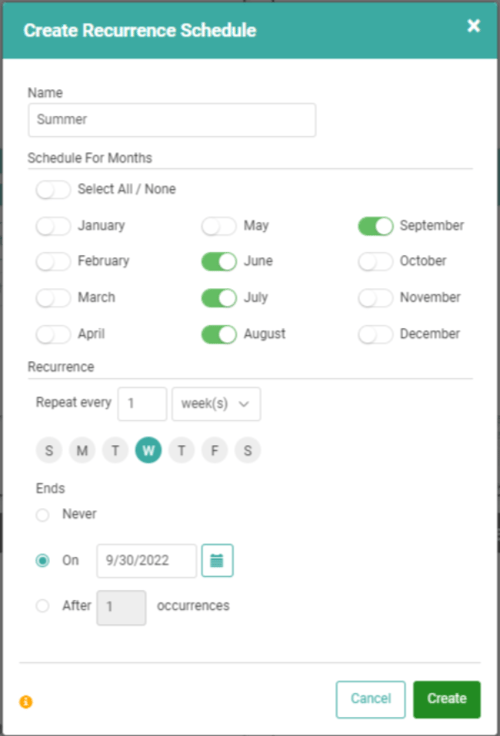
- Name your recurrence. This is important because you can have multiple recurrences attached to one REO.
- Select the Months during which you want the REO to occur. Is this something you will do every month of the year or only a few months?
- Determine how often this will recur during the selected months. Choose Days, Weeks, Months, or Years.
- Depending on the frequency you choose, you will select the day of the month, the day of the week, etc. to define the recurrence.
- In our example, we chose 1x week, so we have selected the day of the week.
- Determine when this recurrence will end. REMEMBER! Once the recurrence has ended, the REO will be considered complete. You can reactivate the REO and update or create a new recurrence.
- Once you’ve configured everything, click
 .
.

The created recurrence will appear on the Recurrence Schedules box. If you need to add an additional recurrence, repeat the steps above. To return to the REO Update Page, click the X in the upper right corner. You can use the Actions link next to the Recurrence to Update, Delete, or view a Schedule Projection. 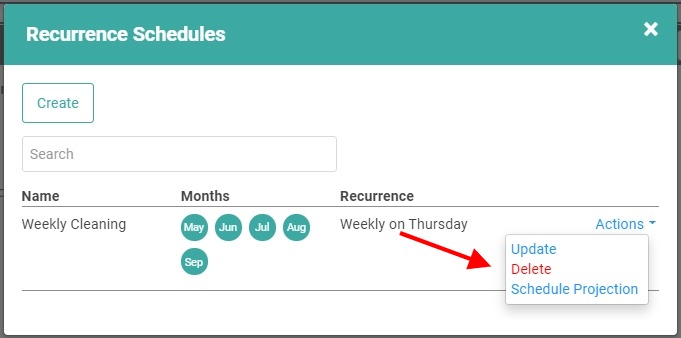
A Schedule Projection will allow you to see what dates the Tasks will be assigned based on your Recurrence settings and Start Date. This projection will show you every Task Date for the entire Recurrence (limited to 2 years if the recurrence is set to Never End). When you select Schedule Projection, you can select the Schedule (if there are multiples on this REO) and then click the  to see the projected Task Dates.
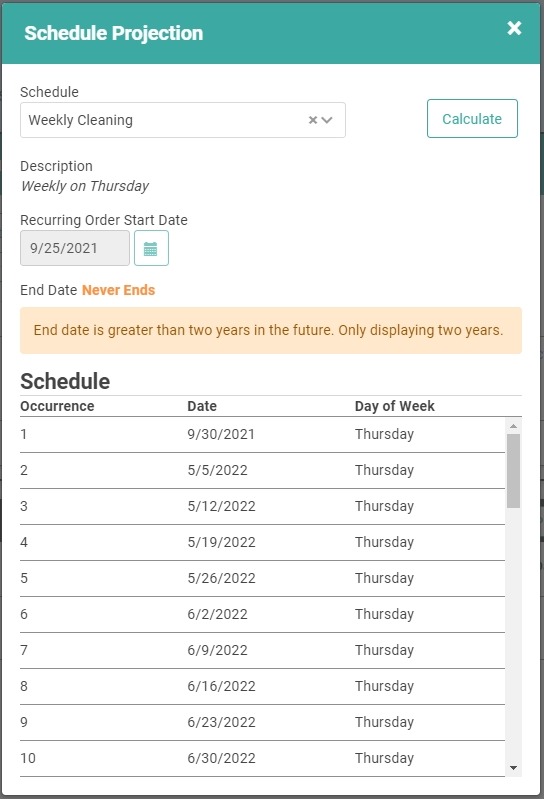
You can click the X to close the windows once you’re satisfied with the review and Recurrence. The recurrence appears in the Recurrence box on the main Recurring Order Update page. 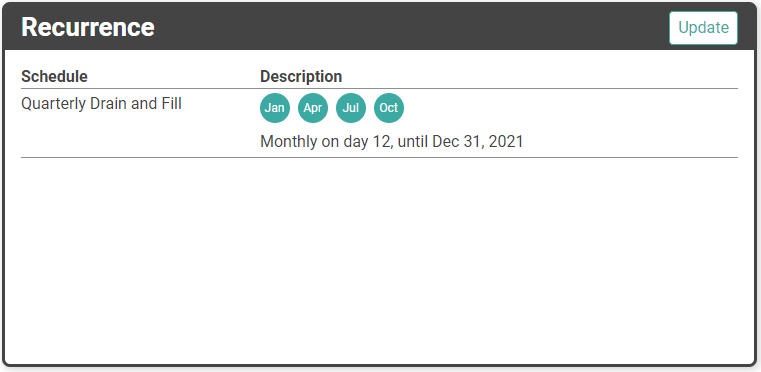
Recurrence End Date and Recurring Order Settings
In the Recurring Orders Settings, you determined how many months for which LOU would create Orders when batching on the 20th of the month OR when using the Process Now feature. When you configure a Recurrence to have an End Date within the number of months you configured, an Order will be created for the correct number of months and any Orders outside the Recurrence End Date will not have Tasks on them.
For example, the Recurring Order Settings are configured to 4 months. The Recurrence on the REO is scheduled for 3 months. When LOU processes the REO, it will create 4 Orders. Three months will contain the Tasks according to your Recurrence settings. The 4th Order will contain all the REO information except the Schedule Tasks.
So what do you do? Well, there are a couple things you can do. First, you can use the Processed Months feature to rollback the empty Order. That will completely delete the Order and there’s nothing additional you need to do.
The second thing is you can use the Order in the event you need to extend the Recurrence. You can roll back the empty Order, update the Recurrence in the REO, and then use Process Now to process the Order(s) according to the new Recurrence settings. This step will not impact any Orders which are already processed. This will only impact the rolled back Order(s) and future Orders if they apply.
Customer
This box contains the Customer information and demographics. You can Update the information if necessary. 
Map
This is self-explanatory. It’s a map of the destination with a pin on the address. 
Schedule Task
This is where you will configure the specific Scheduled Task for the REO.
IMPORTANT! Configuring this box is required for REO Activation.

- To get the Scheduled Task configured click Update. This will allow you to create a Task just like you would on a regular one-time Order.

- Select the Task Type from the dropdown.
- Estimated Time Needed will be prepopulated by Task Type selection, but you can adjust that.
- Add any relevant comments for the Task.
- Select the Color.
- Select any Assets
- Determine Personnel Assignment
- Automatically assign personnel and vehicles to all tasks created from this recurring order: First you must determine whether to assign Personnel and Vehicles at the time of Order creation for this Recurring Order. If you do not toggle this on, Tasks will be created without Techs or Vehicles and go to Unassigned.
- Round Robin will use the Recurring Order Personnel Assignment to assign a tech by round robin.
- Personnel Assignment will allow you to force assign the same tech, helper, and/or vehicle to every Order created for this REO.
- IMPORTANT! If you force assign Personnel here, LOU will not use the Recurring Order Personnel Assignment round robin.
- Force Assign Vehicle
- As with Personnel, you will need to update this on the REO and every currently scheduled task when a change is required.
- Once you’ve configured the Task click Save.
Update Personnel Assignment
You can change Step 7 above for currently processed Orders (except for Tasks scheduled Today) as well as Orders processed for this REO going forward.
IMPORTANT! To change Tasks scheduled for Today, you must go to the Order or Schedule Dashboard to change that specific Task. Updating the Schedule Task Template will only affect Tasks on future Orders, both processed and processed in the future.
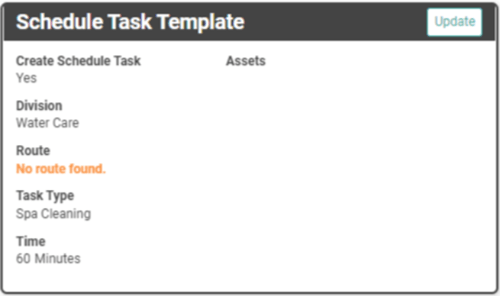
A summary of Task info will appear in the box.
IMPORTANT! You cannot override Routes. LOU automatically routes the task based on the Division, Routes, and your Customer’s Ship To (service destination) Address. If no route is found, double check the Customer’s Address is verified and falls within one of your service areas.
Work Order Request Template
This box allows you to create the Work Order Request.

- To add Request information click Update next to Request.

- If you use Site Profiles, you can select the Site Profile for the Customer in the dropdown.
- You can enter notes on the Request in the Request field.
- Once you’ve entered the information click Save.
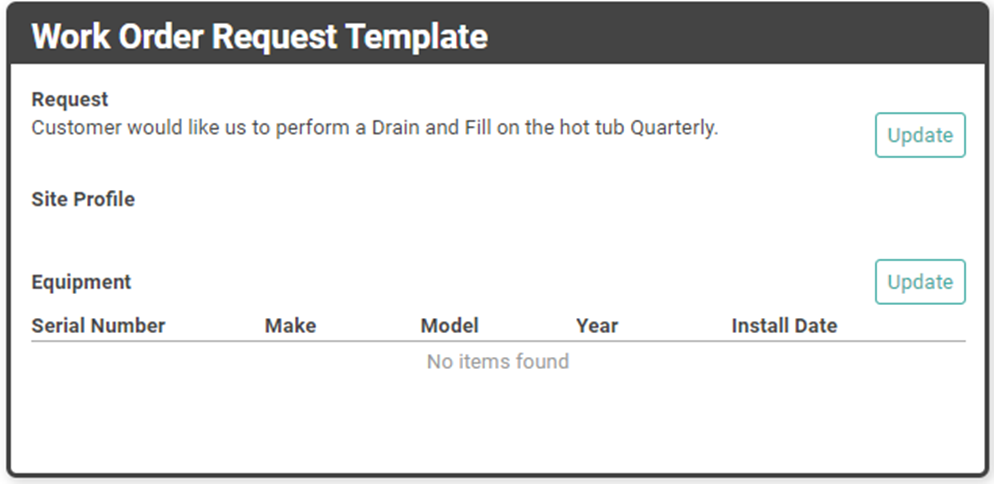
The information will appear in the Request and Site Profile fields. If you have Equipment on file for the Customer which would be affected by the REO you can click Update next to Equipment.
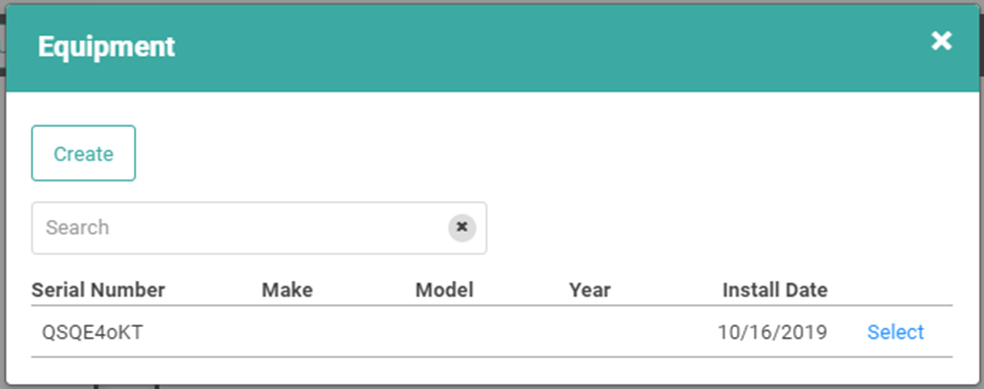
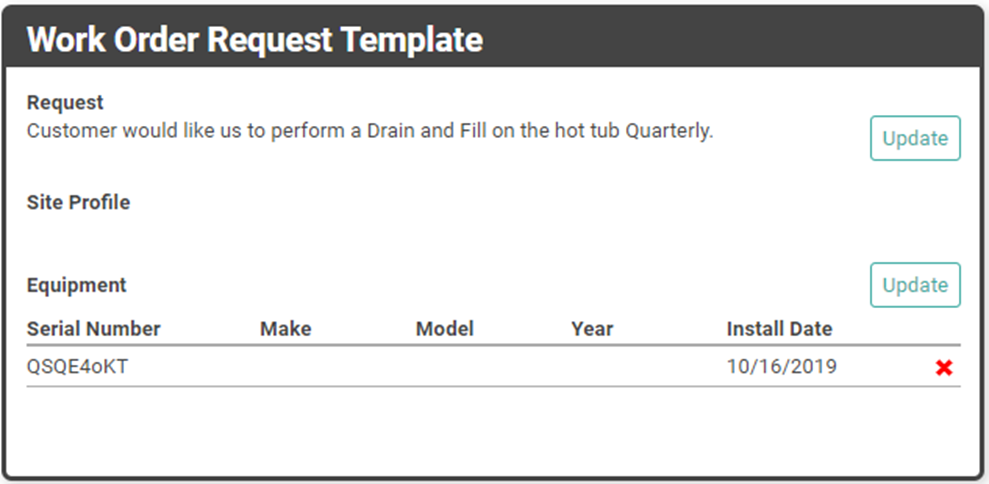
From here, you can Create new Equipment for the Customer or select existing Equipment for the Customer. Once you click the Select link, the Equipment will appear under Equipment on the REO.
SKUs
This is where you will attach the SKUs that will be included in the Orders for the REO. Labor, parts, chemicals, etc. should be included here. You can add all SKU Types to an REO except for Kit SKUs and Special Order Item SKUs.
IMPORTANT! Configuring this box is required for REO Activation.
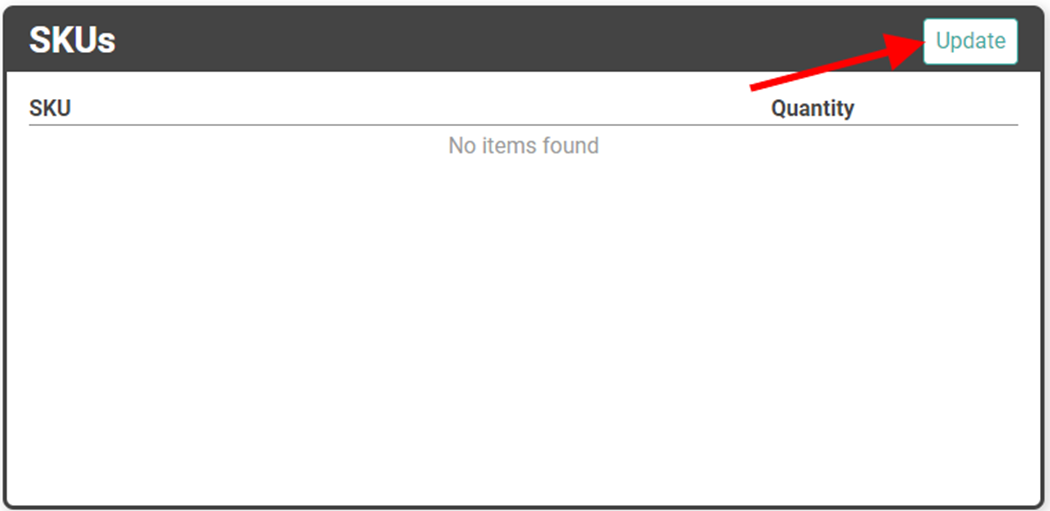
- To begin adding SKUs, click Update.
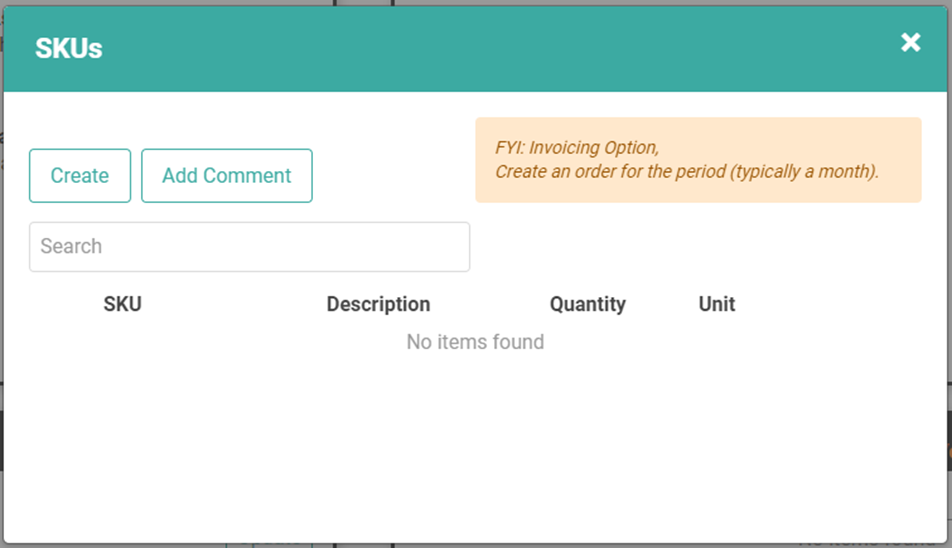
- Click Create to add a new SKU.
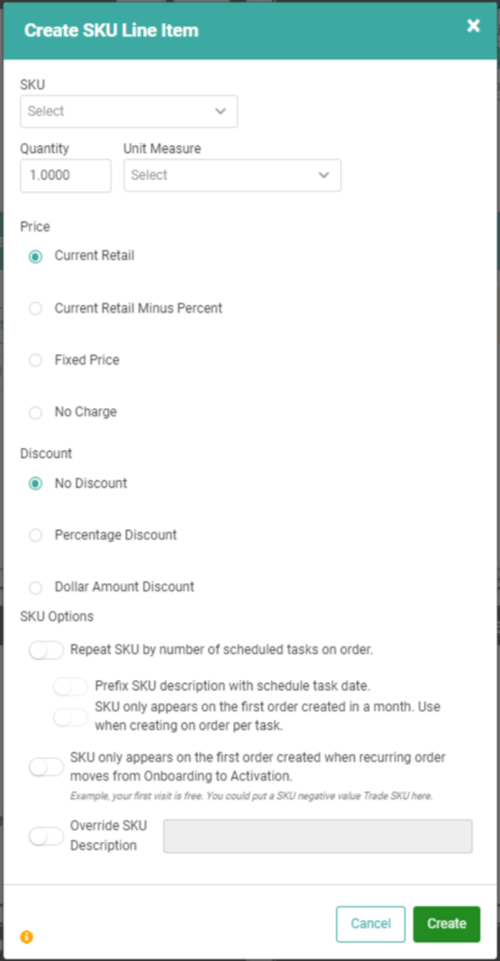
- Select your SKU from the dropdown.
- Determine the Quantity and UOM for the SKU.
- Determine the price. If you want to adjust the price, the options are the same as SKUs in a Kit.
- Determine if you want to provide an additional Discount on the SKU.
- SKU Options allow you to determine how the SKU appears on the Orders.
- Repeat SKU by number of scheduled tasks on the order: If this SKU should be sold/included for each Schedule Task on the Order, toggle this one. If there are 4 Schedule Tasks on the Order, the SKU will be added with a quantity of 4.
- Prefix SKU description with schedule task date: This will add the schedule task date to the beginning of the SKU description on the Order so that you can easily determine that SKU was intended for that specific task.
- SKU only appears on the first order created in a month. Use when creating an order per task: If you only want to charge the SKU once per month, but you’re creating a separate Order for each task, you should toggle this on. The SKU will appear on the first Order of the month, but not the remaining Orders, ensuring the Customer is only charged once for the SKU.
- SKU only appears on the first order created when the recurring order moves from Onboarding to Activation: This should be toggled on when the SKU is only charged once for the entire life of this REO. Example: Trade SKU making first order free or Trade SKU for a one-time Activation Fee.
- You can Override the SKU Description if you want to give a description more specific to the Order.
- Once you’ve configured everything for this SKU click Save.
Repeat these steps for every SKU you need on the Order.
Outcome
Once you’ve added SKUs and configured everything correctly for your Order, you can use the Outcome box to Activate the REO. If you need to void it for any reason, you can Void it as well.

Once the REO is active, it will move to the Active page on Recurring Orders.
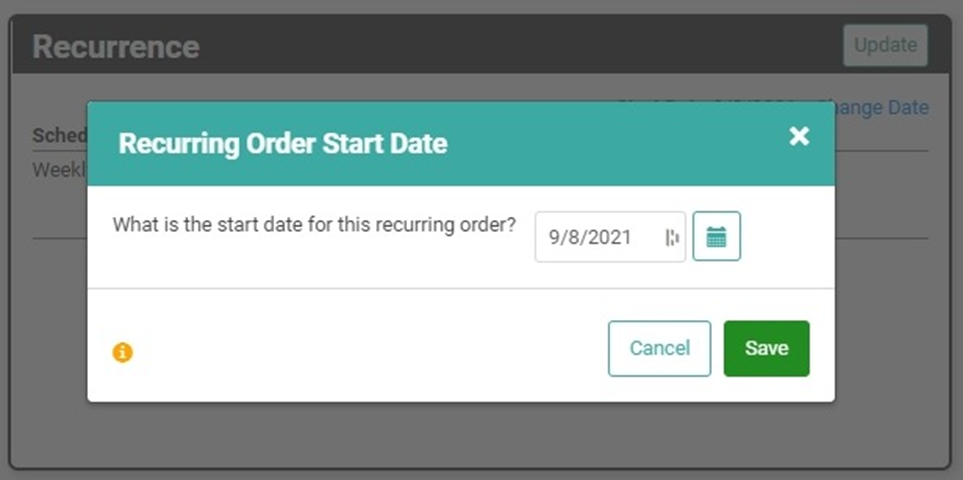
When you click Activate, you will get an Activation Confirmation allowing you to change the Start Date.
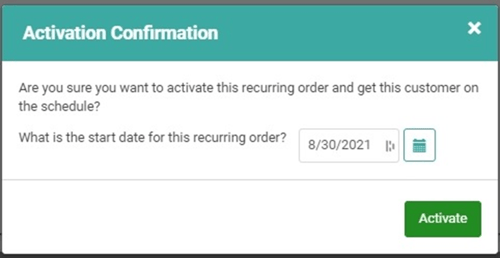
The Start Date defaults to Today but can be updated to any future date.
REMEMBER! Start Date has no bearing on the batch processing. Changing the Start Date will not cause the REO to batch faster.
LOU defaults to scheduling an REO’s Tasks on the first day of the recurrence closest to the 1st of the month. For example, if the first of the month falls on a Wednesday and the recurrence is set up for Thursdays, the first Task of the month will be Thursday the 2nd.
Let’s say you have a new REO Customer with service set to begin next month, but they will be on vacation for the first two weeks of that month and prefer for you to start when they get back. You can change the Start Date to the 15th of the next month. When LOU processes Active REOs on the 20th of the current month, instead of scheduling the first Task nearest the 1st of the month, it will schedule the first Task nearest the 15th of the month.
Using our example above, if the recurrence is set up for Thursdays and the 15th is a Friday, the first Task of the month would be created for the 21st, which would be the first Thursday after the 15th. For every additional month in the recurrence, LOU will automatically create the first Task nearest the 1st of the month.
The Start Date only impacts the first month the REO is active.
IMPORTANT! The Start Date for any REOs in Pending – Active or Pending – Hold can be updated if the REOs have not been processed (batched).
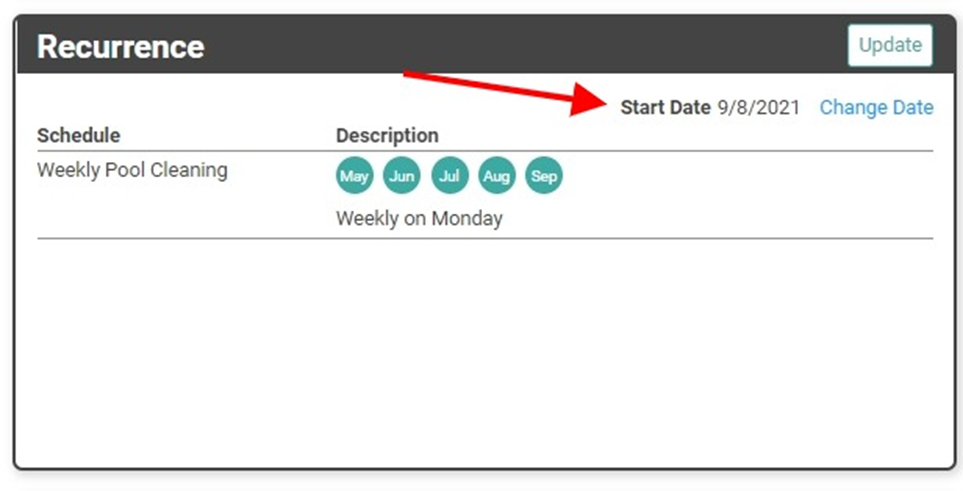
Once you Activate the REO, the Start Date will appear on the Recurrence Box with a button to Change Date.
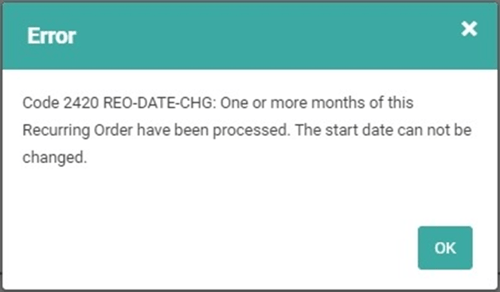
If you attempt to change the Start Date on an Active REO that has already been processed, you will receive an error message letting you know the Start Date cannot be changed.
Process Now
REOs default to processing via a batch process that runs on the 20th of the month and every day through the end of the month. This batch process creates the Orders for the following month. In situations where you want the Recurring Order you’ve activated to process immediately, instead of waiting for the 20th of the month, you can use the Process Now button. This will create an Order for the remainder of the current month as well as full Orders for the future month(s). You will receive a message letting you know what is about to happen.
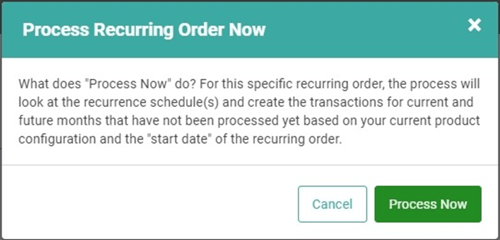
If you want to move forward click Process Now . Once it has completed, a message will let you know it’s finished!
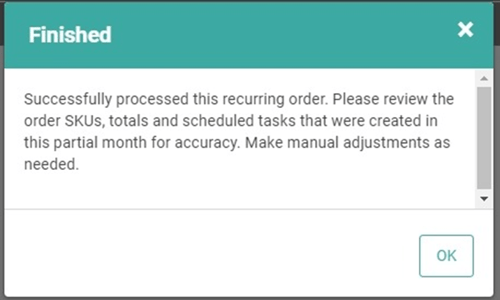
To review the Orders, head to Work Orders or Sales Orders (depending on your REO configuration) to view the newly created Orders. If you need to change or update information, you will have to do so manually on the Order for the current month.
Processed Months
You can quickly view the processed months of an REO by clicking Processed Months. This will show you a list of all the months LOU has processed for this REO. From here, you can view Transactions for that Month and roll back the Month if you realize you need to make a change.
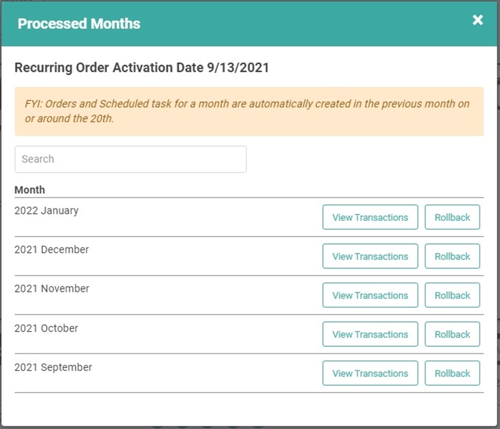
View Transactions takes you to the Transactions page for this Recurring Order.

When you arrive, you will default to the Invoices page. You can also view the Order for this month and the Schedule. You can use the Back Arrow to return to the Recurring Order Update Page. To return to Processed Months, click the button again.
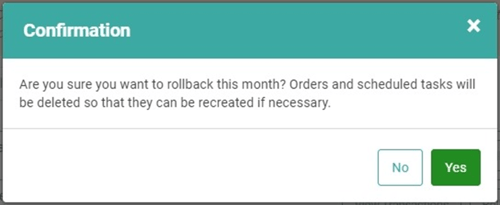
Rolling back a month will delete the Order and all associated Tasks. You will have to use the Process Now button to process the REO and recreate the Order and associated Tasks.
IMPORTANT! You cannot roll back the current, active month. The Rollback feature is intended for making changes or corrections to future months that have been processed. LOU will give you an error message if you attempt to roll back the current active month.
Process Changes to the REO Profile
When you make changes to the REO profile they will apply to any unprocessed future months. Changes will not apply to Orders already created for processed months. This includes any future months processed due to REO Settings which allow multiple months to be processed at a time.
When you change the Recurrence to add or remove months that fall prior to any processed months, you must roll back the processed months and use the Process Now feature to affect the changes to the Recurrence schedule.
Example:
- The Recurrence is set to exclude October, November, and December.
- LOU is set to process two months at a time.
- January and February were processed by LOU on September 20th because those are the next two months in the Recurrence.
- The Recurrence is updated in the beginning of October to include November and December.
- On October 20th LOU processed REOs and saw that REO Settings are set to process 2 months at a time and January and February are already processed for this REO. LOU does not create Orders for November and December.
- Roll back January and February.
- Confirm Recurrence now includes November and December and no additional changes need to be made.
- Use Process Now to process the REOs.
- LOU will see the Recurrence includes November and December and the settings process 2 months at a time. LOU will create the Orders for November and December.
Active Recurring Orders
Your Active Recurring Orders are accessible via the same Recurring Orders Tile and selecting the Active button. Recurring Orders remain in Onboarding until you click the Activate Button on the Recurring Order when you are finished Onboarding/Creating it. Recurring Orders in Onboarding Status will not move to Active on their own.
PRODUCT SETUP MODE (PRE-GO-LIVE) Be aware that REOs created while in Product Setup Mode will not batch until after go-live. Once you go live, the standard rules apply. If you go live prior to the 20th of the month, your Active REOs will batch on the 20th. If you go live after the 20th, REOs will batch during the first nightly process that you are live. Example: You go live on the 22nd, REOs will batch during the nightly process and you will see the Orders for the following month available the next day.
If you don’t want to wait for the monthly batch process to run, you can go into each REO and use the Process Now feature to immediately process the REO. Currently, there is no way to perform this process en masse.
.png?width=670&height=311&name=screenshot-lou-accp-evosus-com-2026-04-29-09-41-59%20(2).png)
The current, active REOs will be listed here. You can see a few key pieces of information, including Activation Date.
Click the Actions link next to an REO to Update or access the Customer Profile.


When you click Update, you are taking straight to that Recurring Order Update page where you originally configured and Activated the REO. From here, you can make any updates to the order you want. In the Outcome box, there is a Hold button and a Complete button.

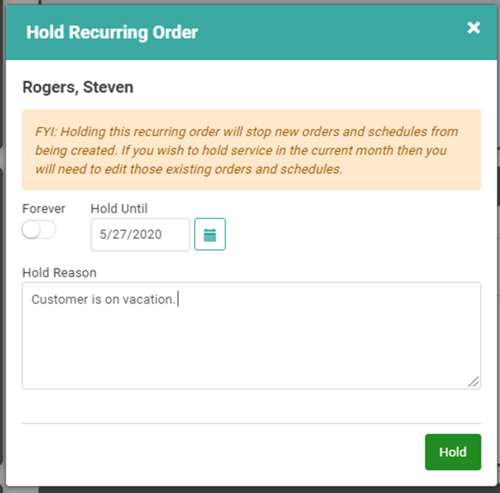
Hold: You can place an REO on Hold. This will prevent LOU from creating the Order or scheduling the Tasks for the following month. It will also move the REO from Active to On Hold.
REMEMBER! Placing the REO on Hold will not affect already processed Orders. It will only prevent future Orders from processing for this REO.

This is useful if you want to pause the REO without Voiding or Completing it. When you click the Hold button, you will get a pop-up allowing you to determine the length of time the REO will be held and to provide a reason.
Once you place the REO on Hold, the Outcome box will update to reflect the new status.
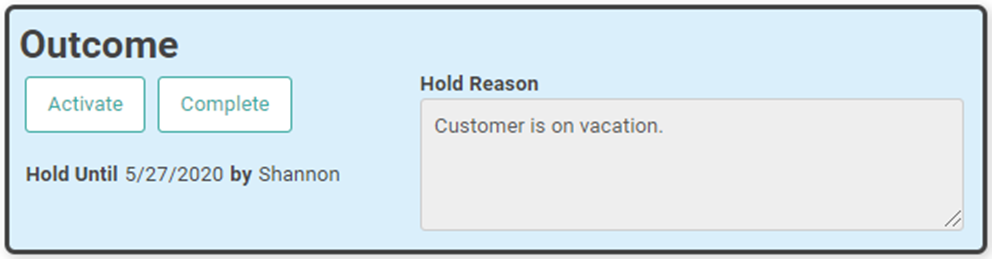
If you enter a date in the Hold Until field, LOU will automatically resume the REO on that date and there’s nothing you need to do. If you want to reactivate the Order, you can do so by clicking Activate.
Complete Recurring Orders
The Complete section is where all your completed REOs are listed. These may be REOs that have been successfully completed or REOs that have been Voided. All the complete REOs can be Updated and reactivated if necessary. If you have an REO that has been completed and some time later, the customer requests the service again, you can go in here and reactivate the REO, saving you time in setting up a brand new one.

Recurring Order Documents
Once LOU has created the Work or Sales Order for the REO, you can see it listed with your Work or Sales Orders.
 The Stage will indicate that it’s a Recurring Order with RECUR and the date. The total amount on the Order will correspond to the cost for the month. You can use the Actions link to perform various actions as with one-time Work or Sales Order.