
Betcha didn’t realize mobile apps are not always for phones or tablets. Well, LOU Retail POS is a mobile app that can be run on either your Point-of-Sale (POS) machine running an Android Operating System or a Windows computer. It requires an active LOU Web Company and Retail bundle to run.
REMEMBER! LOU Retail POS is a separate app from LOU Web, but it is an integral part of the Retail Bundle and included in the bundle price.
WAIT! Make sure you have your TSYS Merchant Account password available. You’ll need this to Set the Terminal Key on the machine.
Devices: This activation process is the same whether you're activating LOU Retail POS for a PAX e-Series e700 or e800, PAX Aries 8, PAX S920, or Windows PC. The only difference is where you download the LOU Retail POS app!
Key Steps:
Use these links to jump straight to the section you need.
- For first time activations, make sure to schedule your appointment with Evosus Financial Services (EFS).
- Activate LOU Retail POS
- Set Terminal Key (Under guidance from EFS. For PAX e-series, S920, and Aries 8)
- Manage Devices
- Manage Users
- Scanner Activation and Configuration
Go to Setup / Configuration / LOU Mobile Apps / POS
LOU Retail POS and LOU Web need to be in contact with each other to ensure data is passed between the POS Stations and LOU Web accurately and efficiently. This requires activating and configuring the LOU Retail POS app on LOU Web in addition to downloading the app on the POS machine.
Activate LOU Retail POS
You’re going to need your computer with LOU Web near your device to complete activation of LOU Retail POS. If you’re activating LOU Retail POS on a Windows machine, you can open LOU Web on a Chrome browser tab and the LOU Retail POS app can sit side-by-side on your screen!
- Download LOU Retail POS (for PAX e-series, go to the PAX Store. For Windows, go the Microsoft App Store.)
- Once the app has downloaded open it and follow the prompts until it asks you to Scan a QR code.
- Move to LOU Web and the steps below.
Since LOU Retail POS is technically a mobile app, it must integrate with LOU Web. A lot of the same technology used to integrate two software applications by different providers is used to make LOU Retail POS and LOU Web communicate with each other.

- To use LOU Retail POS, toggle the inactive button on.
- Confirm you want to activate the integration.
- Activate the first Device by choosing a Primary User, entering a Device Nickname, and selecting the POS Station you want to activate.

- Primary User: You can have as many Users on the device as you’d like. You just need to pick a User to associate with the device during setup. Once set up, you can add additional Users.
- Device Nickname: Don’t make this too generic. Ideally, it should match the POS Station you’ve configured for this device. Make sure it’s easily identifiable from other devices listed here.
- Scan the QR Code with the scanner plugged into your device or enter the activation code on the LOU Retail POS screen.

- Jump to the end for information on setting up and configuring your scanner.
- IMPORTANT! Your device will need to have the LOU Retail POS app installed and you will need to follow through the setup on the app until you get to the prompt instructing you to scan the QR code.
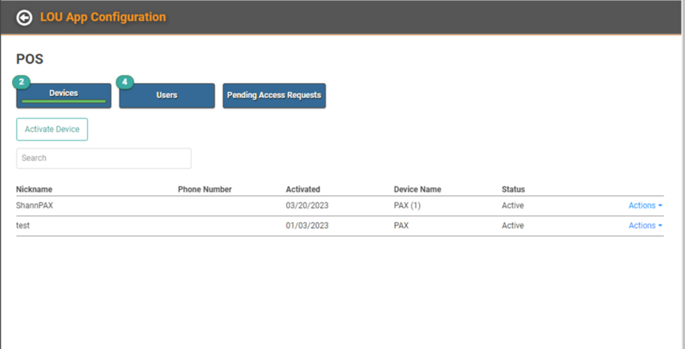
Once you’ve successfully scanned or entered the activation code, you will arrive at the LOU App Configuration page for LOU Retail POS.
On the LOU Retail POS app, you’ll receive a message that says the scan is successful. When you tap OK, you’ll be able to select your User and enter your PIN.
REMEMBER! You will need to use your My LOU App PIN which can be found in LOU Web under My Account. 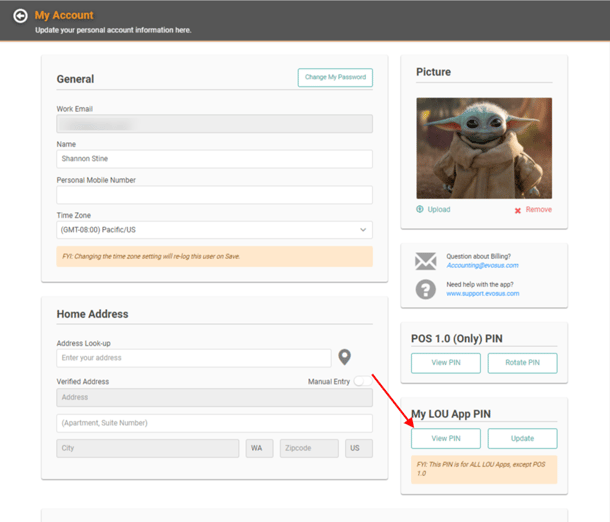
Set Terminal Key (for PAX e-series, S920, and Aries 8)
This will be done with a member of the Evosus Financial Services team. The first time you’re setting up the LOU Retail POS app on a PAX e-series, S920, or Aries 8 machine, you’ll need to take the additional step of setting up your Terminal Key. This configures the Customer-facing credit card screen so you can accept credit card payments.
Setting the Terminal Key is a one-time setup action that helps with communication between TSYS and LOU Retail POS so that future password updates/changes do not negatively impact your POS Station functionality.
IMPORTANT! You will need the password to your TSYS Merchant Account for this step. If you are unsure of your password, or it’s not working, contact Support for assistance.
- Log into LOU Retail POS
- On the main Dashboard, tap the hamburger menu (three horizontal lines) in the upper left corner.
- Select Settings from the menu.
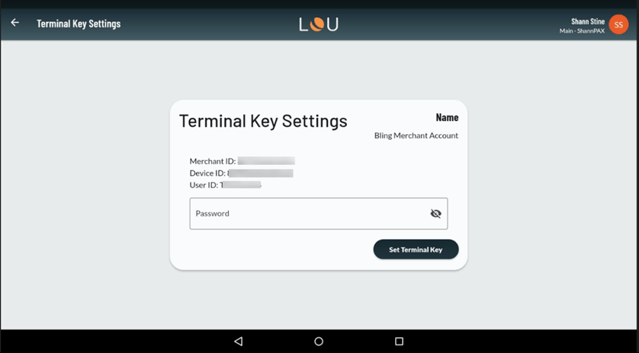
- Enter your Password. The Merchant ID, Device ID, and User ID should already be populated because you have gone through the POS Station Management and Link Merchant Account to POS Stations setup processes already.
- Tap Set Terminal Key.
Once this is set, you’re good to go! You won’t have to do this as you add additional users to this device.
Manage Devices
On the Devices tab, you can manage and activate devices for LOU Retail POS.

You can activate a new device with the Activate Device button, following the same steps as above. You can manage an existing device using the Actions menu.
IMPORTANT! This page allows you to manage the activation/connection of LOU Retail POS for each POS Station. This page will not allow you to configure/manage POS Stations or access POS Station data. You’ll need to go to POS Station Management for that.
Manage Users
To facilitate ease of access for your Users on LOU Retail POS, while keeping your cash drawer secure, Users must be added to each device before they’re able to sign in. There are two ways to accomplish this: first, you can add them through the Users tab and, second, they can request access from LOU Retail POS. The latter will require an admin to come here to approve the request.
Add Users
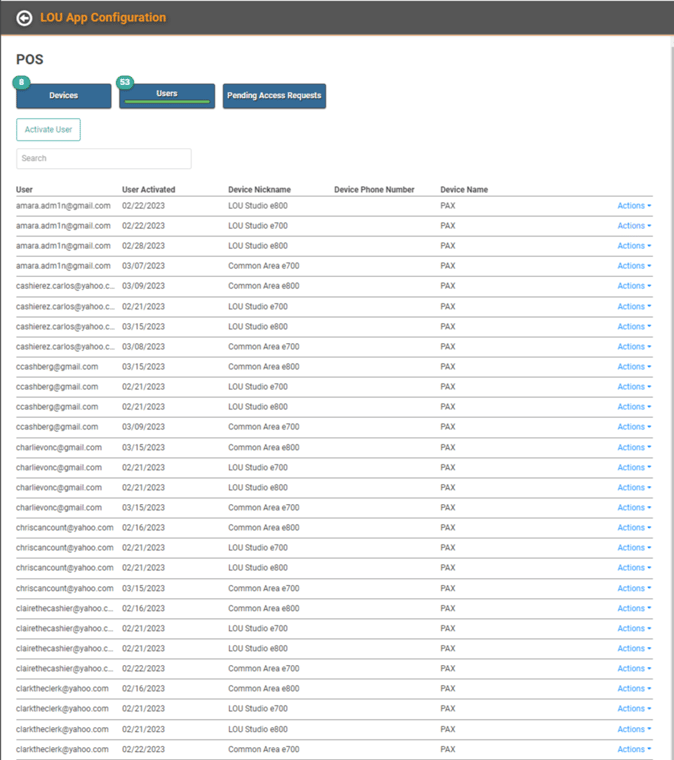
To add Users to the device, go to the Users tab. Each User will need to be activated on every device they are going to use. Click on the Activate User button.

Since you need to create each User on every device, there will be a line item per User, per device, potentially resulting in a long list.
Pending Access Requests
Users can request access to LOU Retail POS directly from the app. Those requests will show under this Pending Access Requests tab. You can approve or deny the requests.
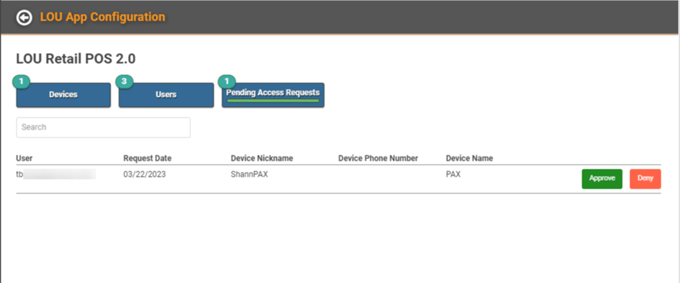
This page will display the User who has requested access along with a few pieces of information about the request and device. You can click Approve, which will add the User the device and allow them to PIN in or you can Deny access. If the User is approved, they will move to the Users tab. If denied, the request will be deleted and the User will not be added to the device.
IMPORTANT! Once you add Users to the device, a user already on the device must log into LOU Retail POS on that device, sync data, and then log out to get new users to appear in the dropdown.
Deactivate Users
When you want to remove access for a User to a specific device, locate the User and Device line item, click the Actions link, and click Deactivate. The User will no longer be able to access that specific device.
Scanner for Activation
You may choose to scan a QR code as part of activating LOU Retail POS on each machine. You only need to scan the QR code the first time you activate LOU Retail POS on the machine. Your scanner must support 2D scanning. Alternatively, there is an activation code which can be typed in.
You may need to use your scanner’s manual to scan a setup barcode to configure your scanner to add a carriage return when scanning. This is required for the scanner to read a QR Code.
For those using the Zebra scanners purchased through the LOU Store, you can access this online guide (page 76) to find the carriage return barcode to set up your scanner to add a carriage return when scanning.
You can also go here and scan these three barcodes to configure your scanner.