
Collecting, reporting, and paying the correct taxes are all necessary components of business. LOU wants to make it easy, so we’ve partnered with Avalara to add a robust, powerful punch to the tools for tracking and collecting taxes with AvaTax.
You will need these things to complete setup:
- An active account/plan with Avalara
- Your Avalara System Tax Codes
- The default LOU Tax Authority and Code that will be used for Avalara. (You need to set this up in LOU through Tax Setup)
- An Avalara Tax Clearing Liability Account (which will be associated with your Tax Authority) on your Chart of Accounts.
- SKU Categories
- Distribution Methods
IMPORTANT! This integration does not currently support Use Tax. To calculate Use Tax, you will need to create those Tax Authorities and Codes in LOU.
Before you activate the integration, check out How to Get Started with Avalara.
Go to Setup / Configuration / LOU Integrations / Avalara 
To get started, click the Inactive toggle on to activate the integration.
You will be asked to confirm activation. 

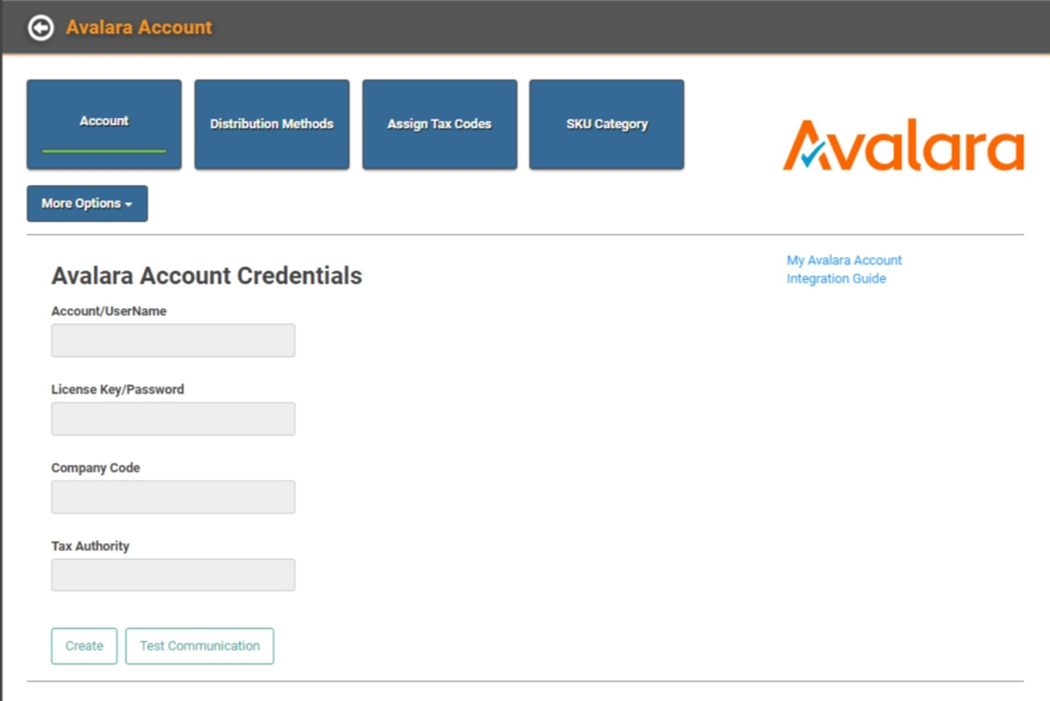
This page allows you to access everything you need to get the Avalara integration configured. We’ve included some helpful links to the Avalara login page, as well as this document for quick reference.
The first step is to link your Avalara account to LOU by entering your credentials. LOU will use these credentials to communicate with Avalara and send data back and forth.
IMPORTANT! You will need to get your account info from Avalara. LOU is unable to create/provide it to you.
Click  to enter your Avalara account information.
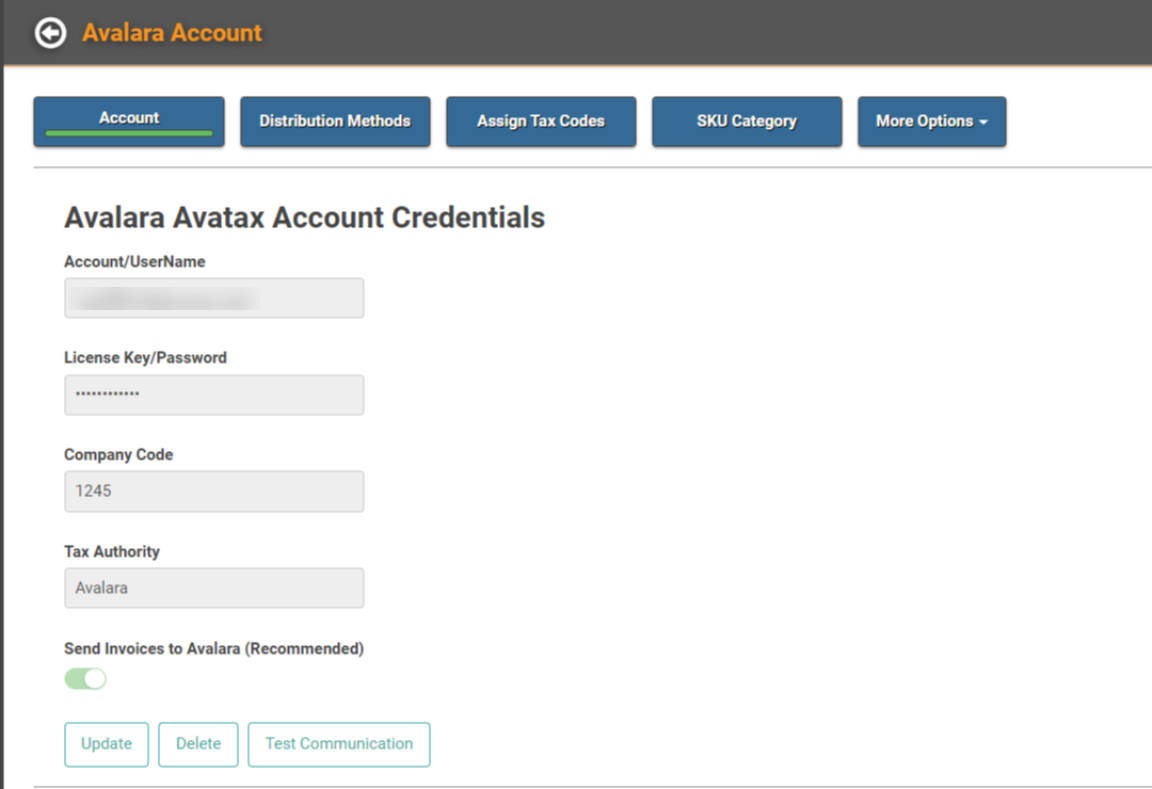
Once you’ve entered the information, click Save.
IMPORTANT! LOU automatically toggles on Send Invoices to Avalara (Recommended). As the text on the screen indicates, this allows you to have a record of Invoices in Avalara as well as LOU, providing a clear audit trail. We recommend leaving this toggled on.
After you’ve entered your account information, confirm that LOU and Avalara can communicate by clicking  . You should see a confirmation message letting you know the account was authenticated.
You can close this window.
TIP! If the authentication failed, double check the Device ID and License Key you entered are correct and that your internet is stable. If you still get an authentication failed message, contact your Avalara rep to confirm the Device ID and License Key you were given are correct and your account is not locked.
Configure the Avalara Integration
With the connection between LOU and Avalara established, we’re ready to configure and set everything up.
REMEMBER! You will need to have your Avalara System Tax Codes already selected and configured in Avalara. If you haven’t completed setup, contact your Avalara specialist for assistance.
Update Account Defaults
You can use this Update pop-up any time you need to make important changes to your account settings. When you first set up the integration, it’s a good idea to click here to review the information about an important setting LOU has defaulted ON for you.

Sending Invoices allows Avalara to file taxes, create important Tax reports, and maintain a record of all your Invoices.
REMEMBER! LOU has a lot of robust reporting, but most of your Tax reports will come from Avalara when you’re using the integration. This setting helps facilitate that.
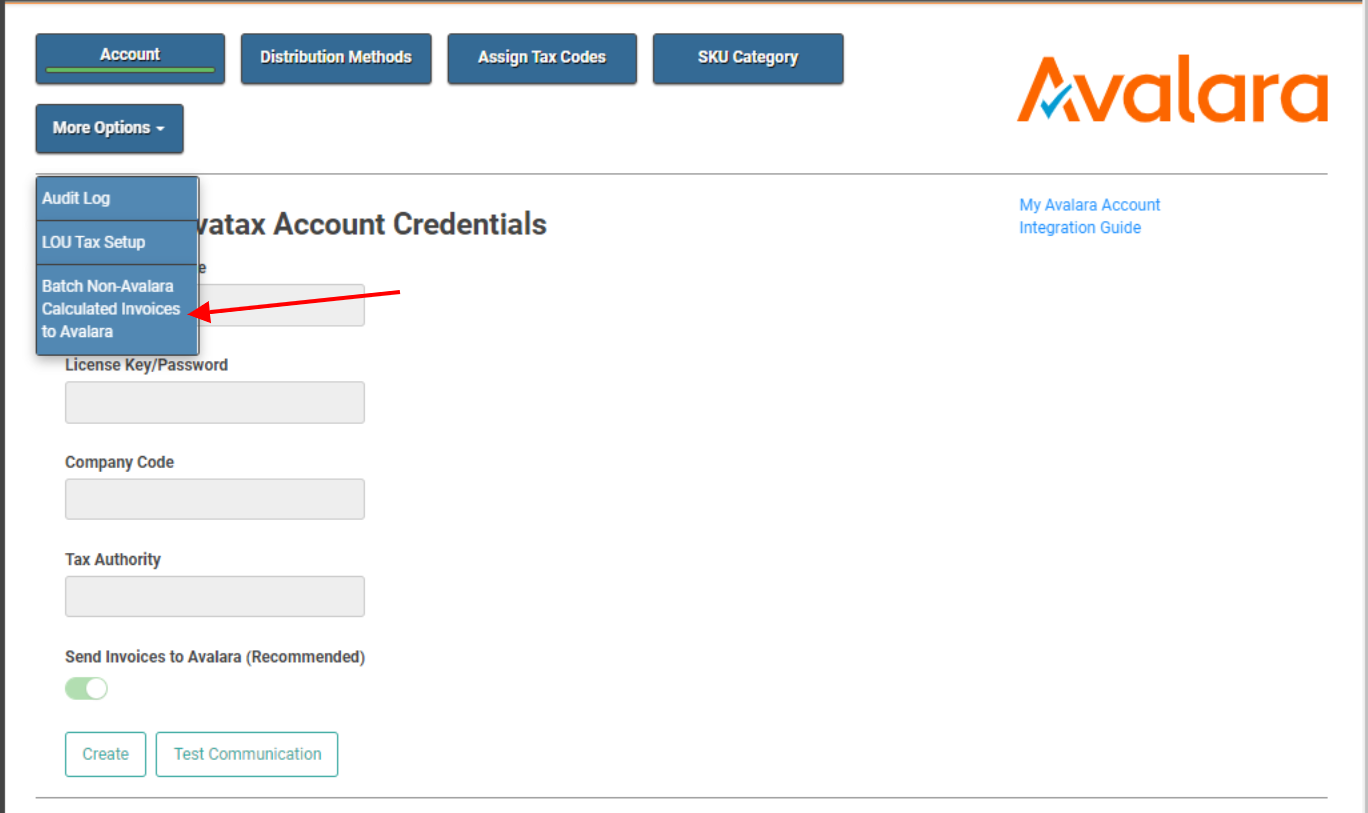
Invoices, including non-Avalara calculated invoices (such as LOU Retail POS transactions), will be sent through a nightly batch process. You can manually send Invoices to Avalara as well. On the Configure screen, click More Options and select Batch Non-Avalara Calculated Invoices to Avalara.
IMPORTANT! You do not have to do this as a regular process. The nightly process will handle it. This manual process is for situations where you cannot wait for the nightly process.
Distribution Methods
You can define which Distribution Methods should use Destination Based Tax. This helps guide what Tax Code(s) to use for the Order. If you have not configured this during Tax Setup, you will need to do so now. 
Assign Tax Codes
You do not have to use Avalara to calculate all your taxes in LOU. You may choose what Tax Codes should use Avalara. If you didn’t do this during Tax Setup, you will need to do so now.
- Click the Assign Tax Codes button.
- Find the Tax Code on the list.
- Click Actions / Update on the Tax Code.
- Toggle Avalara Tax Code on.
- Click Save.

SKU Category
You will need to have your Avalara System Tax Codes defined in Avalara, and all your SKU Categories created in LOU to continue. When you click SKU Category, you’ll see a list of all your SKU Categories. You must assign the correct Avalara System Tax Code to the SKU Category.
IMPORTANT! Your Avalara specialist can help guide you in determining the correct System Tax Codes to use. These System Tax Codes are not the same as LOU Tax Codes.
Click Actions / Update on each SKU Category to add the correct Avalara System Tax Code. 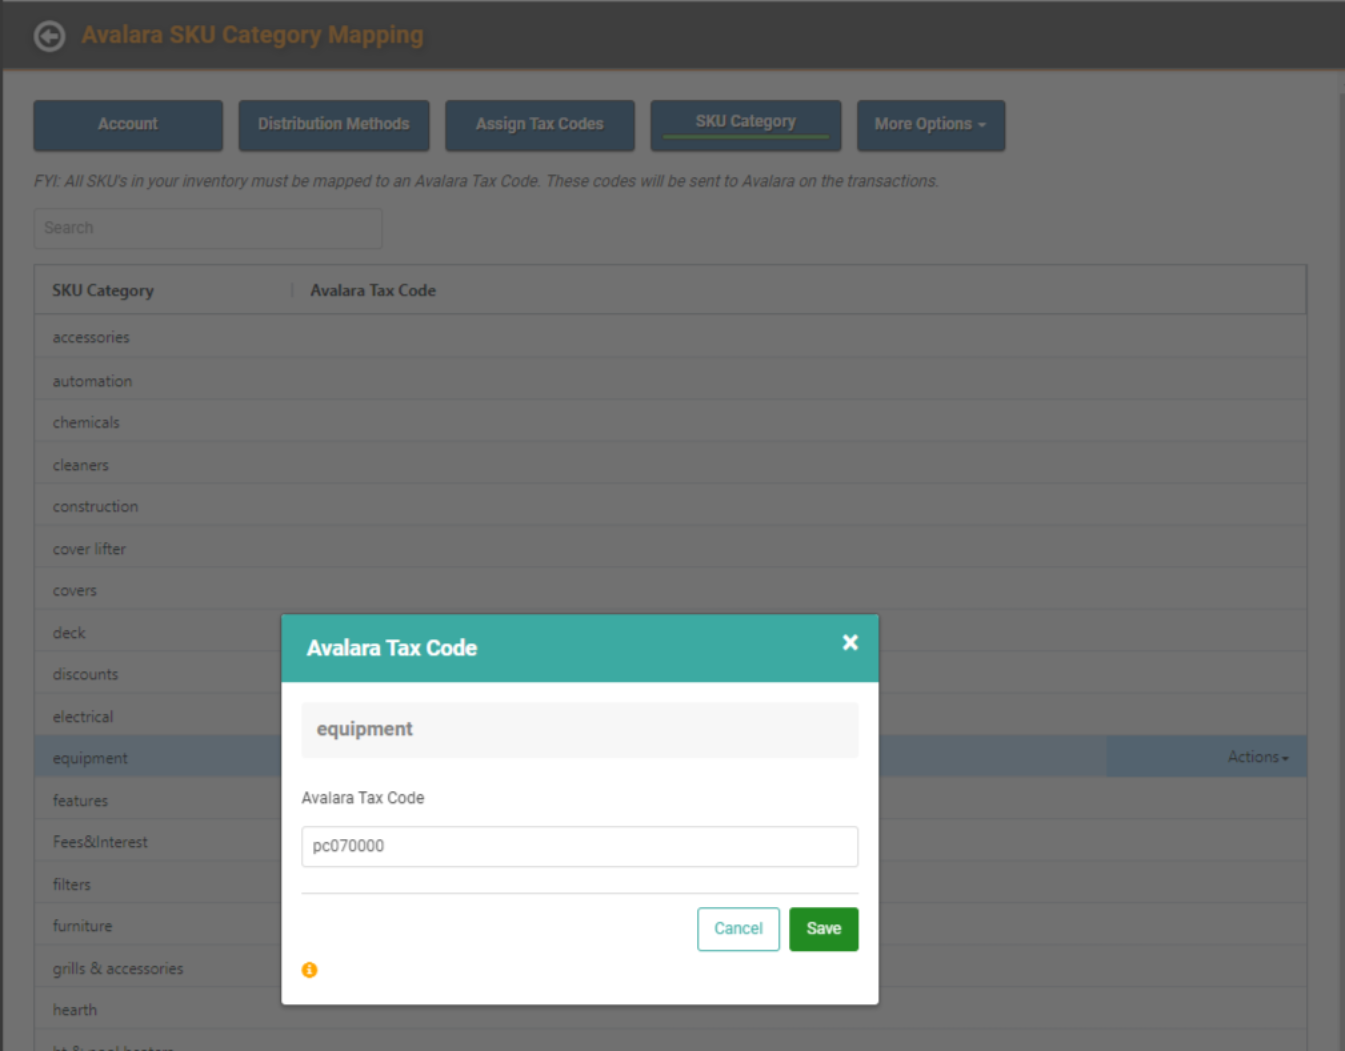
REMEMBER! If you don't assign a specific System Tax Code to your SKU Category, Avalara automatically defaults it to their generic Tangible Personal Property System Tax Code. The Tax Rate for that System Tax Code will be based on the Nexus you have set up with Avalara.
Once you’re finished with these configuration items, you’re all set!