Expenses in Accounting are just that – an expense or something you are obligated to pay. Expenses are also known as Accounts Payable. These are monies owed to creditors for goods and services. Accounts Payable show on the Balance Sheet while the Expenses they represent show on the Income Statement.
Contents:
Know what you're looking for? Use these links to jump ahead!

Go to Accounting / Expense
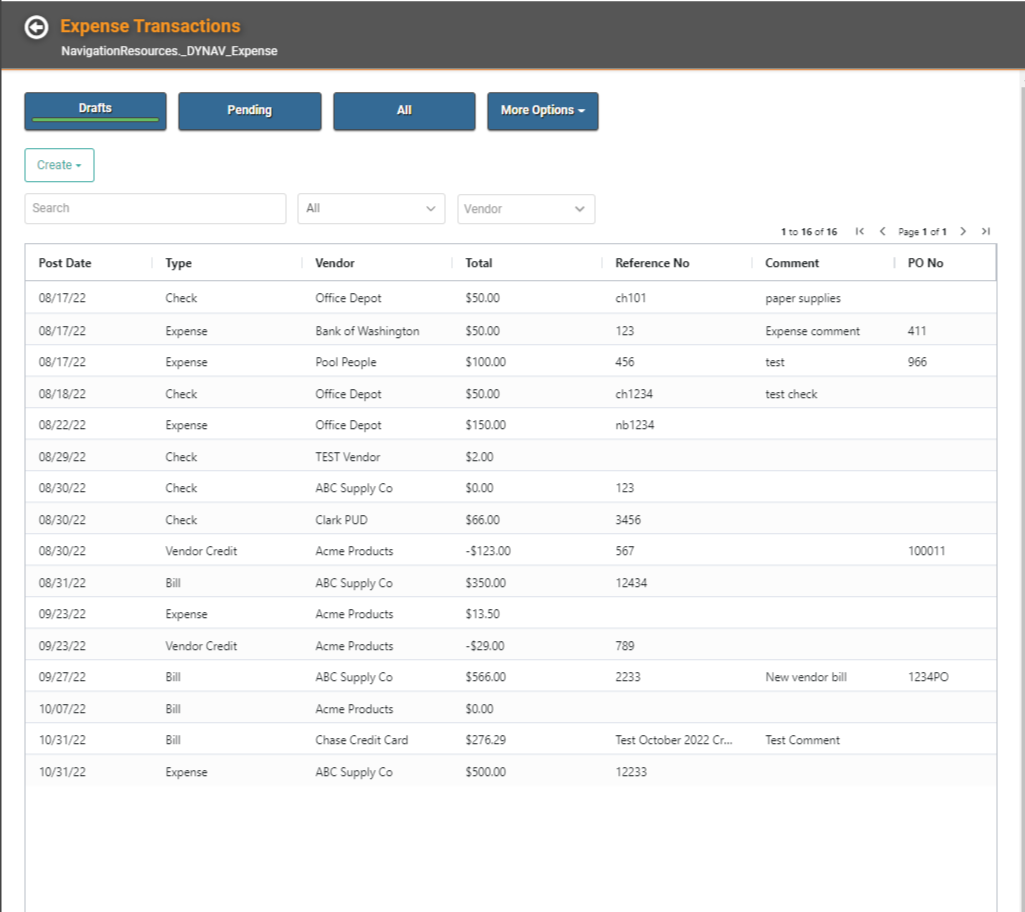
When you go to Expense, you arrive on the Drafts page. In addition to Drafts (Expenses created, but not yet Posted), you can view Pending Expenses (Posted, but not yet Paid) or All Expenses (both Drafts and Posted) as well as access More Options. 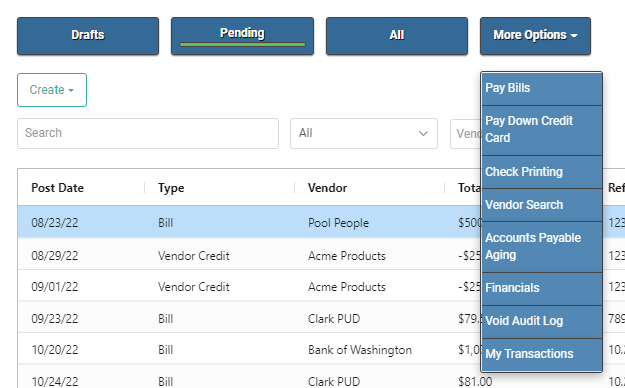
Create Drafts
These are the Expenses you’ve drafted but have not yet posted. On this page, you can create new Expenses or Update, Post, Copy, and Delete Drafts.
To create a new Expense, click Create and select the Type. 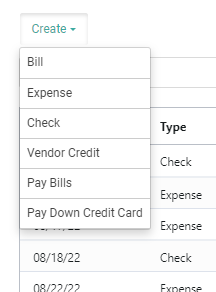
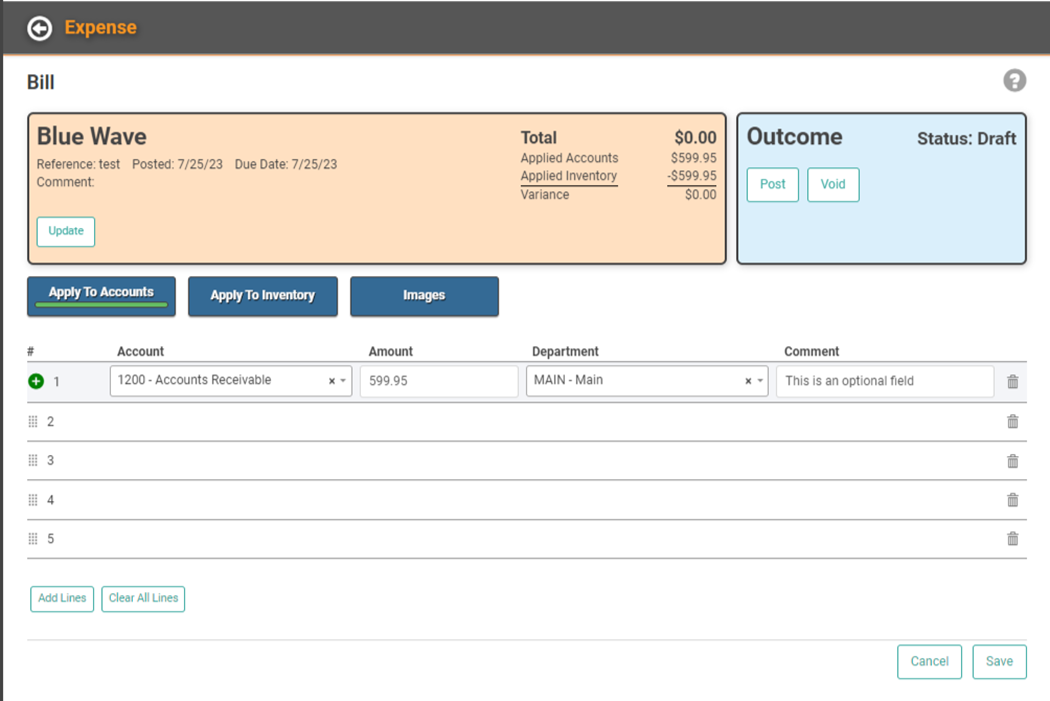
- Bill A liability due in the future.
- Expense A liability which has already been paid by Cash or Credit Card.
- Check A liability which will be, or has already been, paid by Check.
- Vendor Credit An Amount owed to you by a Vendor which can be applied to future invoices from the Vendor.
- Pay Bills Record the Payment of open Bills. Alternatively, you can reach this feature through its own tile.
- Pay Down Credit Card This is akin to making an extra payment on your Credit Card. This allows you to make a partial payment on a credit card in addition to the normal monthly bill recorded under Bills.

Once you’ve chosen the Expense Type, you can fill in the appropriate fields and click Save. This will create an Expense Draft and the line item will appear on the Drafts page.
The Bill Expense Type adds an additional field allowing you to select Payment Terms.
Draft Expense Profile
On the Drafts page, you can select an Expense line item and click the Actions link to go to the Profile for the Expense. 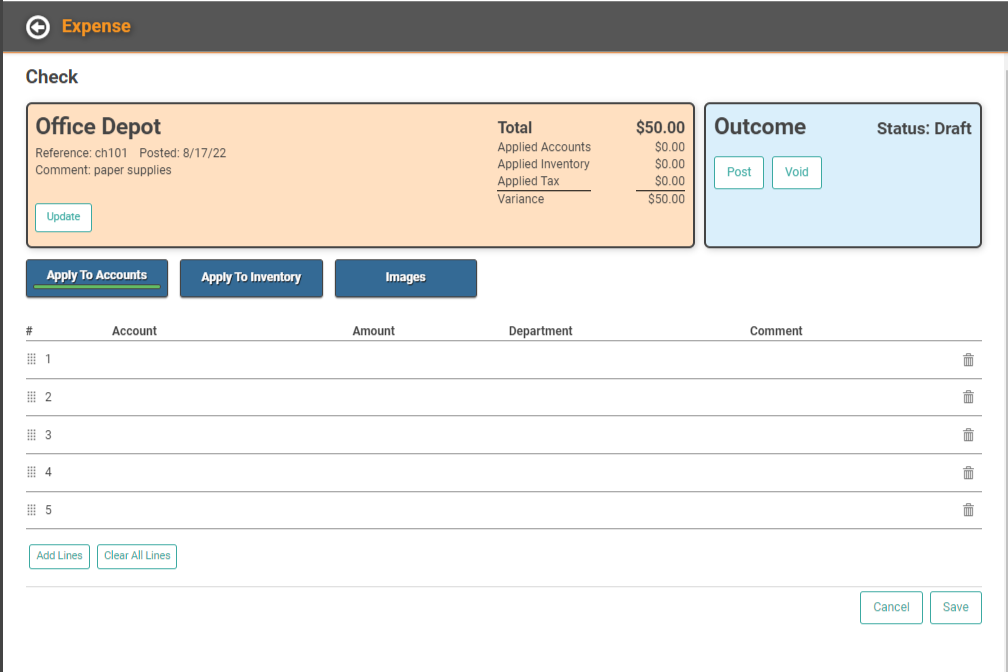
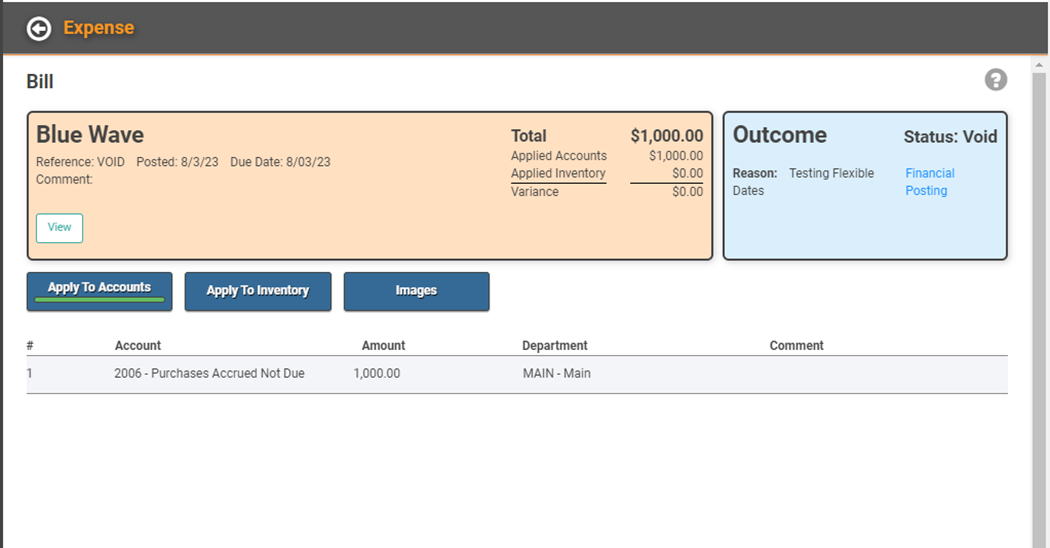
On the Profile, you can determine which GL Accounts to which the Expense should apply, Apply the Expense to Inventory, and add Images. You can also Update, Post, or Void the Expense.
Apply to Accounts
This is where you will tell LOU what GL Accounts should be affected by this Expense. Click anywhere on each line item to open fields to select or type appropriate information for each column.
Apply to Inventory
LOU doesn’t currently support Vendor Invoices; however, you can still record those Invoices here! When an Expense is related to Inventory, you can Apply the Expense to the Inventory, create a Manual Purchase Receipt, and Receive existing Purchase Orders related to the Expense. You can also perform Cost Adjustments as appropriate. 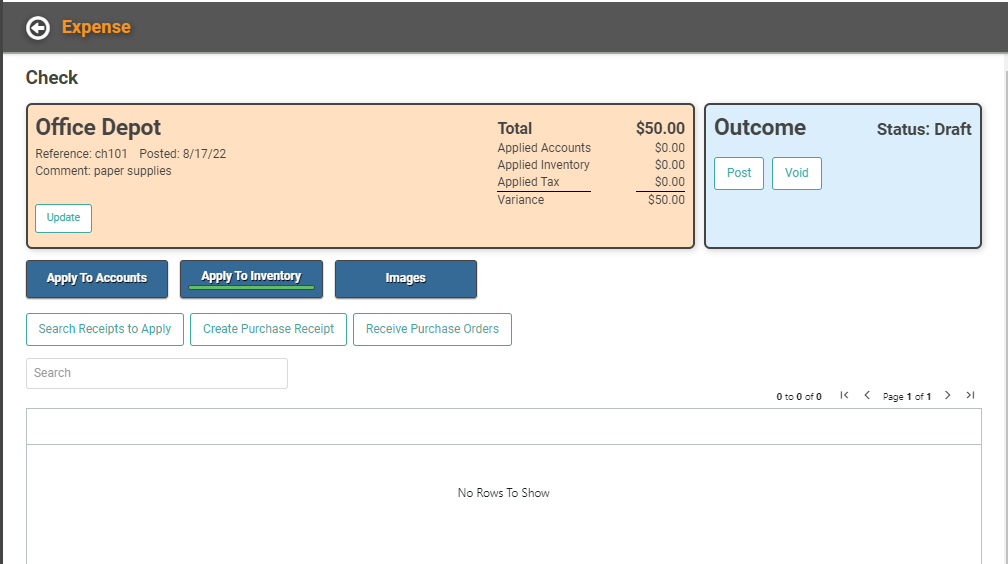
Images
You can upload images to associate with this Expense. 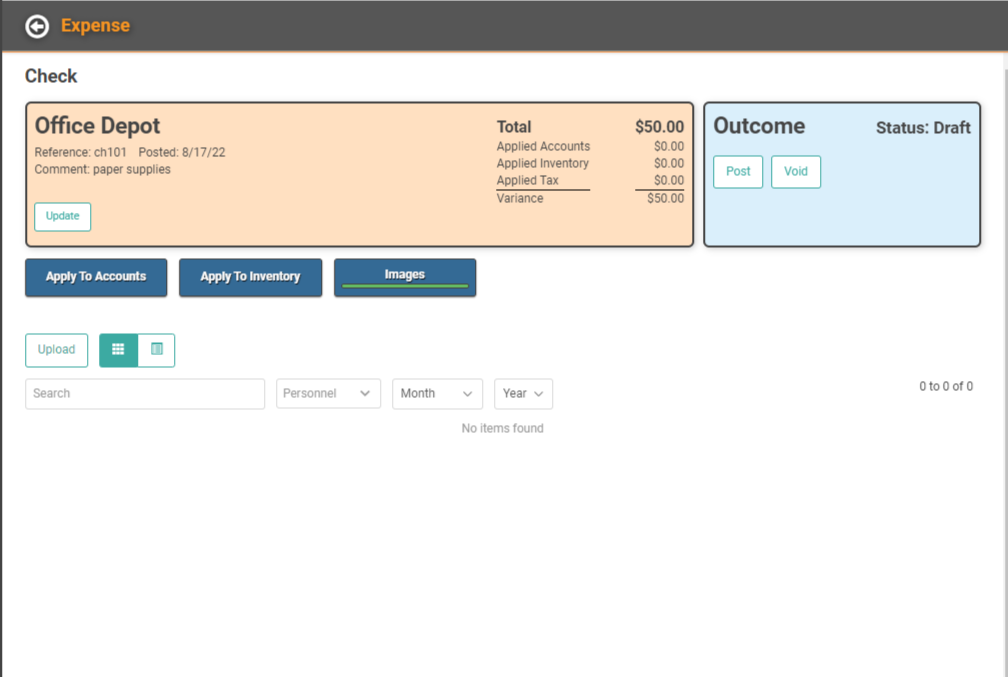
Post
Once you’ve created the Expense and applied the Accounts and/or Inventory you’d like, you’re ready to post. On the Drafts page, you can select an Expense line item and click Actions / Post. You can also click Post on the Expense Profile page.
Once the Expense has been Posted, it will move from Drafts to Pending. 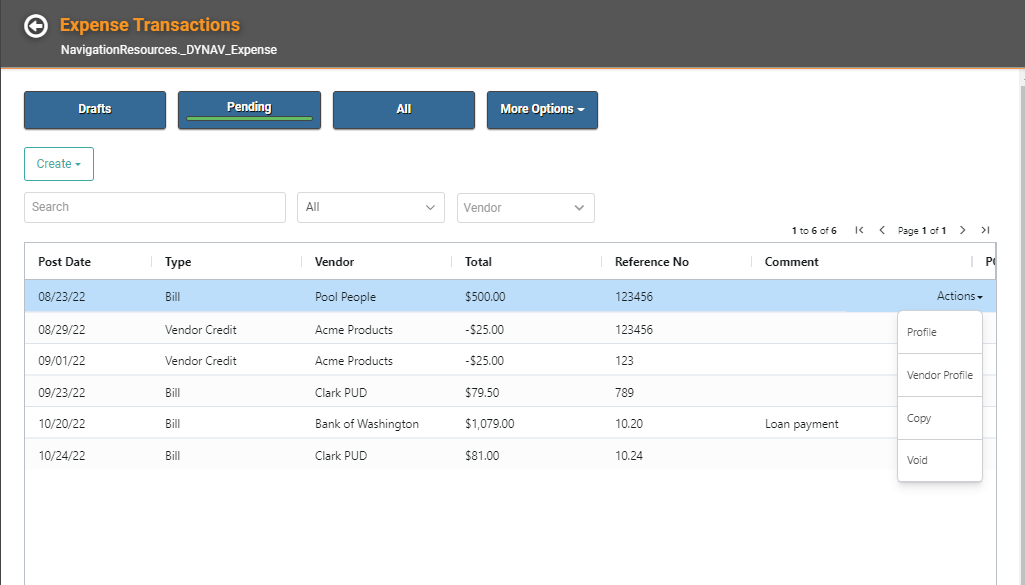
On the Pending Page, you can select the Expense line item and click Actions to access the Profile, access the Vendor Profile, Copy the Expense, or Void the Expense.
Pending Expense Profile
The Expense Profile looks exactly like the Expense Profile in Drafts with a status updated to Pending. The Expense still needs to be Paid to move from Pending to Complete. 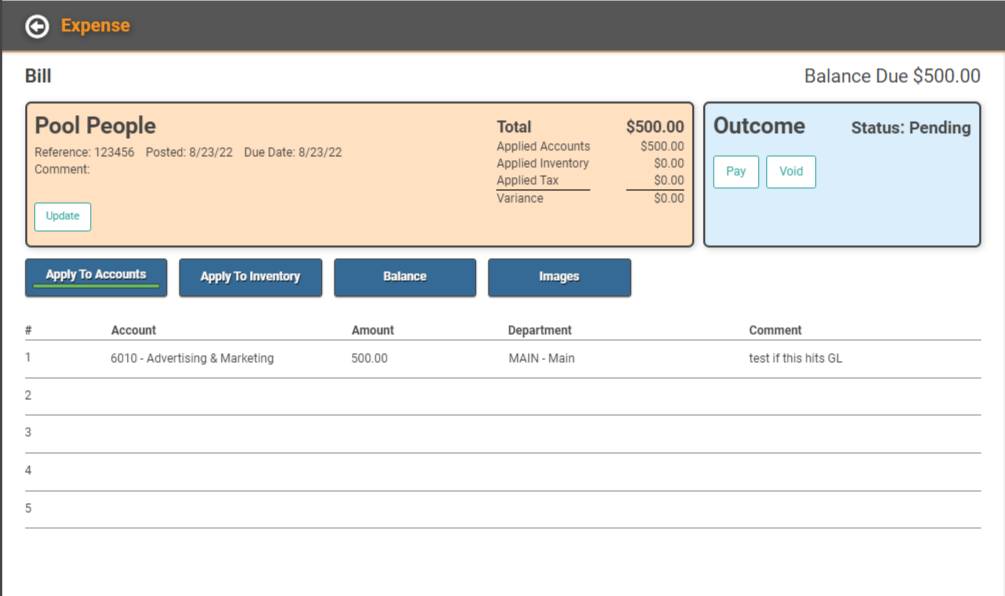
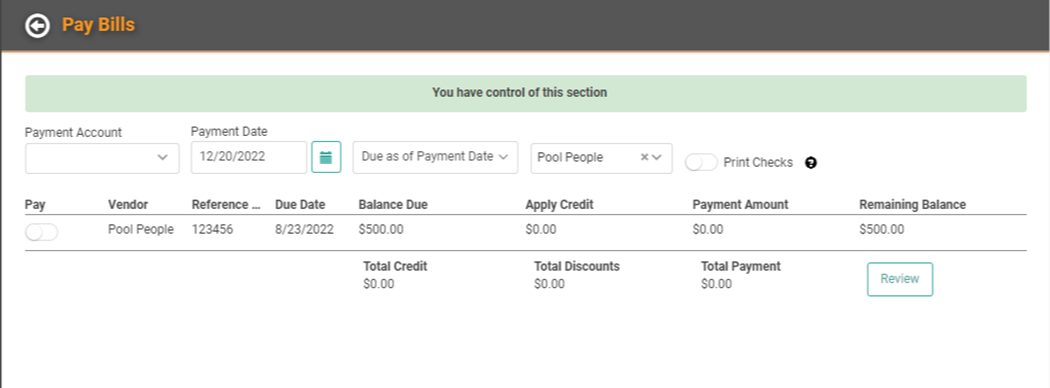
To pay the Expense, click the Pay button. This will take you over to Pay Bills and allow you to pay this Expense. 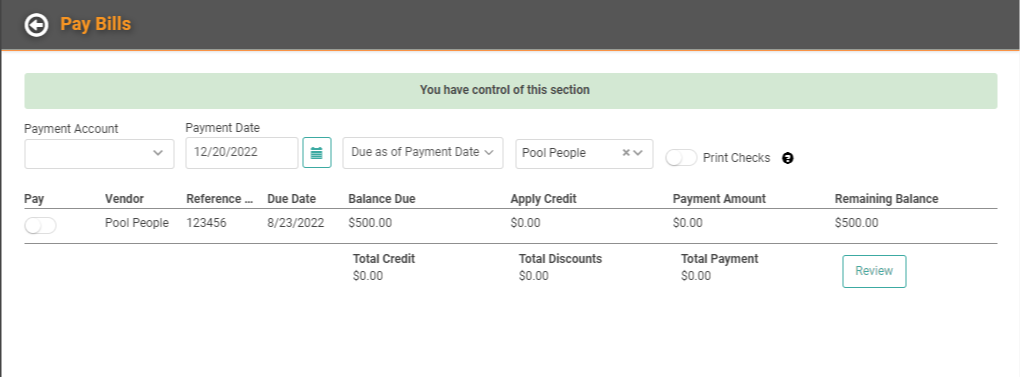
Pay Expense
To pay the Expense, click the Pay button. This will take you over to Pay Bills and allow you to pay this Expense.
Void Expense
Occasionally you may post an Expense that you need to void. Before you can Void a Complete Expense, you must un-apply the Amounts. After that, the process for Voiding Complete and Pending Expenses is the same.
Un-apply Amounts
To Void a Complete Expense, you will follow the same process above except you will need to un-apply the Amounts first. If you click Void before un-applying the Amounts, you’ll get a warning message indicating that.

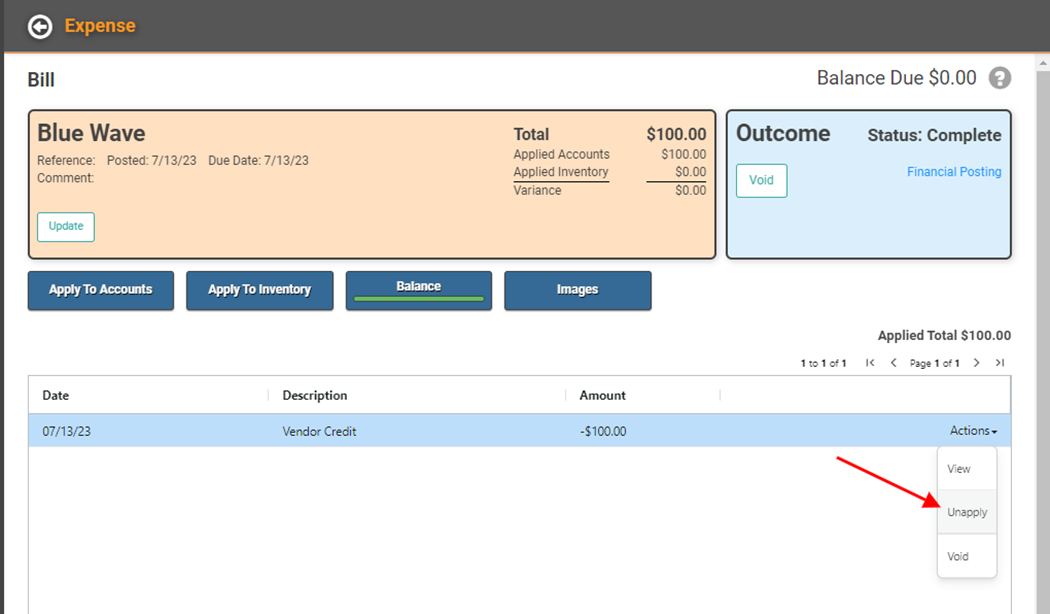
Once you un-apply each Balance, the process to Void is the same as Pending Expenses.
Void an Expense
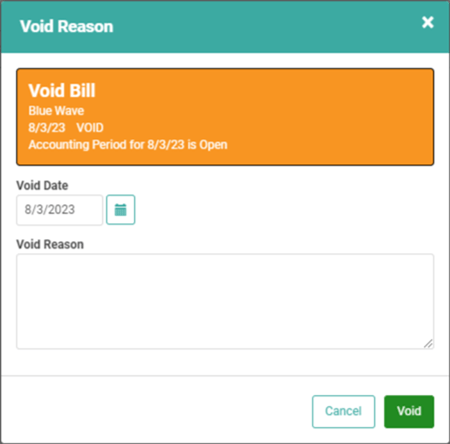
- Click Void
- Choose the Void Date. (You can choose any date from the original Post Date forward. You cannot choose a date prior to the Post Date.)
- Enter an optional reason to indicate why you are Voiding the Expense.
- Click Void
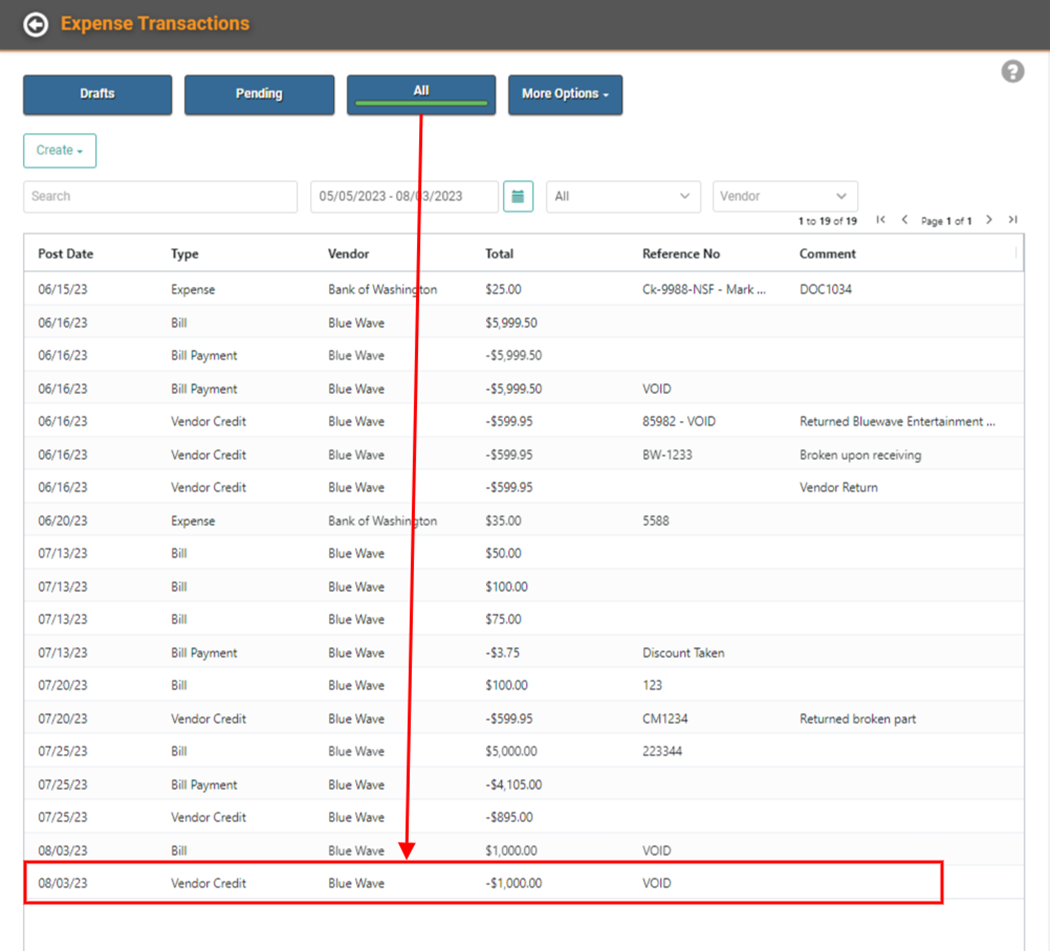
As soon as you click that green Void button, LOU will reverse transactions and un-apply the Expense from Inventory. The status of the Expense will update to Void and the Expense will move to the All button on the Expense Search page. Once voided, this Expense cannot be updated or changed. The record exists as a record of the Void only. You cannot undo a Void. If you voided something by mistake, you will need to create a new Expense.