Vendors are an important part of your business. They’re a big part of LOU, too!
When you first get started with LOU, you will need to create your list of Vendors. This can be a time-consuming task if you’re forced to do so one-by-one.
That’s where Data Imports comes in. You can download a template, allowing you to create a spreadsheet of all your Customers that can be imported to add them en masse.
VERY IMPORTANT! Do not change the template in any way. Populate data in the fields, but do NOT change formatting, add additional columns, or move columns around. Templates are intended to be a document with specific formatting and placement already configured. Making changes to these preconfigured fields will cause errors and prevent the data from importing correctly.
Key Step Summary:
- Download the Vendor Import Template
- Populate data in the Template
- Upload Template
- Review Data and make corrections, if necessary
- Click Import Data to complete the Import

Go to Operations / Import Data
Download the Template
The first thing you need to do is download the Template you’ll use to create the file you upload.
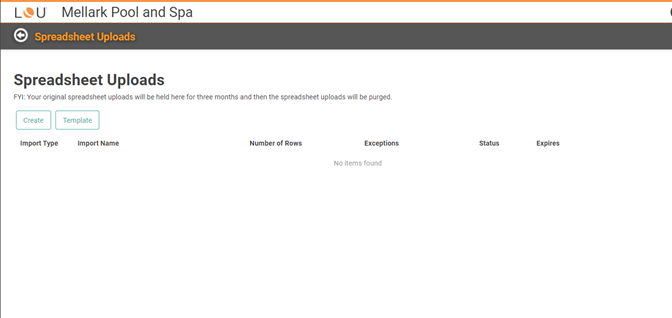
- Click

- Select Vendors as the Spreadsheet Type and .xlsx as the File Type.
- .xlsx is currently the only supported file type
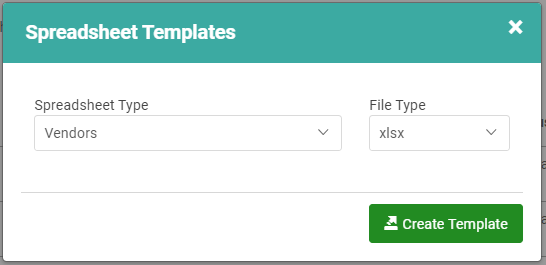
- .xlsx is currently the only supported file type
- Click

- The Template will download and you will receive a confirmation

Create a File to Upload
The Template will download to the folder designated as the default in your browser settings. For most people, this will be the Downloads folder.
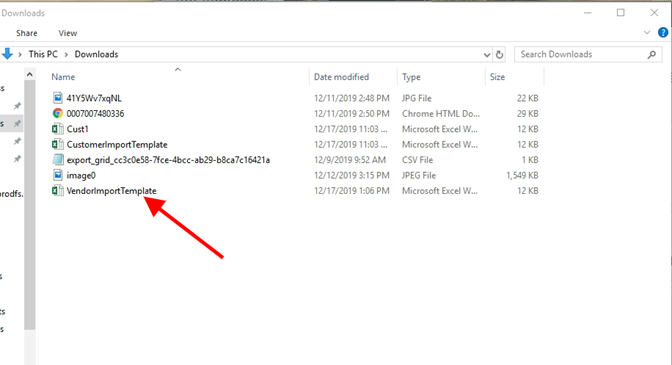
The file will be an .xlsx file which can be opened by Excel. If you are having trouble getting the file to open, you may need to change the default app used to open this file type in your Windows Settings. Find instructions on doing so here .
The Template contains every field available when you create a Vendor Record. The fields which are required are highlighted. You cannot upload data without these fields correctly populated. All non-highlighted fields are optional.
IMPORTANT! Do not change the formatting of the template. Excel may add characters or formatting that are not recognized by LOU.
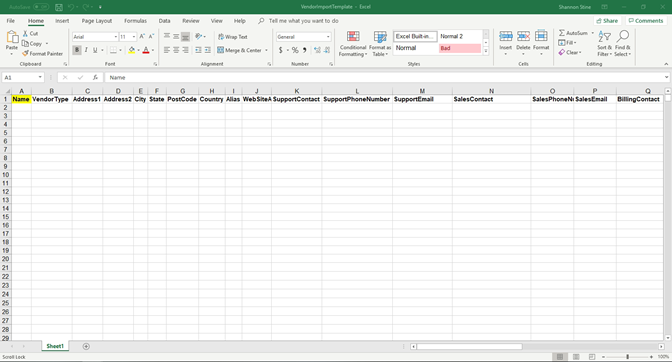
There is one required field. Please be aware some fields require specific data:
· Name
IMPORTANT! When uploading, there are a couple important things to keep in mind.
1. Do not change formatting in fields.
2. Do not add or change formatting in fields.
· This is particularly important with fields like Phone Number. Phone Numbers should be entered as numbers only. Do not use parentheses or dashes. Example: 3605551234, not (360)555-1234 or 360-555-1234
· Nothing should be bold, italicized, or underlined in data fields.
3. Do not add spaces to the end of data. Excel interprets spaces as characters and this can cause errors in fields in LOU.
You will likely include additional fields, but this is the only field which are required to create a Vendor Record in LOU.
Upload Spreadsheets
Once you’ve used the Template to create the Spreadsheet, you can upload it by clicking 
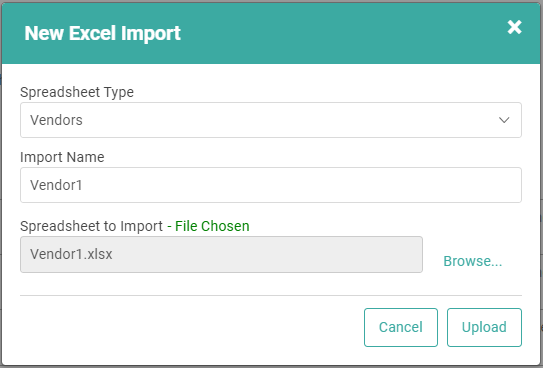
1. Select your Spreadsheet Type
2. Give your import a name
3. Select the file from your computer to upload
4. Click 
You should see the Status changing from Uploading to Validating to Ready to Import.
IMPORTANT! Large import (2501+ records) files will take several minutes or more to upload. The system has to go through the data line-by-line and add it appropriately. Spreadsheets uploaded during business house with 5000+ records will be Queued by LOU and will not import until after 4p PST.
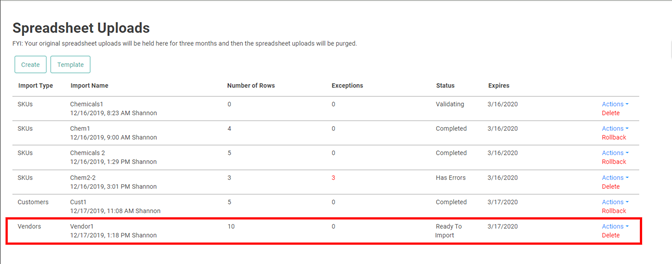
5. Click the Actions link on the line corresponding to your upload.
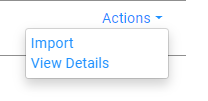
6. Select View Details to confirm the information being uploaded. The information in the spreadsheet has not been added to your database yet. Confirming the information here is an important step in preventing bad data uploads.
· The Details Page will display the information from your spreadsheet as it will upload into LOU.

· You can click a line item and use  to see specific information on a line item and make changes. IMPORTANT! Do not remove data from required fields without replacing it. The upload will fail if you don’t have the required fields correctly filled in.
· TIP! The columns are smashed together. Use your browser’s zoom feature to zoom out and make more room for the columns to expand.
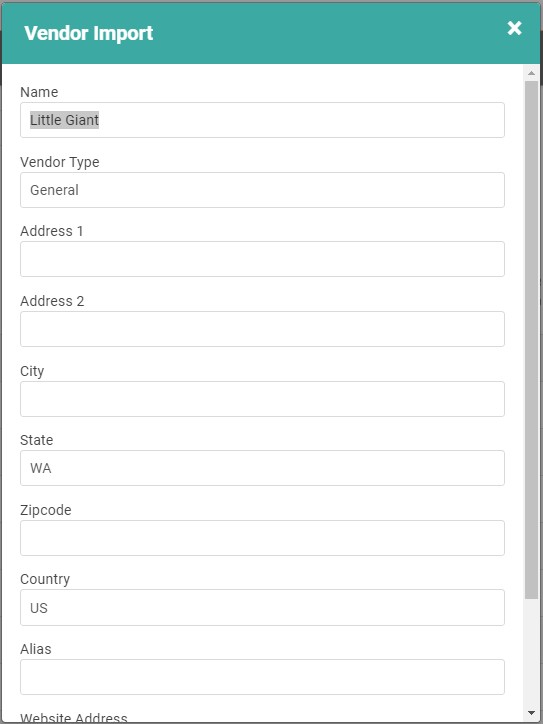

· When you’re finished, click 
· To delete the line item entirely, click 
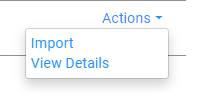
7. Once you’ve confirmed what will be uploaded, and made any changes you wish to make, you are ready to complete the import. Click the Actions link and select Import.
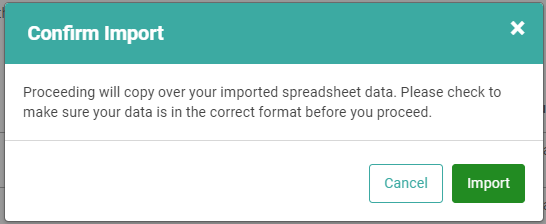
8. The Confirm Import message will pop up, confirming that you are going to copy the data onto your database. Click Import.
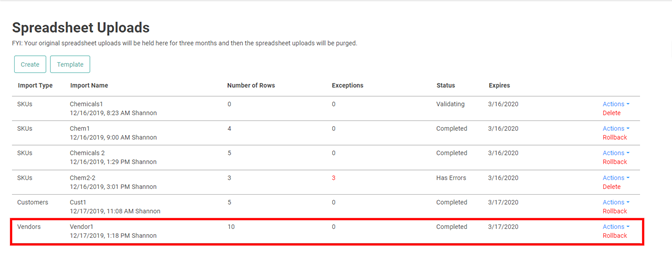
The status should update from Ready to Import to Complete.
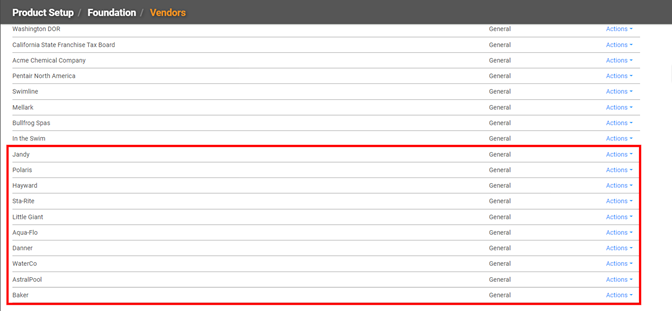
You can access your Vendors and create POs, SKUs, and update the Vendor Record.
Rollback an Import
If you complete the Import and realize there’s a mistake, you can undo the Import under specific circumstances. For Inventory SKUs, the Import can only be rolled back if there is no financial data associated with the SKUs. This means no transactions have been posted with those SKUs and no Beginning Balances were entered. BEWARE! A Rollback will essentially make it as if the SKUs never existed, deleting all mention of them in the database.
IMPORTANT! If you perform a Rollback on an Import that contains SKUs which have financial data (Transactions and Beginning Balances), they will not be rolled back. If the Import contains SKUs that have no financial data, they will be rolled back while the SKUs with financial data remain.
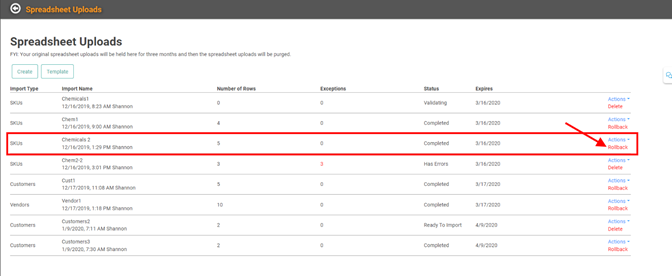
Once the data has been rolled back, the line item will disappear from Spreadsheet Uploads. To verify the SKUs are gone, you can go to Inventory and search for the SKUs.
What Happens if Your Import Contains Errors?
You may have errors in your file. Maybe you forgot a required field. Maybe you have a character in a field which doesn’t belong. Maybe you included a SKU which is already in your Inventory. When you have an error in the upload process, LOU will tell you. After you’ve completed steps 1-4 above, you may see a number under the Exceptions column and the Status listed as Has Errors.
Click the Actions link next to this line item to see what actions you can take to view and correct the errors.
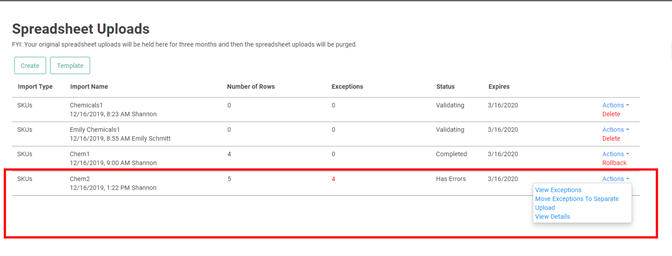
Click View Exceptions to see the errors. This will take you to a Details page with each item in the spreadsheet listed. The ones with errors will have a red bar with the error message in it.

You can use the Update link to update the information in the SKU. However, some errors may require you to make updates to the spreadsheet and upload again.
If there are items in the upload which are good – free from errors, you can go back to the Spreadsheet Uploads page, click the Actions link for the import file you’re working with, and select Move Exceptions to Separate Upload. This will create a new line item with just the errors. The Status of the original file should update to Ready to Import as it now only contains the valid line items from your spreadsheet. You may complete the Import process outlined above on the line item which is Ready to Import.
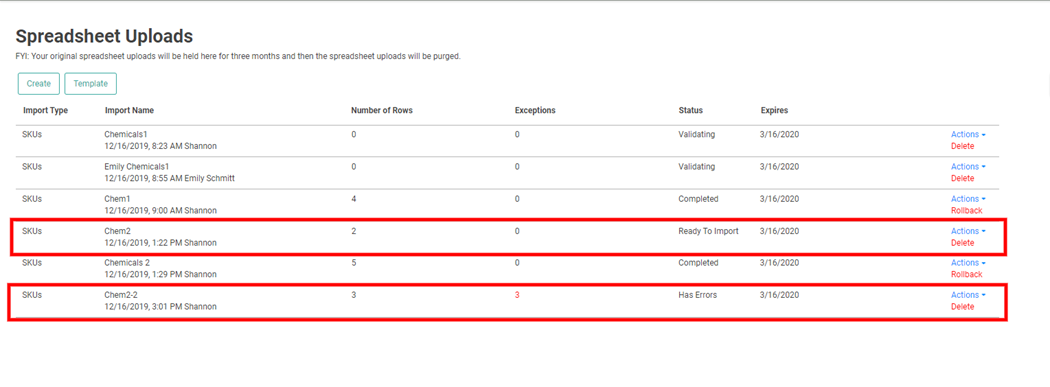
For the line item which now contains only the errors, you can complete updating the items to correct them and finish the Import process, or you can click the Delete link to delete the line item with errors. Go back to your template and make the necessary changes and corrections, then process a new Import.
