Tags are keywords or phrases that can be attached to the tops of various profiles to allow you to group and organize data. They can also be used to remind Users to perform a task.
Tags are located at the tops of the following profiles:
- Estimates
- Sales Orders
- Work Orders
- Purchase Orders
- Invoices
- Customers
- SKUs
- Vendors
You can use Workflows to create Tag sets that help guide Users to take action on a profile in specific order. For example, a Workflow could have steps such as Order Product, Schedule Delivery, Follow up, Send Thank You.
Group Security
This feature can be configured for Group Security to control what users have access to within Tags and Workflows. Head to Group Security to learn more.
Quick Jump Links:
Use these links to navigate through this document.
Let’s look at how Tags and Workflows work in LOU.
This is where you will manage/create and access Tags. From here, you can see the items you’re following and manage your follows, search for Tags, and create or update Tags.
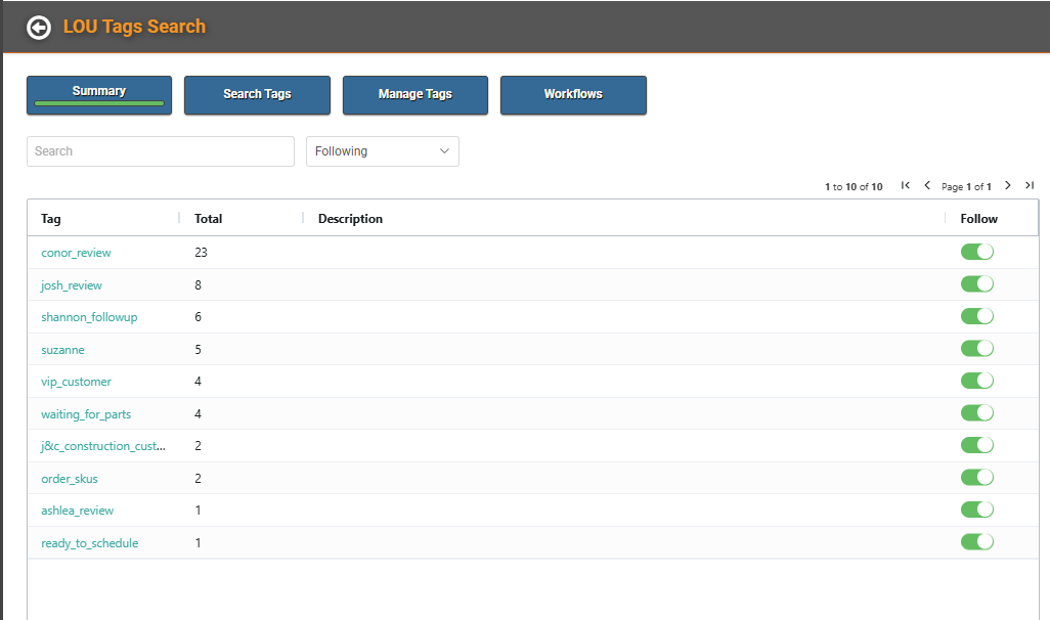
The Summary tab defaults to displaying the tag you are following. You can use the dropdown to see All Tags, Following, or Not Following.
The grid will show the name of the Tag, the total number of profiles on which the Tag appears, a Description of the Tag (if one exists), and a Toggle allowing you to quickly Follow or Unfollow the Tag.
Click on the Tag to jump to that Tag’s list of profiles in Search Tags.
Search Tags
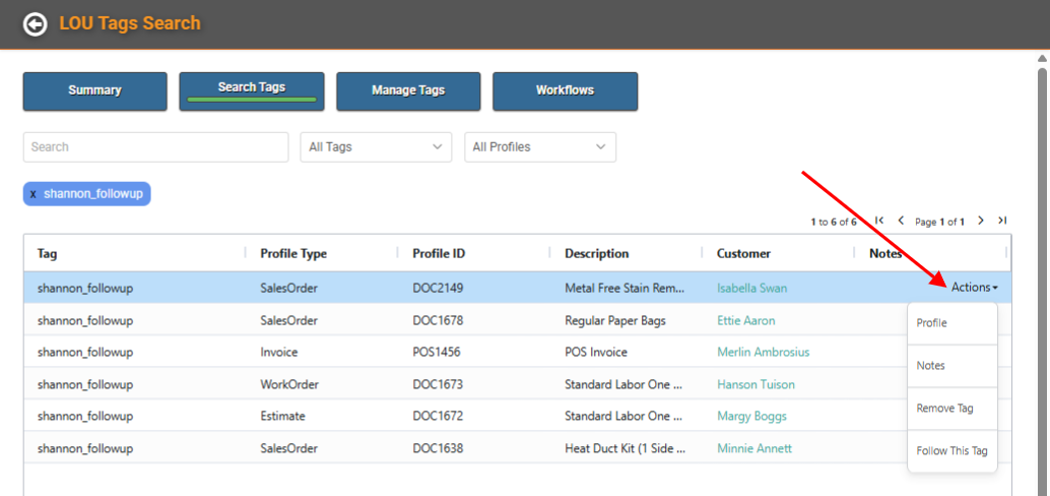
You can see a list of all the profiles that contain Tag. If you arrive here by clicking on a Tag from the Summary page, the search will be pre-filtered.
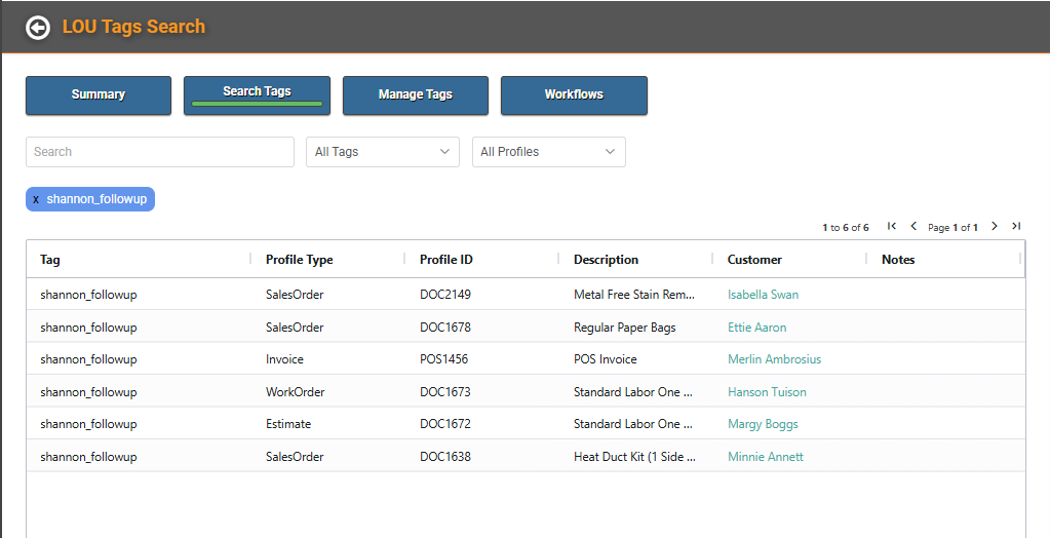
The Actions menu on each line item will let you see the profile, Notes on the Tag, remove the Tag, or follow the Tag.
Manage Tags
This is where you can Create and Manage the Tags available in LOU.
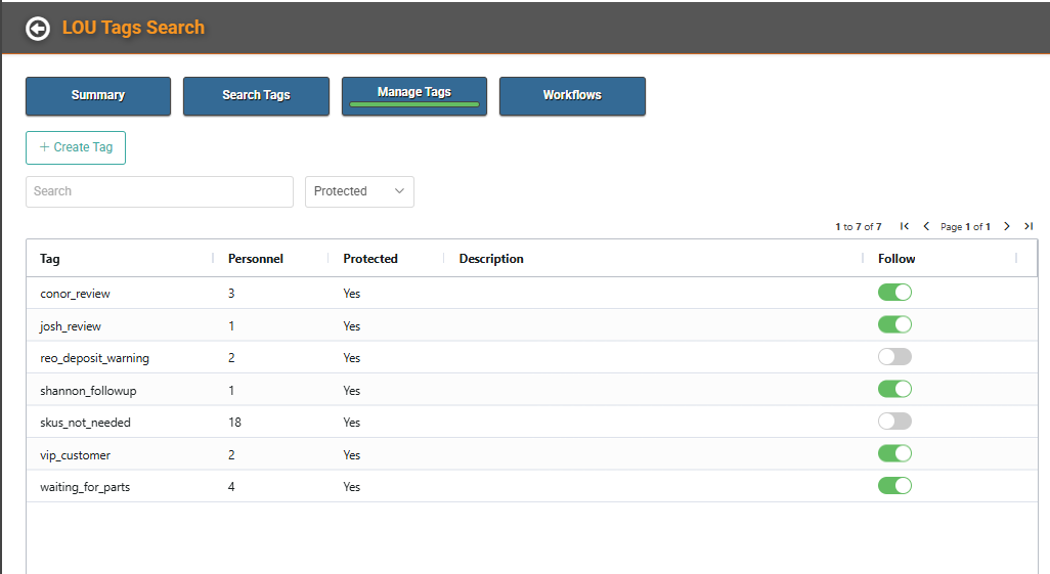
When you first arrive, you default to the Protected Tags filter. To see all Tags, change the dropdown.
To Create a new Tag, click Create. To update an existing Tag, double click or use the Actions / Update.
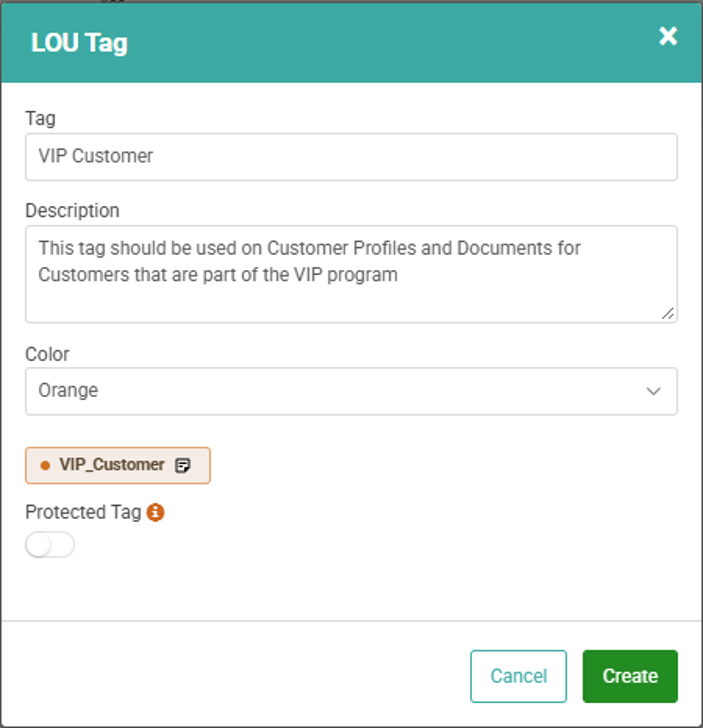
When you create a Tag, you can give it a name limited to 25 characters and a brief Description. You can choose a color from the dropdown and determine whether the Tag should be Protected. Once you are satisfied, click Create. The Tag is now available for use.
Protected Tags
These are Tags that have been created and assigned to specific Users so that they cannot be deleted from a Profile by any User. They can only be deleted from a Profile by the assigned User(s). When creating Tags, you can click the little (?) icon next to the Protected Tag toggle for information on Protected Tags.
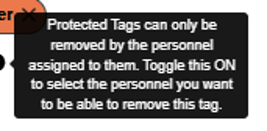
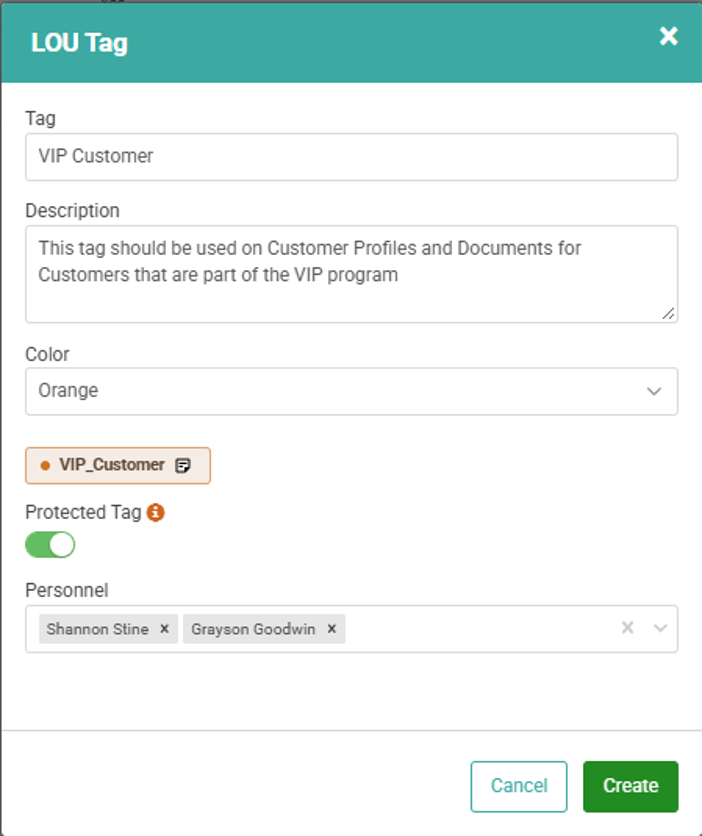
With the Protected Tag toggled on, select the Personnel you want to have control of the Tag from the dropdown. You can select multiple Users.
Protected Tags can be added by any User to a Profile, but they can only be removed from the Profile by the User(s) listed on the Tag.
Add Tags to Profiles
You can add Tags to the following Profiles:
- Estimates
- Sales Orders
- Work Orders
- Purchase Orders
- Invoices
- Customers
- SKUs
- Vendors
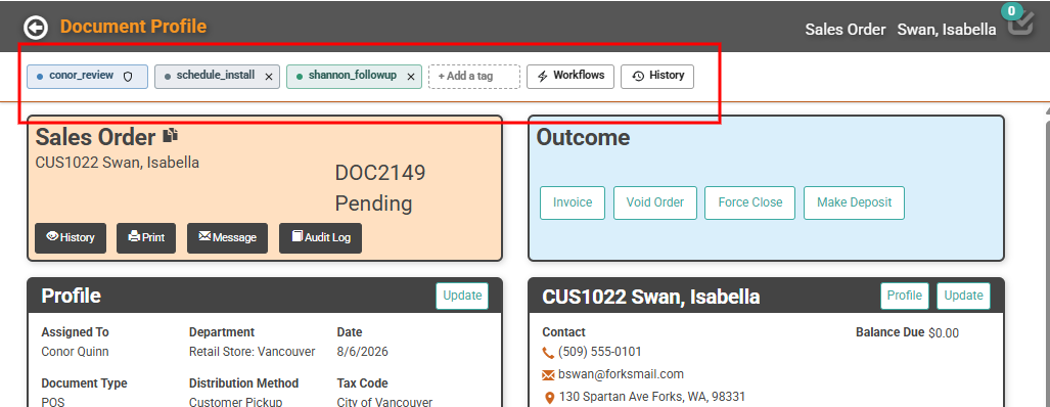
On the top of the Profile page, there is a field that says Add a Tag along with Workflows and History. To add a Tag, start typing the Tag name in the field. Hit enter or click the Tag to add to the Profile.
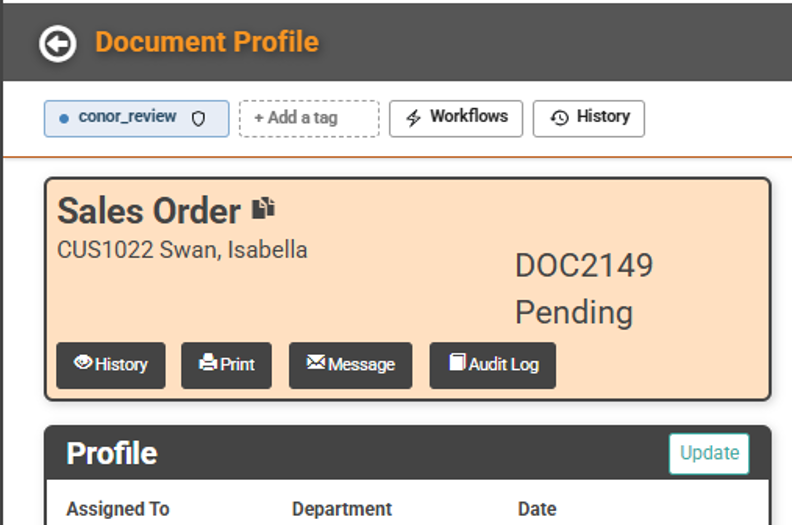
The Tag will appear. You can add multiple Tags to a document. They will continue to list out alongside existing Tags.
Notes and Follow
You can click on a Tag on a Profile to open a pop-up that allows you to enter a note associated with that Tag for that Profile and to follow the Tag.
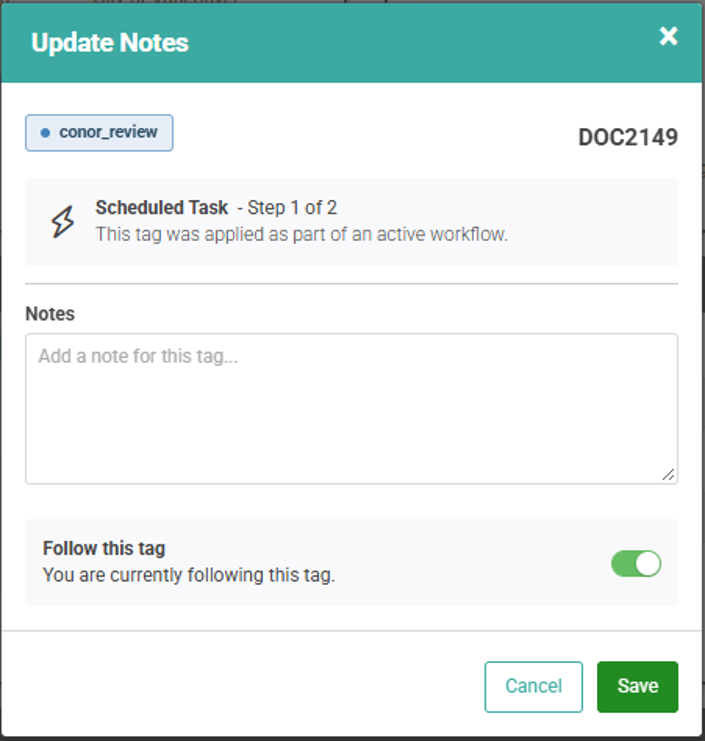
The Notes field is a whiteboard like many Notes fields throughout LOU. You can add, edit, delete Notes in this field. There is no Date or Timestamp associated with a Note. These Notes are only visible by clicking the Tag on the Profile.
REMEMBER! Notes on Tags are only for that instance of the Tag on that Profile. They will not appear on the Tag on any other Profile or the Manage Tags page.
History
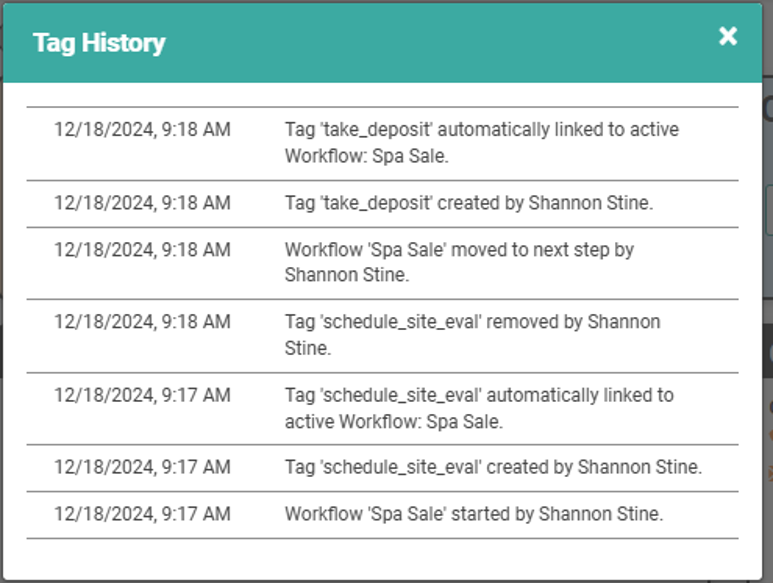
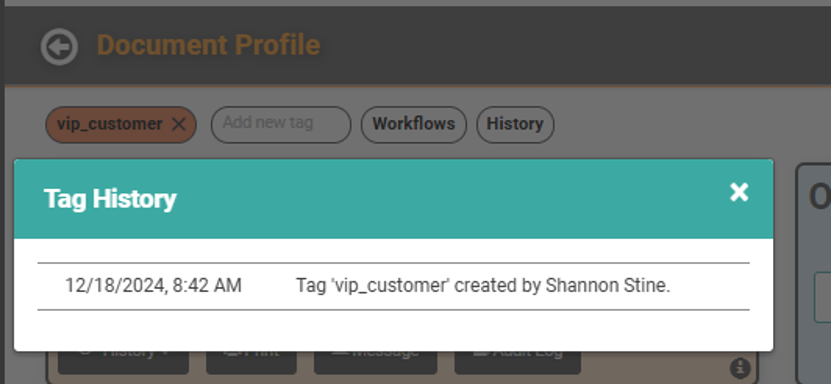
You can quickly see who added or deleted a Tag from a Profile by clicking the History button. It will list all Tag History for this Profile.
Workflows are a group of Tags that appear on Profiles to help you follow a workflow or process.
When you add a Workflow to a Profile, the first Tag in the Workflow will appear on the Profile. Once that Tag has been completed and removed, the next Tag in the Workflow will appear. This will continue until the Workflow is fully complete.
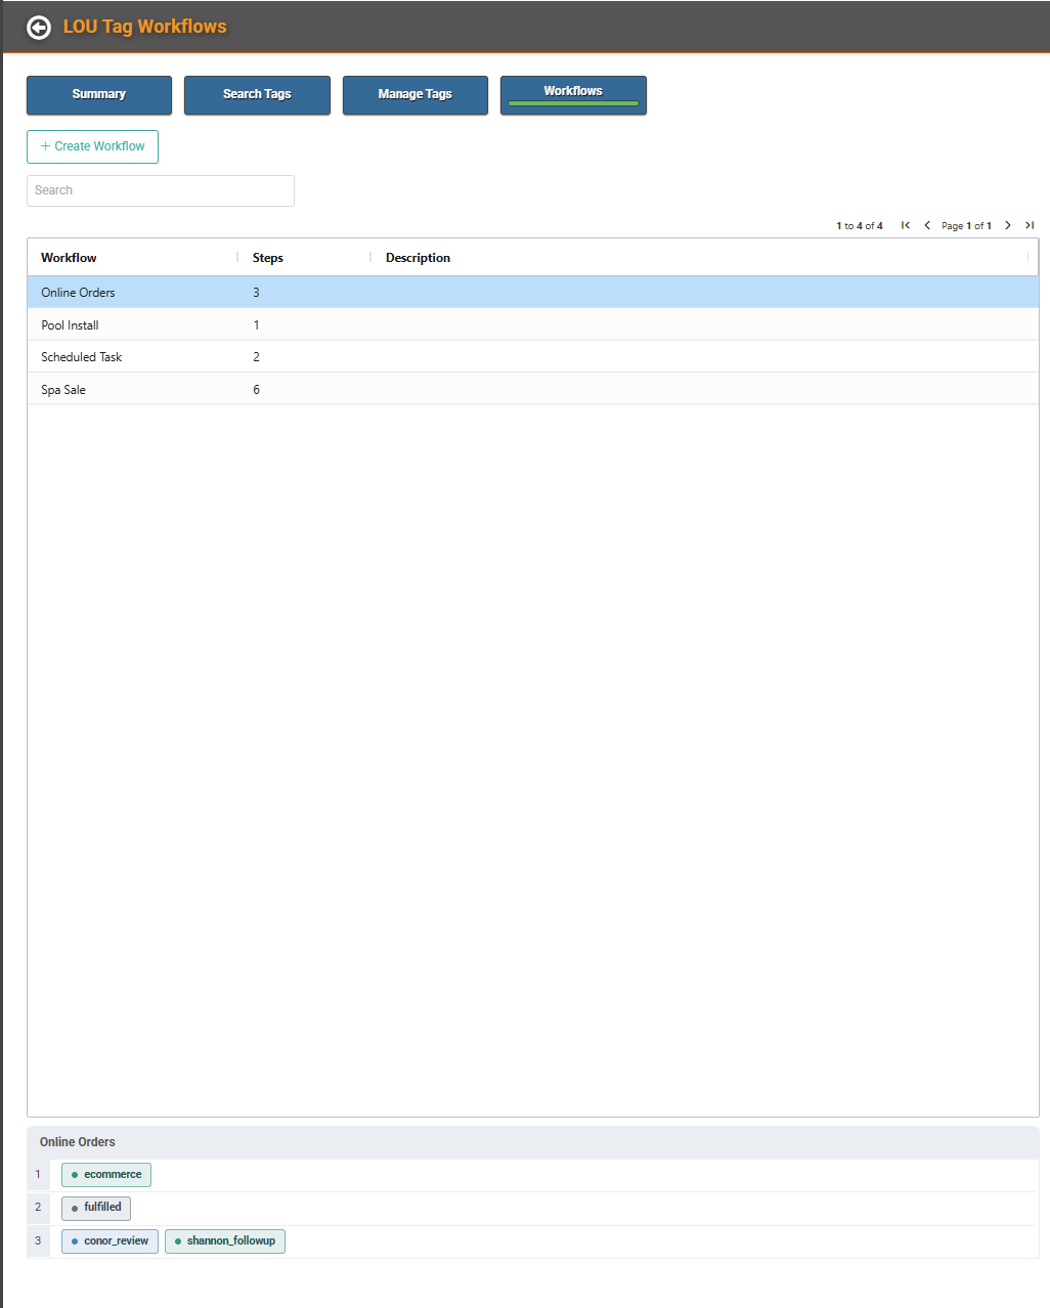
The Tag Workflows page allows you to see a list of all the Workflows and to Create and Manage Workflows. The bottom of the page will show you all the Tag Steps in the highlighted Workflow.
Create a Workflow
Before you create the Workflow in LOU, give some consideration to what you want the steps to be. Once you have the steps in mind, click that Create button.
- Give your Workflow a Name
- Enter an optional Description
- Click Create to begin adding Tags
- Step #1 – Enter a Tag. You can search an existing Tag or create a new Tag.
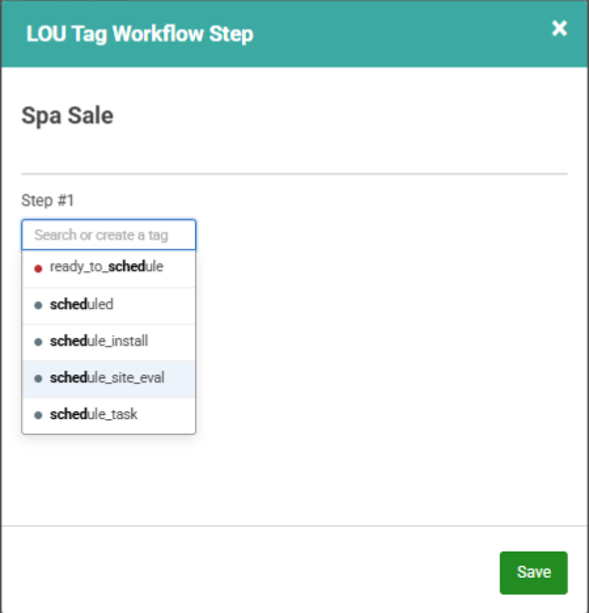
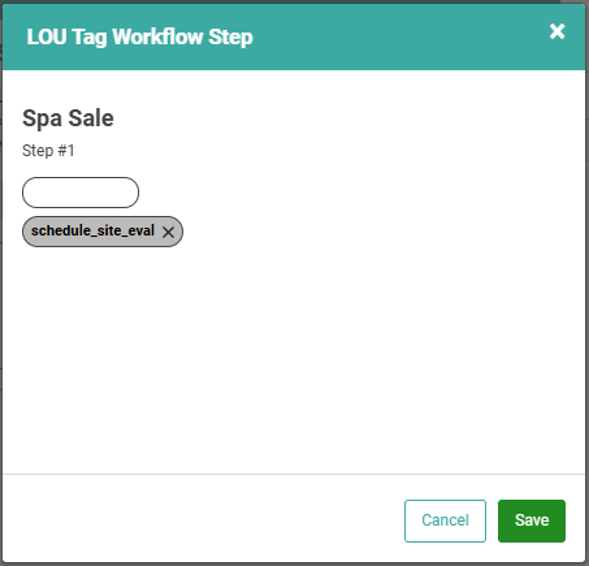
- When you create a Tag, you need to hit <Enter> after typing the Tag before you click Save to save the Tag as a Step.
- You can add Protected and Unprotected Tags to the Workflow. However, if you create a Tag through this process, it will use the default settings – unprotected, gray color, etc.
- Go to Manage Tags to update the Tags you create here if you want them to be colored or protected.
- Continue to Create Steps until your Workflow is complete
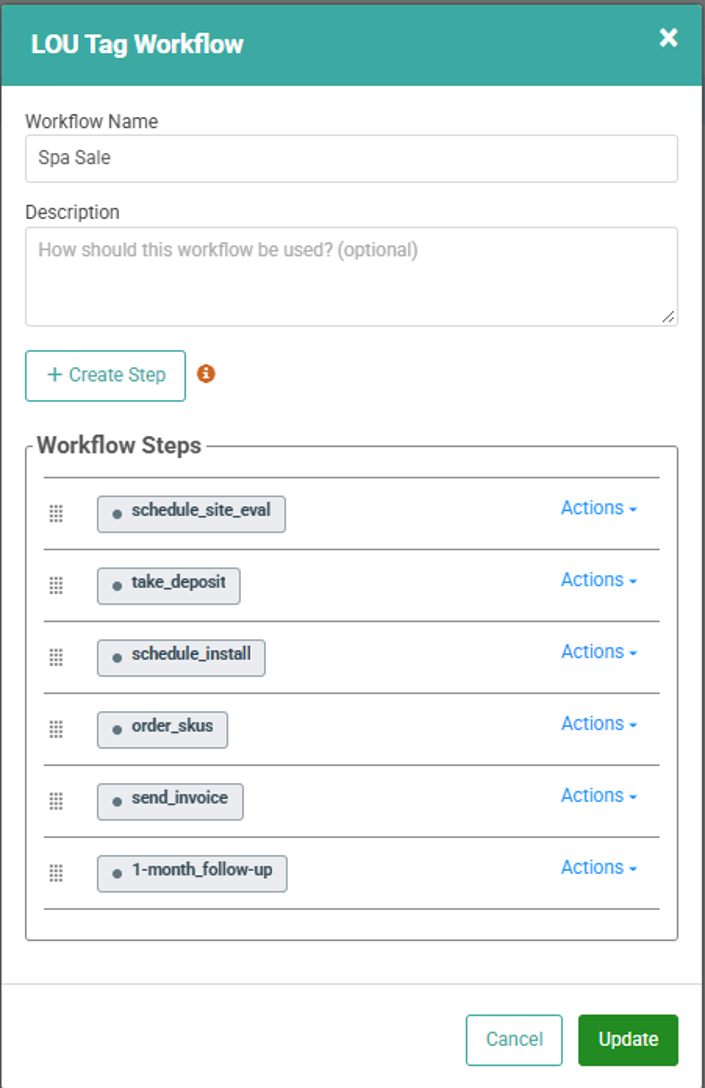
As you create the steps, if you determine they should be reordered, you can use the dotted icon on the left to grab and drag the Tag to a new position.
Once you’re satisfied with the Workflow, click Save. The workflow is now available for use on Profiles.
Add Workflow to Profile
On a Profile, you can add a Workflow by clicking the Workflow button at the top of the Profile.
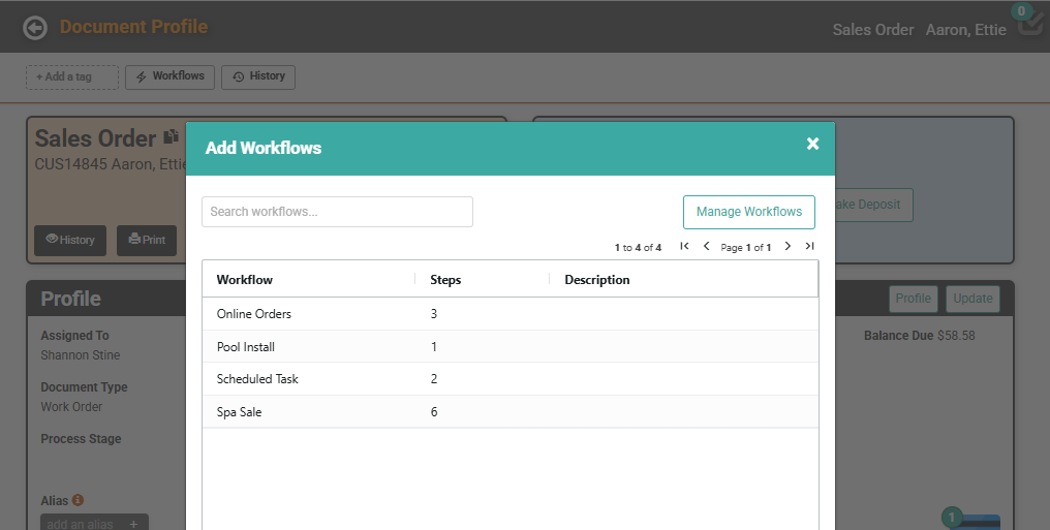
- Click Workflows
- A pop-up with a list of Workflows will appear, allowing you to click Add on the appropriate Workflow.
If you are unsure which Workflow is best, you can click View to see the steps of the Workflow prior to adding it to the Profile.
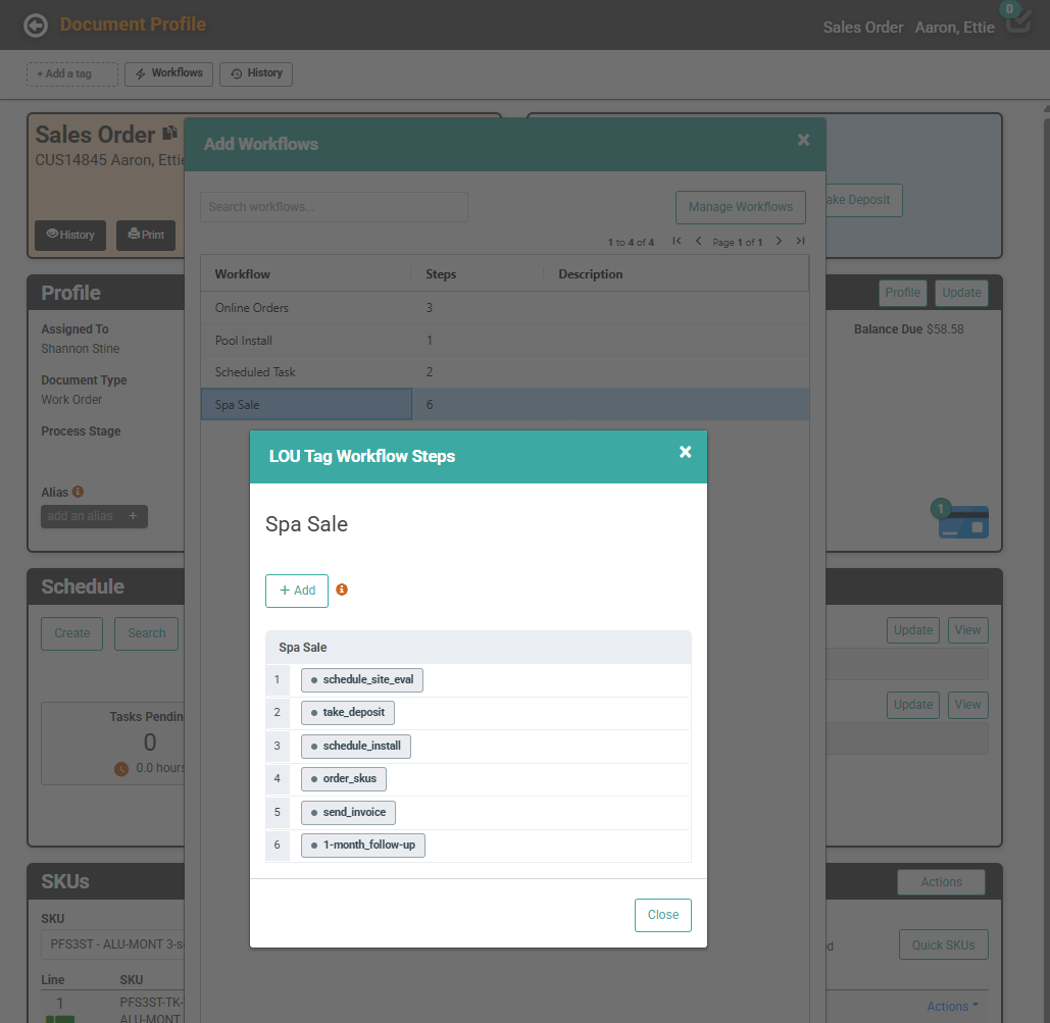
Once the Workflow is added to the Profile, the first step Tag will appear in the row of Tags on the Profile.
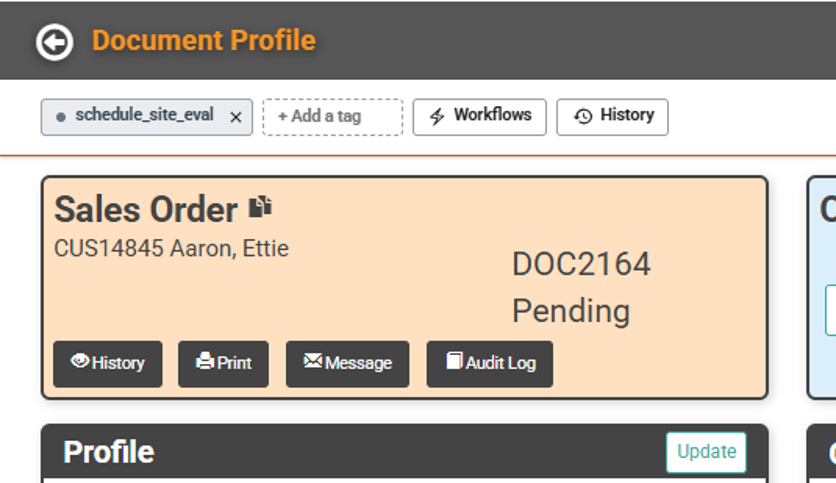
As you complete steps, click the X on the Tag to remove it. The next step will automatically appear on the Profile.
History
Workflow activity will show on the Tag History as well.