Special Order Items (SOIs) are those products which are not usually kept in your Inventory and can be customized upon ordering. They may include things like patio furniture, pool covers and liners, billiards tables, and more.
What’s the difference between a Special Order Item and a Kit? Kits are a collection of several SKUs sold together as a single package. A starter kit of pool chemicals, the hot tub with steps, a cover, and installation, and so on. A Special Order Item is a single item that can be purchased with customizations. A billiard table with specific felt colors and wood finishes, a pool cover custom-fit to the pool shape and size, or a patio chair in wood or metal, with cushion colors. Special Order Items cannot be included in Kits.
When you add a Special Order Item to an Order, you will have to complete a Purchase Order process as well.
WAIT! Before you can add an SOI to an Order, you need to create the SKU. Check out How to Create Inventory SKUs and skip to Special Order Items.
- Add the Special Order Item to the Estimate or Order and select the attributes to "build" the item.
- Use the steps below to create the Purchase Order for the SOI right from the Estimate or Order.
- This step is important because it links the Estimate/Order with the Purchase Order.
- Place the PO on order and follow your Vendor's standard procedures for ordering and shipment.
- When you receive the item, follow the Receive process outlined below.
- This will correctly update the SOI from the "placeholder" SOI SKU to the Serialized SKU on the Estimate/Order in addition to correctly updating Inventory.
Need to review a specific part of the process? Click here:
- Add Special Order Item SKU to an Order or Estimate
- Create a Purchase Order
- Receive Special Order Item Inventory

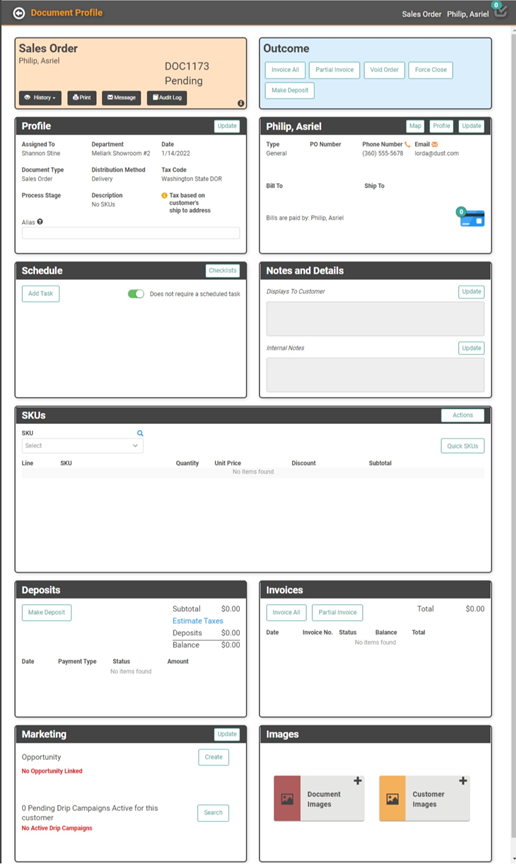
Add Special Order Item SKU to an Order or Estimate To get started, create an Estimate, Sales Order, or Work Order.
- Add a Special Order SKU to the Order.
- Use the Magnifying Glass or the dropdown to search for the SKU and add to the Order.
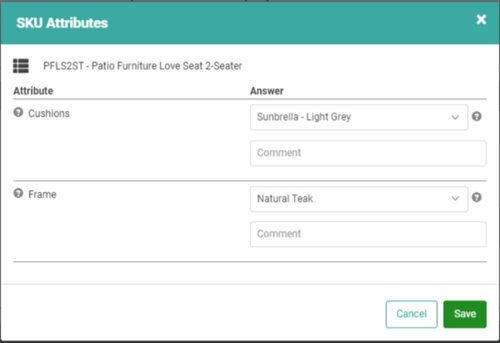
- As soon as you Add the SKU, the SKU Attributes box will pop up. Answer the Attributes.
- You can use the Question Mark (?) to view Help Text configured when the SOI was created.
- You can use the Question Mark (?) to view Help Text configured when the SOI was created.
- Click Save to save the SKU Attribute Answers to the Order.
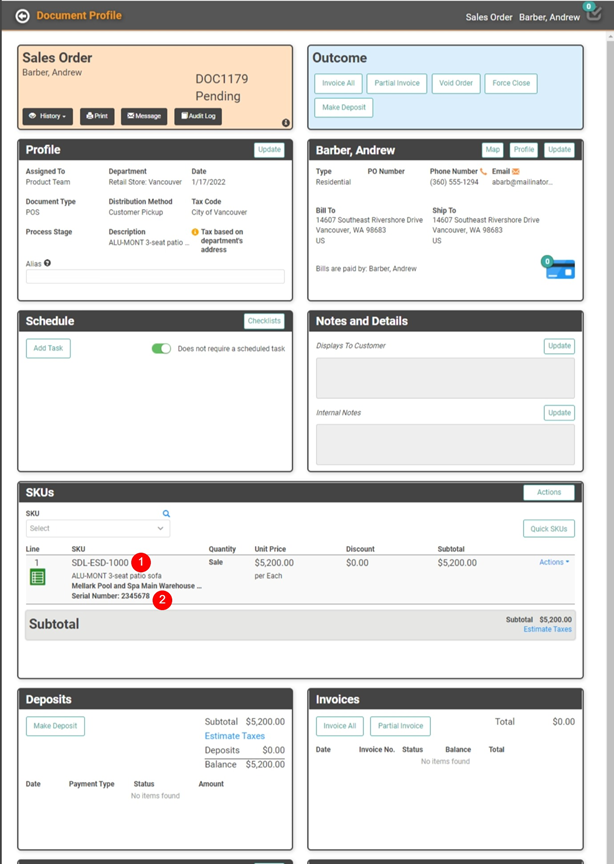
You will return to the Order. In the SKU box, the Special Order Item SKU will be updated according to the Answers you gave on the Attributes.
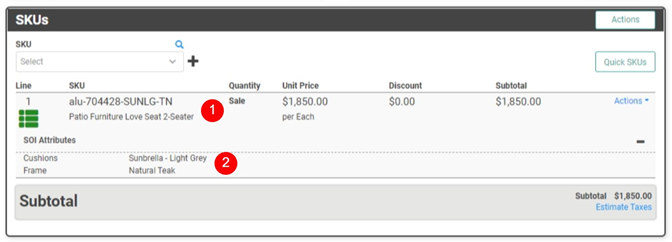
- The SKU has been updated to reflect the Vendor SKU with appended codes (determined during Special Order Item creation)
- The Attributes and Answers will be listed to clarify exactly what is being ordered.

Create Purchase Order for SOI
Once you’ve finished creating the Order, you will need to create a Purchase Order before you can fulfill the Order. The process to create the Purchase Order and put it on order is no different than any other Purchase Order. However, how you generate the Purchase Order matters. For Special Order Items to move correctly through LOU, you must generate the Purchase Order through the Estimate or Order as outlined below.
On the SKU Box, click the Actions button and select Purchase Orders.
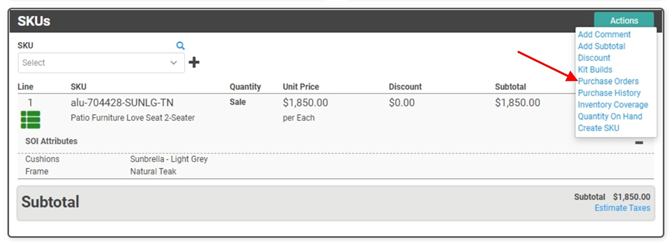
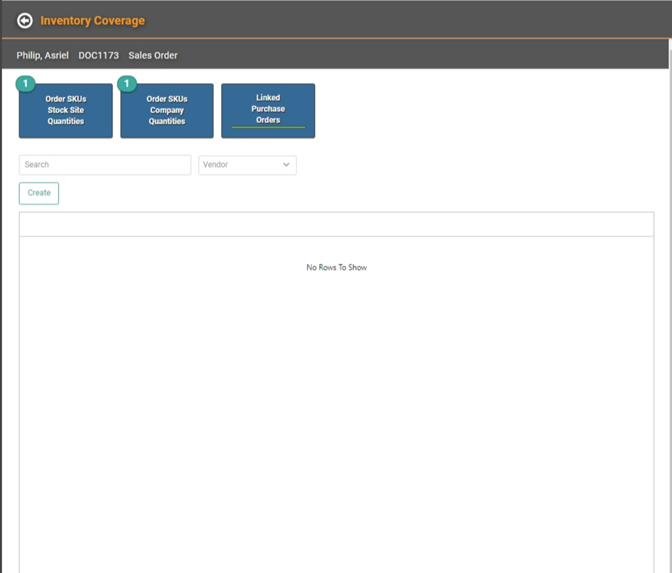
If there are Purchase Orders associated with this Order, you can select one to Add additional SKUs. Otherwise, click Create. Fill in the Purchase Order details as you would for a standalone PO.

Once you’ve placed an order with the Vendor, you can change the status of the PO by marking it as Place on Order.

Receive Inventory for Special Order Item
- On the Purchase Order, click Receive Inventory.
- Or go to Operations / Inventory / Receive Inventory
- Or go to Operations / Inventory / Receive Inventory
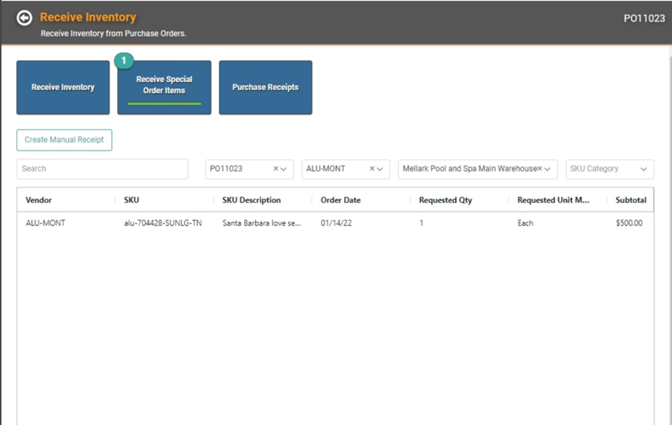
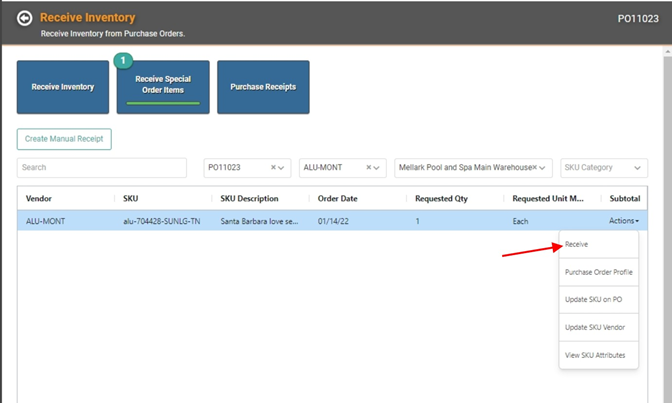
- On the Receive Special Order Items page, click the actions menu on the line item and select Receive Inventory

To receive a Special Order Item into Inventory, you need to create a SKU that represents the specific customization of the item. This is what will be used on the Order and in the Inventory Search page. These SKUs are reusable.
If you’ve previously received the SOI and created a Serialized SKU, the SKU you created will be listed on this page. You can choose to create a new Serialized SKU or select the one you already created. If you select one you already created, skip to Step 7 below.
Let’s start with creating a new SKU.
- Click Create.
- The Create SKU window will open with fields prepopulated, using the Vendor SKU information. You can update My SKU or leave the Vendor SKU. (We recommend updating the My SKU to something unique for this configuration)
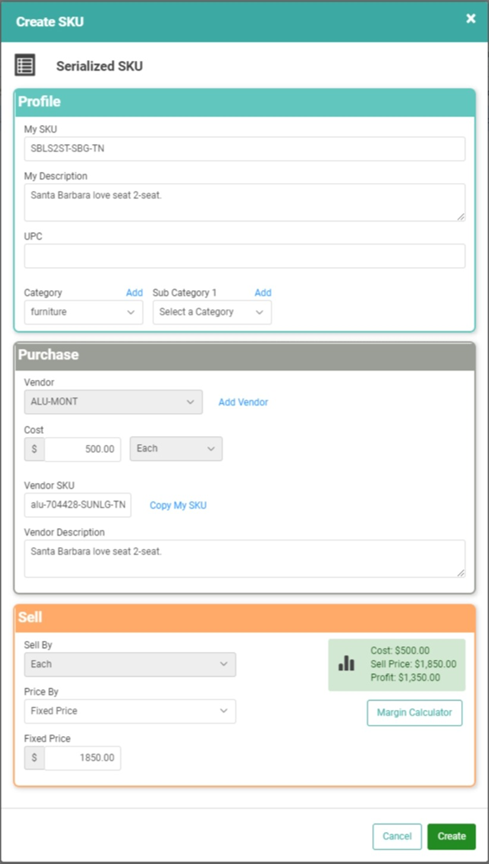
- Click Create
- You will return to Receive Inventory. Click Actions on the line item.
- Click Receive
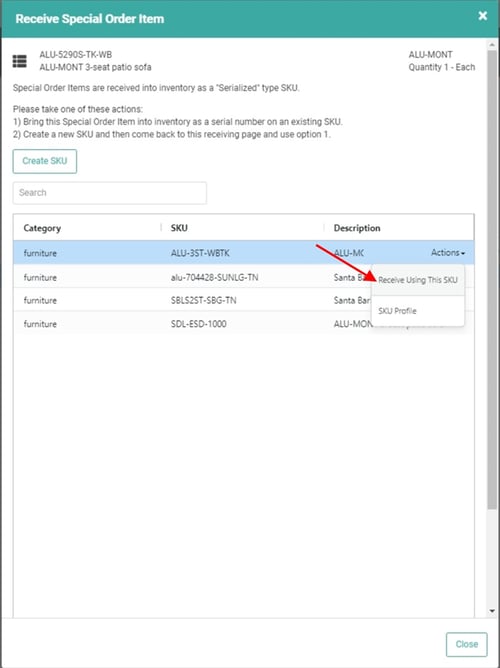
- The SKU you just created will appear on the list. Select it and click the Actions link.
- Select Receive Using this SKU.
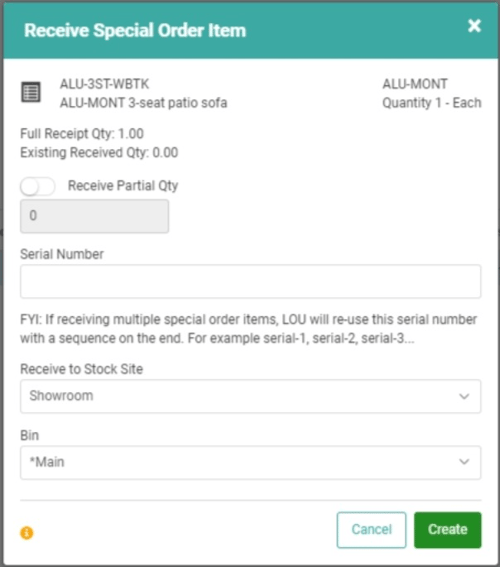
- On the Receive Special Order Item window, enter the Serial Number. Everything else should be defaulted for you.
- IMPORTANT! Serial Numbers are required because the item is unique. The SKU can apply to different items, but the Serial Number is a truly unique identifier for that exact item. If the Vendor doesn't provide you with a Serial Number, you can make one up!
- PRO TIP! If you need to make up a Serial Number, keep it simple and identifiable! Create a naming convention using the Customer's Name and Order Date. Example: AsrielPhilip102021.
- If you need to receive a partial Quantity, toggle Receive Partial Qty on and enter the quantity you wish to receive.
- If you want to change the Stock Site and Bin from what you originally placed on the Purchase Order, you can use the dropdowns on each.
- IMPORTANT! Serial Numbers are required because the item is unique. The SKU can apply to different items, but the Serial Number is a truly unique identifier for that exact item. If the Vendor doesn't provide you with a Serial Number, you can make one up!
- Click Create
The Inventory has now been received! The SKU on the Order will be updated to reflect the one received, and the Serial Number will be auto-populated. You can complete the Order and Invoice.