
Estimates are an important part of business. LOU's Estimates search page is where you can see a record of your Estimates, manage Estimates and create new Estimates.
Go to Estimates
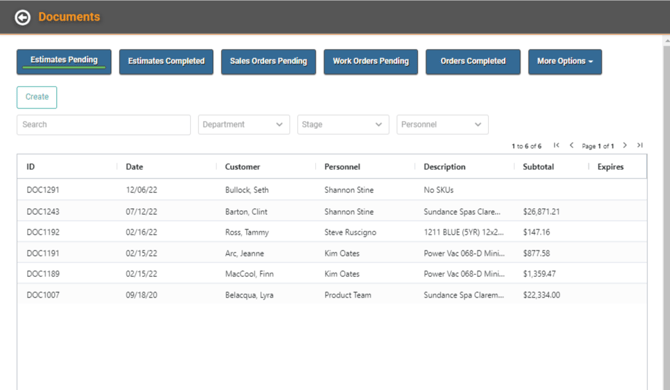
Estimates appear on a larger Documents search page where you can quickly access your Sales and Work Orders as well. There are fields to filter your view by Document Type, Status, Department and Date Range.
On the main Estimate Documents page, each Estimate has an Actions link with a few quick action buttons you can click.
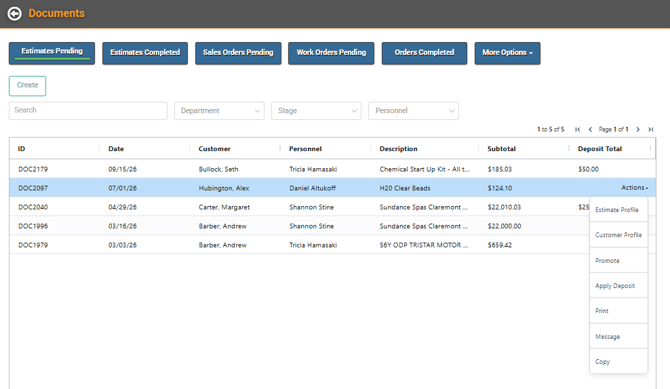
From this Actions link, you can quickly get to the Estimate Document Profile, the Customer Profile, Promote the Estimate, Apply a Deposit, Print the Estimate, Message or Copy the Estimate.
Create an Estimate
- Click
 .
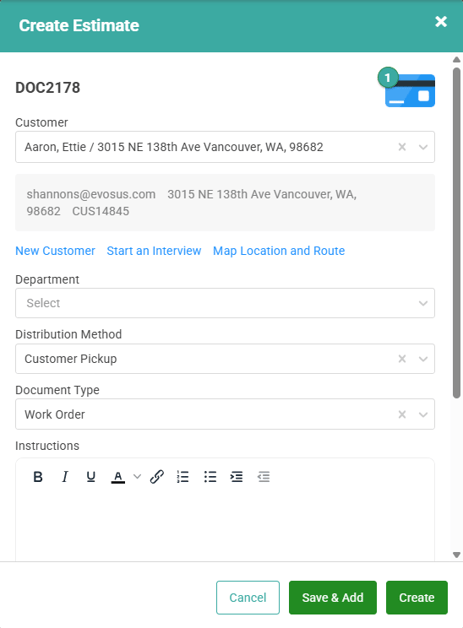
. - Select the Customer.
- Select the Department.
- Select the Distribution Method.
- Select the Document Type.
- Enter optional Instructions.
- Click
 .
.
Once you have created the Estimate, the Estimates Document Profile will generate.
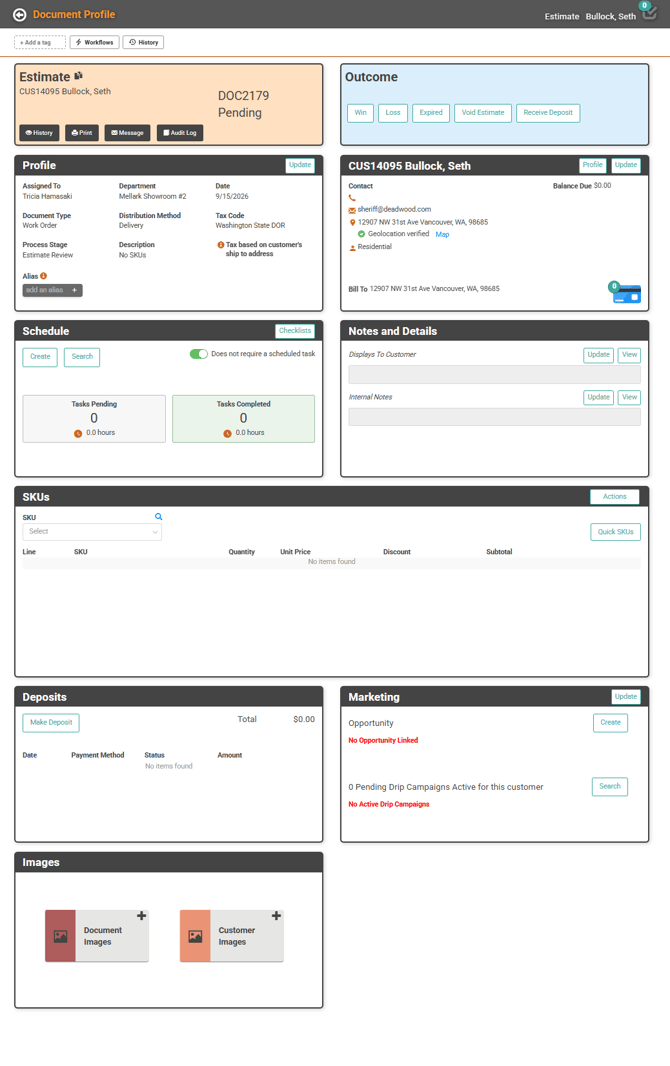
Profile
If there is anything to update in the Profile box, you can click Update.
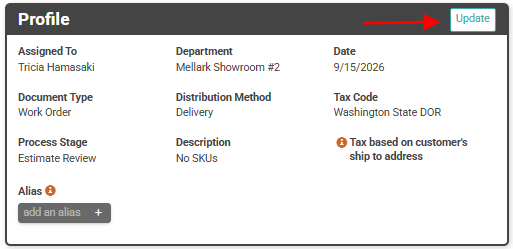
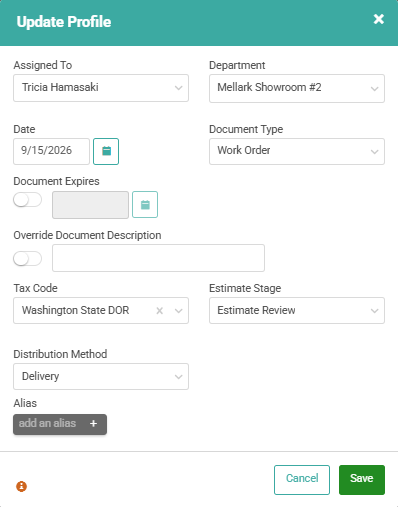
You can give the Document an Expiration Date; Override the Document Description which defaults to the Document Type; add an Estimate State; add an Alias; or update the existing information.
IMPORTANT! As with all Documents in LOU, the default Tax Code is the Department Tax Code. If you need to update the Tax Code for Destination Based Tax, you should do so here.
Once you've updated everything, click  .
.
Customer Information
You can click Map to see a map of the Ship to Address; Profile to open the Customer Profile; or Update to update the Customer information for this order, including the Billing and Shipping Addresses.
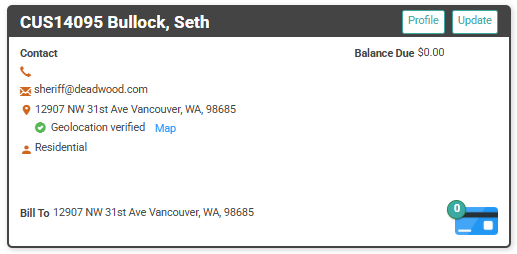
When you click Update, a pop-up will allow you to make changes to the Customer Information.
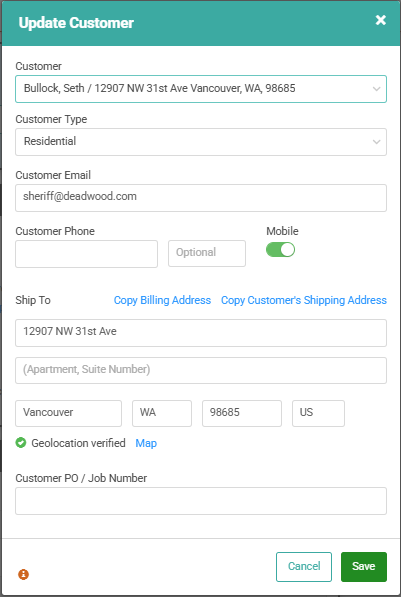
Be sure to click after entering the information.
When you click Profile, you'll be taken to the Customer Profile. You can use the back arrow in LOU to go right back to the Estimate Document Profile.
You can use the  to update or add a Card on File.
Schedule & Notes and Details
If the items included in the Estimate require a scheduled task, you can create that information in the Schedule box. You can add both customer-facing and internal notes in the Notes and Details box.
The Schedule box also contains a button to access and complete Checklists.
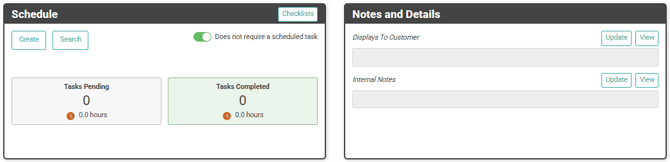
Since it's less common that an Estimate would require a Schedule Task, the Does not require a scheduled task option is toggle on. This won't prevent you from creating a Schedule Task. If you want to require the Schedule Task for the Estimate, you can toggle it on. Scheduling and completing the Schedule Tasks will function just as they do when associated with a Work or Sales Order.
The Displays to Customer notes field is a great place to include important information the Customer will need to know. You can use this field for anything which doesn't have it's own field that you want to track on the Estimate and display to the Customer.
Internal Notes will not display on the Customer-facing documents (printed and/or electronic).
REMEMBER! Note fields are limited to 500 characters. This includes spaces.
SKUs
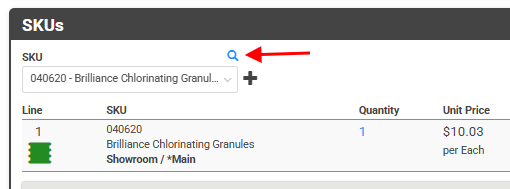
In the SKUs box you can add the SKUs for the order. You can add SKUs a few different ways. Use the dropdown to select the SKU and click the plus sign  .
.
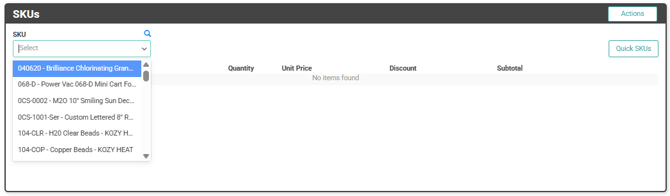
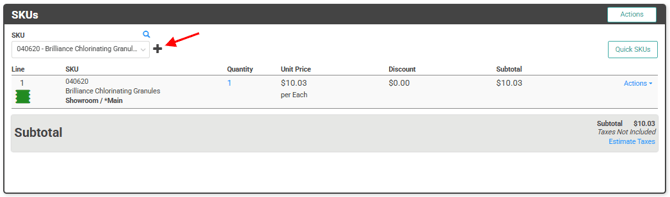
The SKU will appear in the list along with the Total amount.
You can use the magnifying glass to search for SKUs.
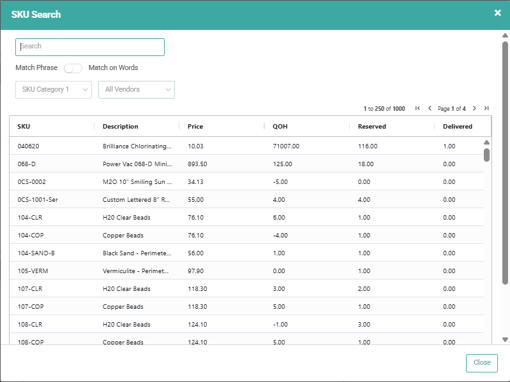
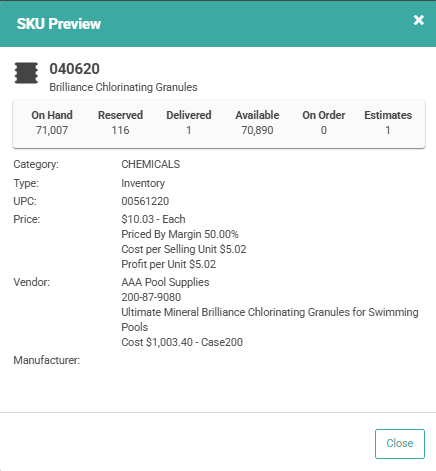
Using this pop-up window, you can search for SKUs or browse Categories. You can open the SKU Preview by hovering over the SKU line and clicking Actions and choosing Preview.
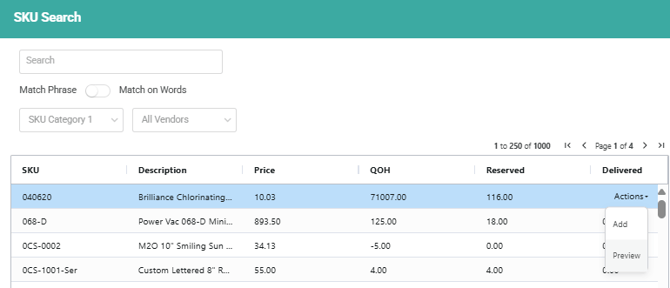
You can add the SKU with the Add button. To add multiple quantities of one SKU, click Add multiple times equal to the desired quantity. Once you've added all SKUs you are looking for, click the X at the top right of the SKU Search window or use Close and return to the Estimate Document Profile.
Finally, if you've set up Quick SKUs, you can use that to add SKUs.
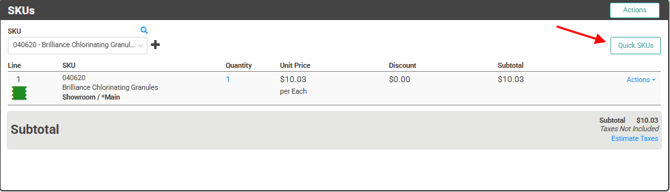
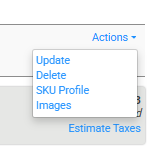
If you need to make adjustments to the SKU, including adding the Serial Number, click the Actions link on the line item and select Update.
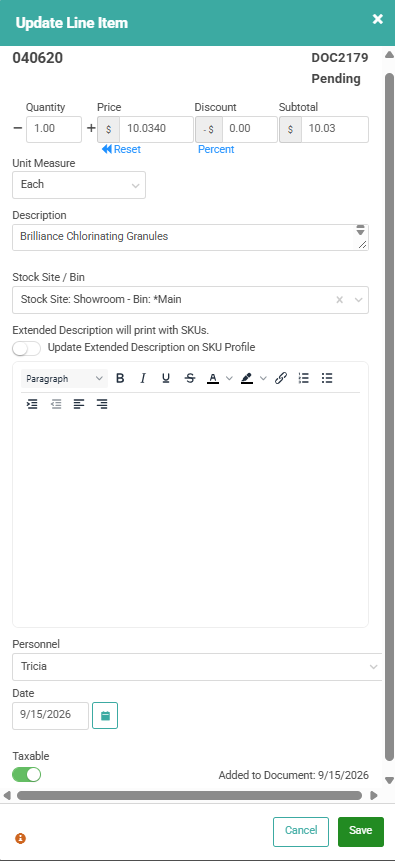
From here, you can designate the SKU as a Return; adjust the Price; apply a Discount; edit the Description (just for this Order, not the SKU Profile); add the Serial Number; and View or Edit the Personnel who added the SKU to the Order and the Date the SKU was added. Finally, you can toggle the Taxable button to change whether the SKU is taxable on this Order alone.
Once you're satisfied with changes, click .
The SKUs box has an Actions button. This button opens a menu of additional Actions you can take on SKUs for this Order.
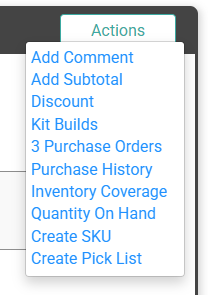
Add Comment
This allows you to add a comment immediately below the last SKU.
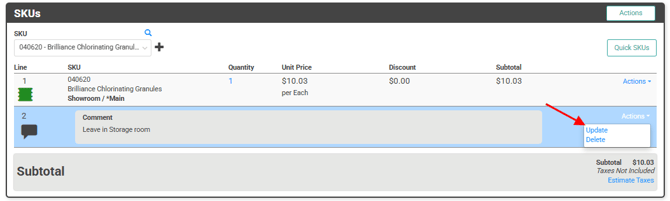
To enter the Comment, click the Actions link and select Update.
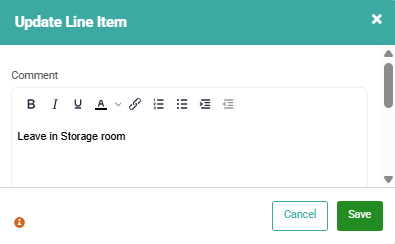
Once you've created the Comment, click .
Add Subtotal
If you have a large Order, and you or your Customer would like to see a subtotal after part of the SKUs in the Order, you can use this button to add the Subtotal. This Subtotal does not include Tax.
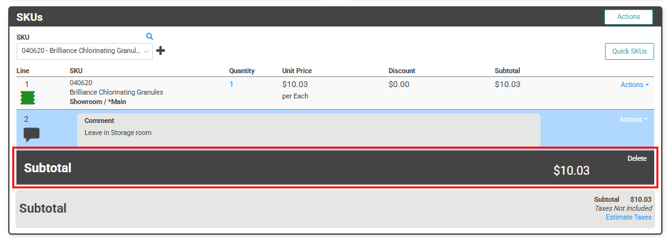
You cannot update or change the Subtotal, but you can delete it with the Delete link.
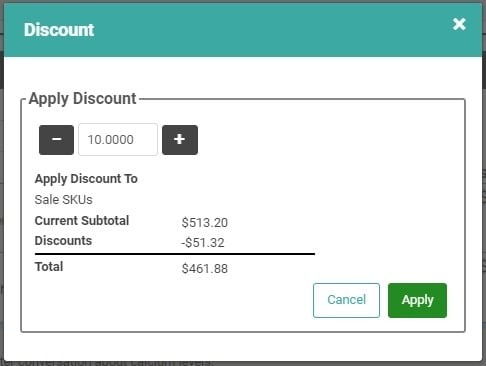
Discount
You can apply a Percentage Discount to the entire Order. For more information, or to add a flat dollar amount Discount to the Order, check out How to Create Discounts on Orders.
Kit Builds
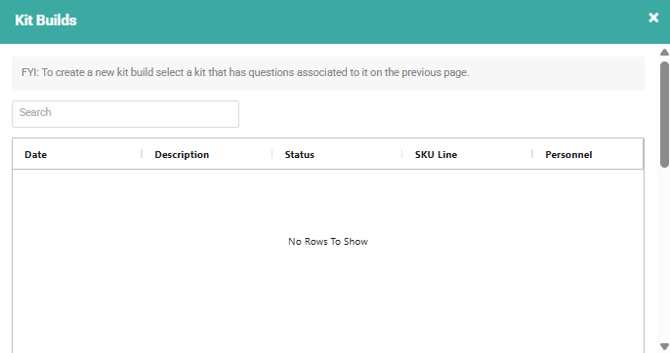
This is where you can track the Dynamic Kit builds that exist on the Estimate.
Purchase Orders
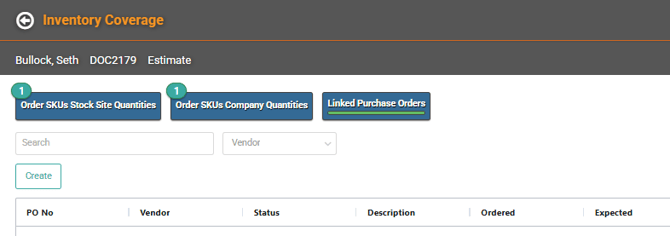
You can associate the Order to a Purchase Order by adding it to a PO Wait List. The number of POs associated to the Order will appear next to Purchase Order in the Actions menu. You can access the PO Profiles by clicking this link.
Purchase History
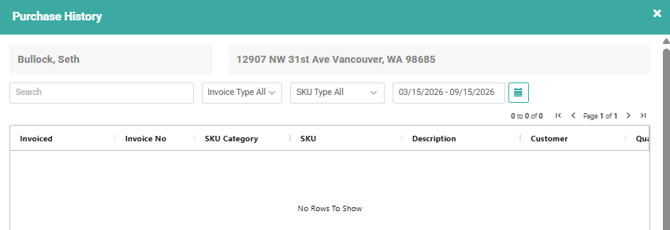
You can quickly access the Customer's Purchase History. The Purchase History window allows you to search purchases; filter by Invoice Type; filter for SKU Type; choose a Date Range; or even Export the purchase list to Excel.
Inventory Coverage
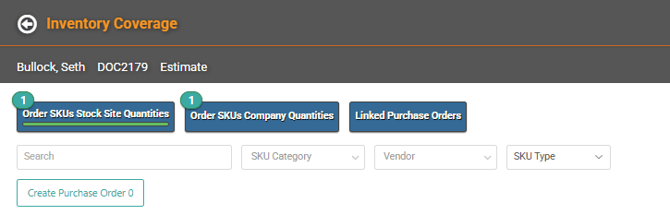
Inventory Coverage allows you to see the quantities of SKUs associated with the document on hand - by the Stock Site; in the Company as a whole; and if they are linked to any Purchase Orders. You can also create POs from here if necessary.
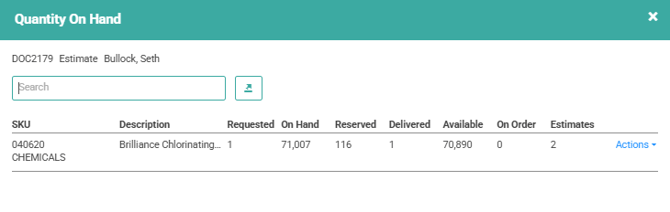
Quantity on Hand
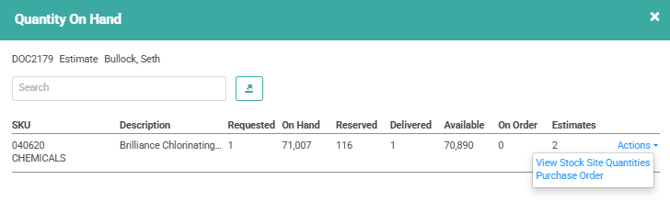
This allows you to quickly see the QQHs for each SKU on the Order. The Actions link next to each SKU line item allows you to View Stock Site Quantities for the SKU or create a Purchase Order for the SKU.
Create SKU
If, for some reason, you determine you need to create a SKU in the middle of creating an order, you can use the Create SKU link to do so.
Kit SKU Actions
When you add a Kit SKU to the Estimate, click the Actions link on the Kit SKU line item to perform specific actions for the Kit SKU on the Order.
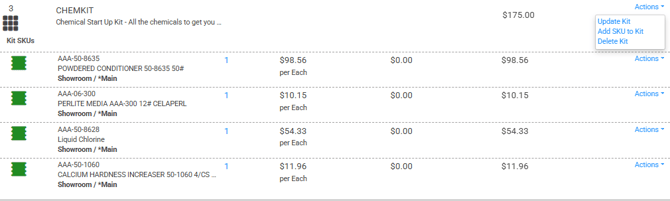
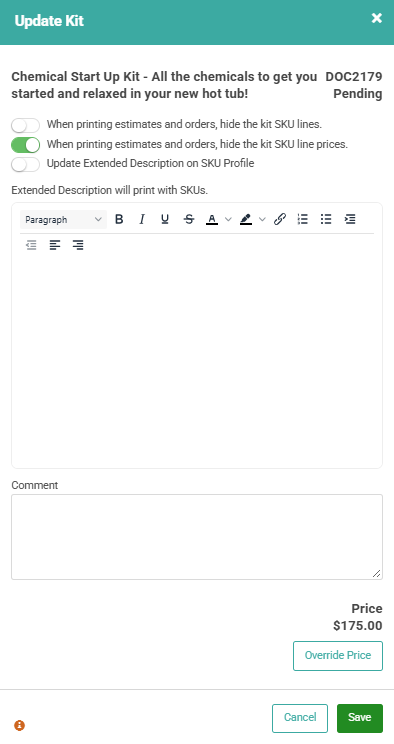
- Update Kit: Use to override the Kit Price for this Order only or to hide SKU line items or SKU line item prices on printed documents and customer-facing document links, including the Customer Portal.
- Add SKU to Kit: Add an additional SKU to this Kit for this Order only. This does not add the SKU to the Kit permanently. This affects the current Order only.
- Delete Kit: Remove the Kit SKU from the Order.
IMPORTANT! Hiding Kit SKU lines also hides Kit SKU line prices but hiding Kit SKU line prices will not automatically hide the Kit SKU line items.
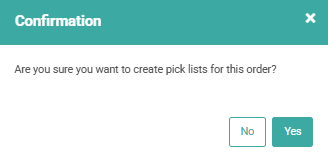
Create Pick List
Creating a Pick List will create a list of inventory, non-inventory and serialized SKUs for the Estimate that you will need on your Service Vehicle. This will help you move inventory efficiently and quickly for your Personnel.
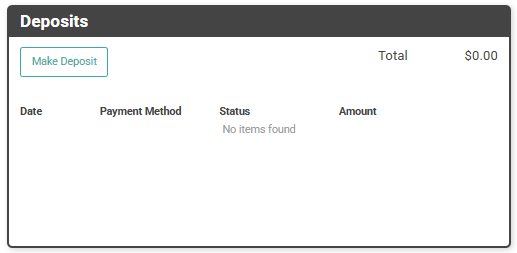
Deposits
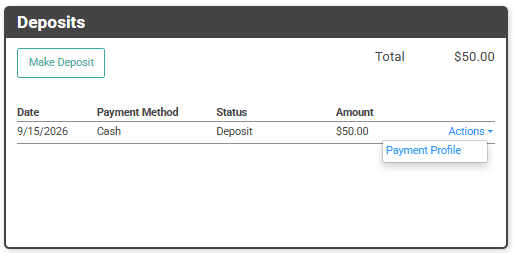
To add a Deposit to the Estimate, click the  button. If deposits exist on the Order, you will see them listed in this box and the Order total updated to reflect the deposits.
You can click the Actions link on a deposit line item to visit the Payment Profile for that Deposit.
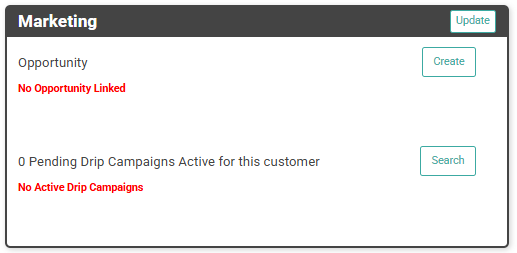
Marketing
You can Create and see lists of the Opportunities linked to this Customer, as well as search Drip Campaigns in which the Customer is enrolled. You can use the Update button to link the Customer to an existing Opportunity.
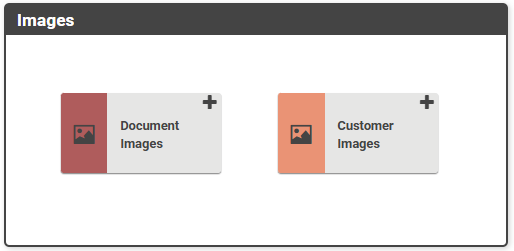
Images
This is where you can access or add images specific to this Document or the Customer's Profile. Create and Manage Images and Files
Estimates and Outcome
Once you've completed filling out the boxes with all the information, the Estimate is ready for the next steps!
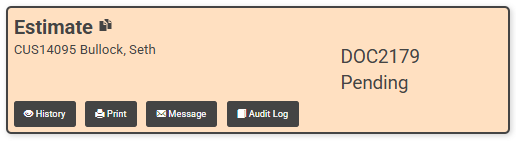
Let's just back up to the top of the page and look at the Estimate and Outcome boxes.

In the Estimate box, you can see the Document ID, Status and Amount; print a physical copy or PDF of the Estimate; send an Email or Text message of the Estimate; or view the Audit Log of actions on the Estimate.
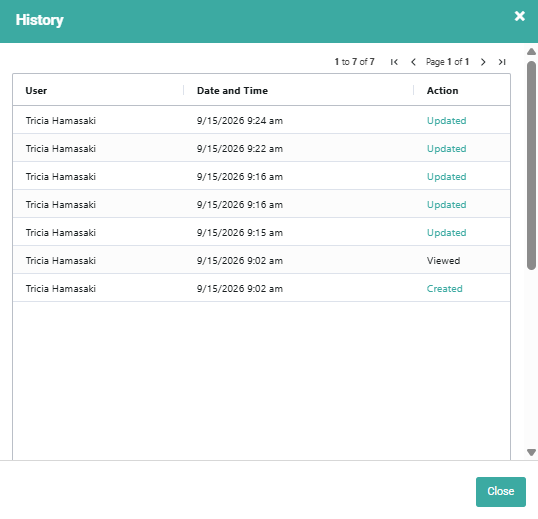
History
History will show you a log of the updates made to the Estimate, including User, Date and Time, and Action.
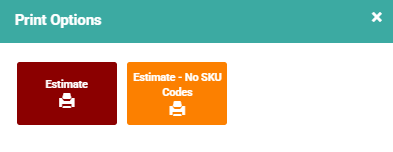
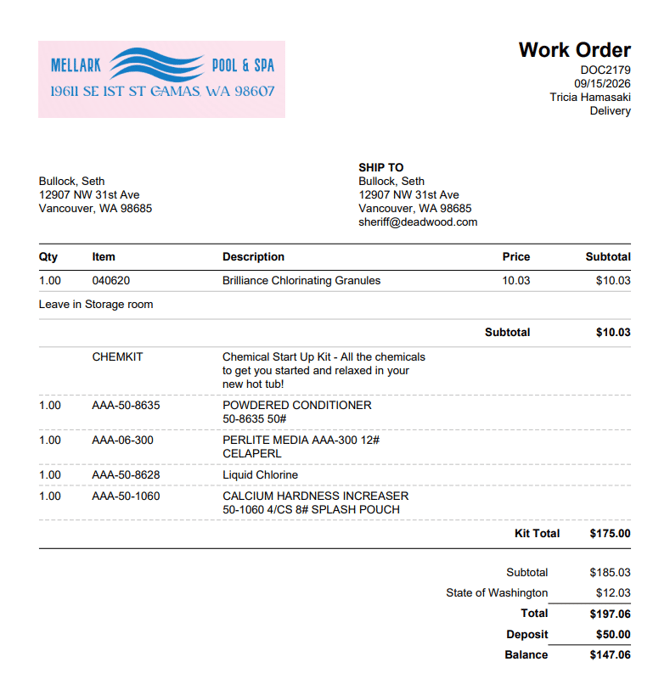
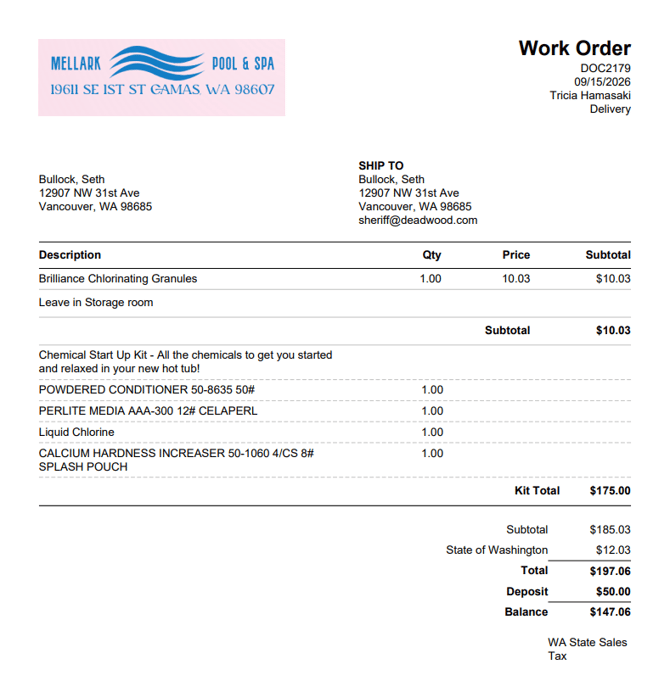
Print Options will be to show the SKU item code or not.
-
Estimate Option
-
Estimate - No SKU Option
Message
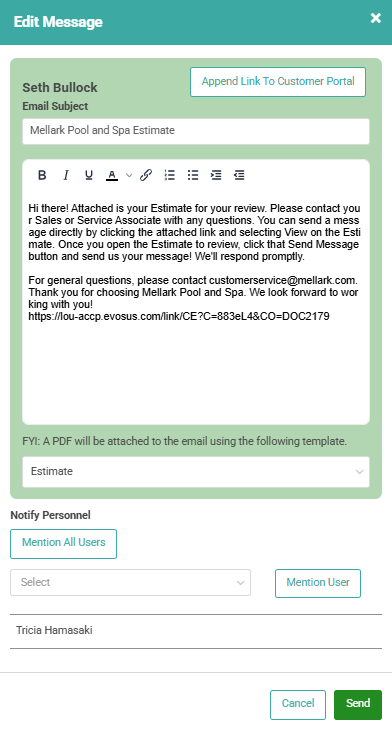
To send an Email or Text message of the Estimate to your Customer, click the Message button. The email is created/managed through Setup > Configuration > LOU Integrations > Email Messaging. Depending on the Customer Message Preferences, when you click the Message button on the Estimate Document Profile, LOU will open a pop-up box with the message you've configured as well as a link directly to the Estimate.
REMEMBER! If you have "Send Both" selected in the Customer Profile's Message Preferences, this message button will only send the text message to the customer.
The button allows you to add the link to the Customer Portal to the Email.
REMEMBER! You do not have to click this button for your Customer to view the Estimate electronically. The Email or Text will automatically include a link directly to the Estimate.
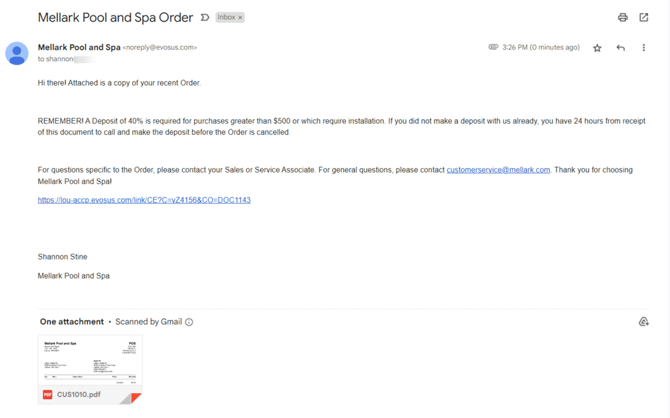
Email messages will include both the default link to the electronic document and an attached PDF. You may choose not to include the link by deleting it from the body of the email. You cannot opt out of sending the PDF.
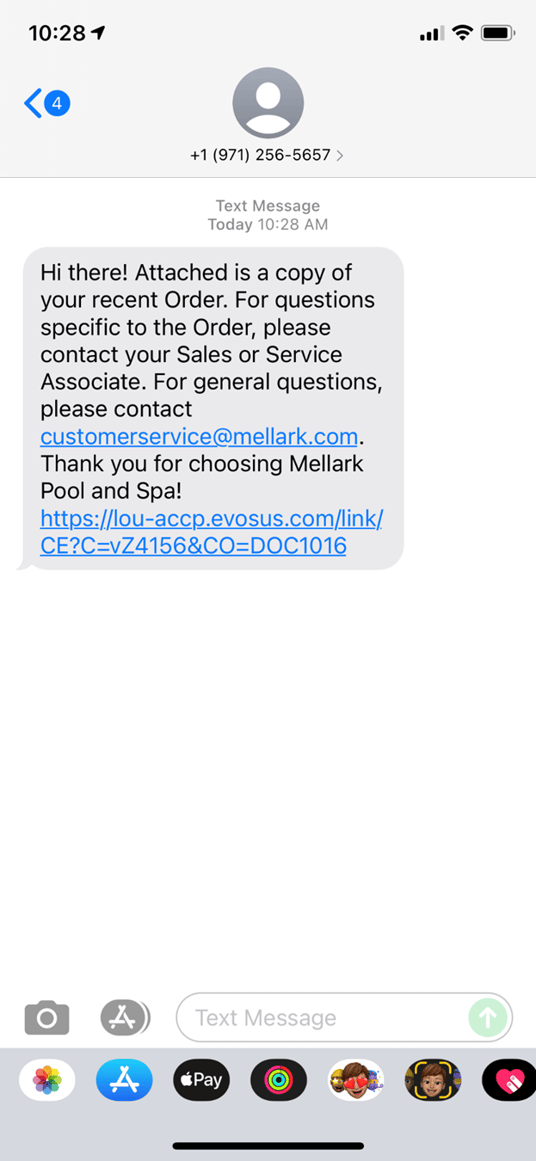
Text messages do not include a PDF as they are difficult to access on mobile devices. Instead, only the link to the electronic document will be included.
In addition to customizing the email or text message, you can notify additional Personnel about this message, creating a thread in their My Messages page. LOU will automatically include the Document Owner. If another user is sending the message, they will be included as well.
Once you have customized the email or text message and are ready to send, click the  button and the Text or Email will be sent!
Customer Message Preference - Do Not Message
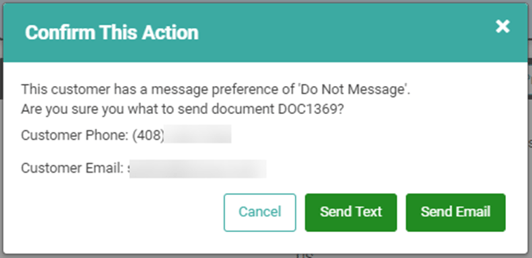
If your Customer has Do Not Message toggled on their Customer Profile, clicking the Message button will give you a warning, letting you know that the Customer's message preferences is 'Do not Message'. It will provide the Customer's contact phone number and email and will allow you to click Cancel / Send Text / Send Email on the pop up and return to the Document Profile. If you select either Send Text or Send Email, LOU will bypass the Do Not Message instructions and will send the message.
This is what the Customer will see when you send them a message:
This is what a text message may look like:
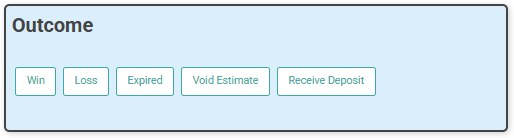
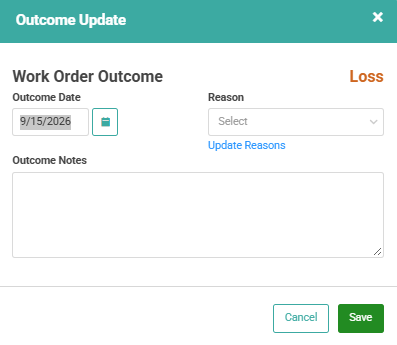
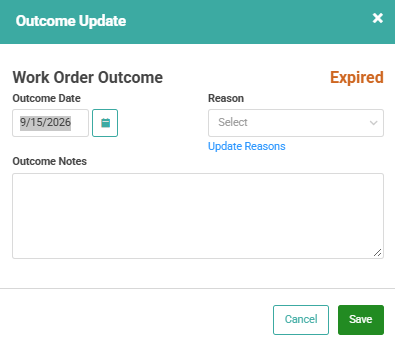
In the Outcome box, you can move the Estimate forward by marking it as a Win or a Loss or marking it Expired. You can also Void the Estimate and Receive a Deposit for the Estimate.
Win
- Select a Reason
- Add optional Outcome Notes
- Toggle Include Pending Schedule Task on if necessary
- Select Document Type
- Promote to Sales or Work Order
- Click

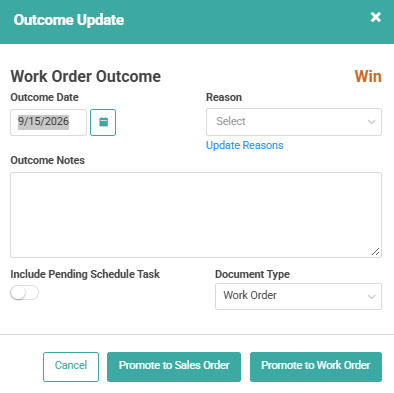
REMEMBER! The Order created from promoting an Estimate will be Assigned To the Personnel who promoted it. The Completed Estimate will remain Assigned To the Personnel who created the Estimate even if they are different from the Personnel who promotes the Estimate. The Assigned To field can be updated on Estimates and Orders as long as the Document is not Completed.
Loss
- Select a Reason
- Add optional Outcome Notes
- Click
Expired
If you didn't update the Profile box to include an Expiration Date, you can mark an Estimate as Expired manually here.
- Select a Reason
- Add optional Outcome Notes
- Click
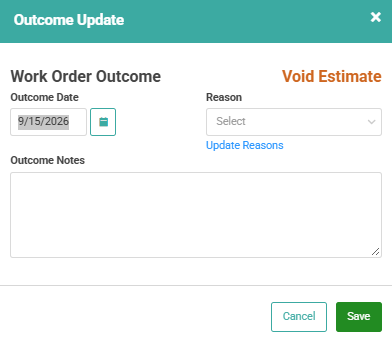
Void Estimate
If you want to Void the Estimate rather than marking it as a Win or Loss, you can use Void Estimate.
- Select a Reason
- Add optional Outcome Notes
- Click
Receive Deposit
This will take you to the Payments page where you can process a Deposit for the Estimate.